Here’s the migration guide for anyone still using the old SLA/OLA management. As of version 3.0.0, we will discontinue support for SLA v1 and remove it from the application—only SLA v2 will remain. To prevent any disruptions, we strongly recommend migrating to SLA v2 as soon as possible.
You can find detailed migration instructions in this guide. If you need assistance, please reach out to our support team. Should you encounter any issues—such as potential feature gaps—contact us through the usual support channels so we can investigate and propose a solution.
To streamline this transition, we’ve added a built-in migration feature that automatically carries over most of your existing settings (working calendars, color thresholds, SLA/OLA field definitions, etc.). By following the steps in this guide, you’ll minimize the time required to start using new and improved SLA.
Here are key differences between new and old SLA/OLA management:
|
|
Deprecated SLA / OLA |
New SLA / OLA |
|---|---|---|
|
Action Types |
Five separate post-functions: Start, Freeze, Reset, Reset & Start, Stop |
Start, Pause, Stop, Reset triggers based on Jira events; “Reset & Start” is replaced by selecting both Reset and Start on the same transition. |
|
Trigger Configuration |
Defined per workflow transition via post-functions |
Defined centrally in the SLA Triggers configuration tab. |
|
OLA Handling |
Separate OLA post-functions and fields |
Integrated into SLA – use the same trigger conditions and SLA levels to track internal team response times. |
Step-by-Step Migration Procedure (using the SLA Migration Helper)
-
Choose an appropriate maintenance window
-
Ideal timing: off-peak hours or a scheduled maintenance window when few users are active.
-
Reason: During migration SLAs will pause and then be recalculated for every open issue, which can take significant time on large instances.
-
-
In Jira navigate to Jira Administration -> HelpDesk -> SLA -> [Deprecation notice] SLA & OLA.
-
Click “Migrate” button and you will open Migration helper:
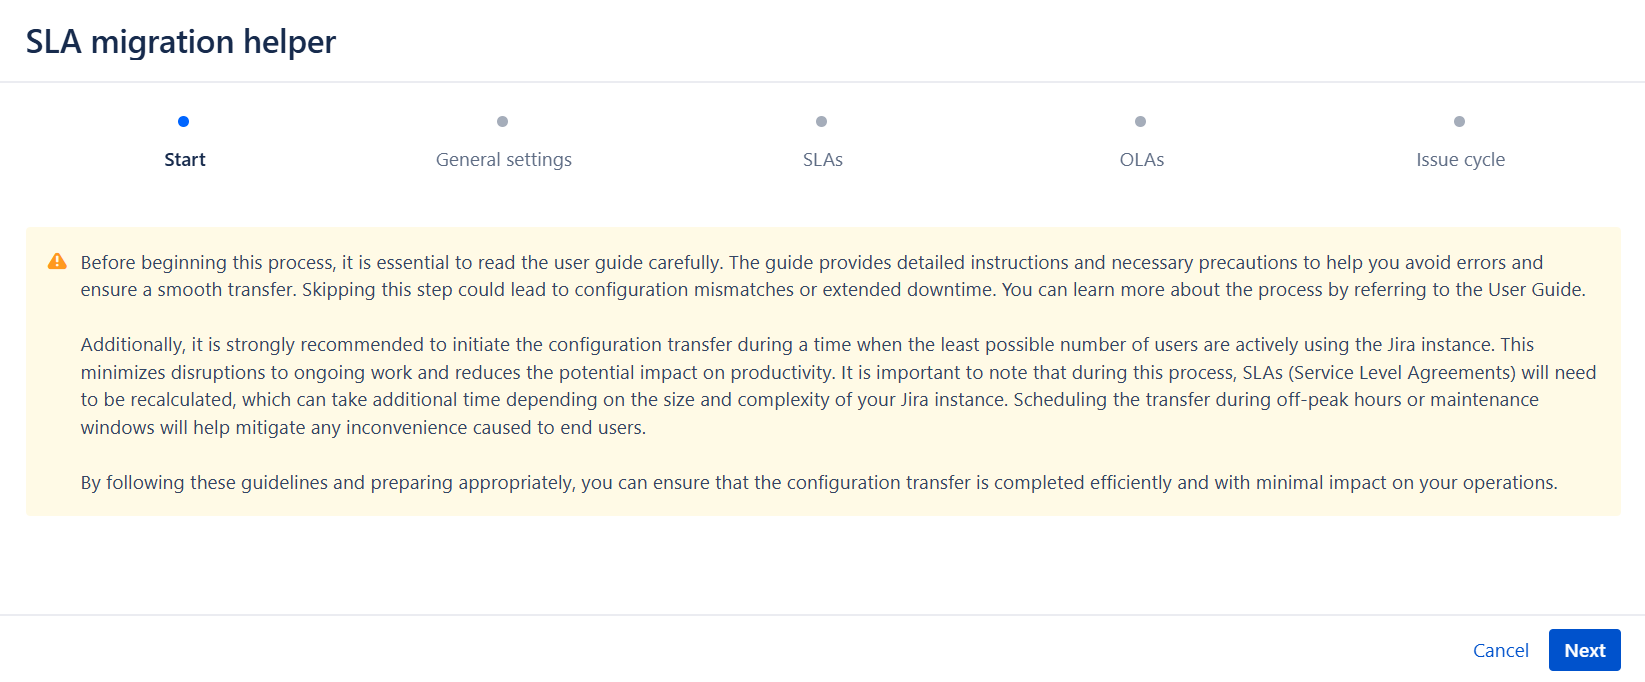
Read the information in the “Start” and “General Settings” steps carefully
-
Automatic Migration of General settings
Some of your settings will be carried over automatically by the migration engine and after migration you can immediately reuse these in your new SLA rules. There is no manual re-entry required for:-
Working Calendars (including all exceptions and holidays)
-
Color Schemes (all thresholds and palette rules)
-
Working Day / Week definitions
-
-
At the step “SLAs” you must explicitly review and (if desired) tweak during the migration is your trigger conditions (formerly workflow post-functions). At the SLAs step, for each SLA entry:
-
Click the “Show more migration details” button on the right.
-
In the menu you’ll find SLA/OLA settings which will be migrated (can’t be changed) and four checkbox lists (Start, Pause, Stop, Reset) - they correspond to the old “HelpDesk SLA/OLA Management” work types. All work types which were defined in post-functions will be selected here. Change your conditions if needed.

-
-
-
-
You can add multiple condition per action — no need for separate post-functions.
-
Click Next.
-
-
The “OLAs” step consists of all created OLAs which will be transformed into SLAs (because OLA is now integrated into SLA). To maintain effective tracking of internal team performance, you must reconfigure your triggers on previous step. Additionally, after the migration is completed, you’ll need to transform your existing OLAs goals to new logic (more on that at step 9 of this guide).
-
Click Finish to apply.
-
All open issues’ new SLA timers will be back-filled and recalculated. This can take several minutes to hours depending on number of issues.
-
Once migration completed, you’ll need to reconfigure your OLA settings because all existing OLAs will be automatically transformed into SLAs. In previous version the SLA and OLA were managed separately: you chose a custom “Team” field in the OLA settings and then embedded each team’s name directly into the JQL. In the new SLA model, OLA is a built-in part of SLA: you define one generic JQL per goal and then pick which teams that goal applies to via a “Teams” select field.
To transform your existing OLA goals to new logic, you should change each goal and remove any “teams” from its JQL. Then, after you strip out the “teams” from different JQL, you may end up with multiple goals using identical JQL—feel free to delete those duplicates and then use the “Teams” select field to add the specific teams you need with the appropriate goals for them. -
Create a few test issues and walk through your workflows (don’t forget to configure new SLA/OLA fields) to confirm:
-
SLA timers start, pause, reset, and stop exactly where you expect.
-
Color thresholds display correctly.
-
Re-opens behave per your chosen cycle mode.
-
-
When you’re satisfied with the result:
-
Update any runbooks or internal docs referencing “HelpDesk SLA Management” or “HelpDesk OLA Management” post-functions.
-
Notify your team about the changes when the new SLA is ready.
-
Remove any leftover post-functions for the old SLA and OLA in your workflows and remove any “SLA Karma” custom fields to keep your instance clean.
-
SLA Karma Is No Longer Supported
The SLA Karma feature – where HelpDesk awarded positive or negative points to a numeric “SLA Karma” field on each issue when an assignee closed or resolved it – will not be available in the new SLA engine.