.png)
Marketing Calendar
Marketing calendar
Use case description: The Marketing Calendar serves as a central hub for planning content and campaigns across multiple projects. It allows teams to track various marketing activities like blog posts, social media content, newsletters and offline events in a unified, time-based format. By enabling filtering based on content type, team members, and campaign tags, the calendar helps ensure timely execution and team alignment.
Primary Actor: Marketing Lead or Campaign Manager.
Calendar Shared With: Marketing team, content creators, product managers.
This guide will walk you through setting up a Marketing Calendar using our Calendar for Jira app. We've pre-configured various work types and custom fields within our demo instance to fully showcase the app's features. If you'd like to see the exact parameters and settings used, you can find a detailed breakdown below.
Create the respective work types.
For this case, we opted to use four different work types to describe typical marketing activities: Blog Post, Newsletter, Social Content, Event.
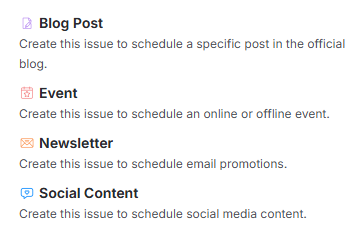
Marketing calendar - Work types
Following Jira logic, we'll use Epics to unify different work items into separate marketing Campaigns.
Create workflows.
We decided to use one shared workflow which describes the usual stages of marketing activities. Once a work item is created, it is then moved to a draft stage (status Draft, category In Progress), where the initial idea is described. It is followed by the review (status Review, category In Progress) to receive the suggestions on how to achieve the goal of said activity. The changes are then applied in the preparation phase (status Preparation, category In Progress), which is followed by the final review (status Final Approval, category In Progress). After the details are confirmed, the activity is scheduled and the work item will remain in that status until the chosen date (status Scheduled, category To Do). It will transfer to Published status once the work is finished (status Published, category Done).
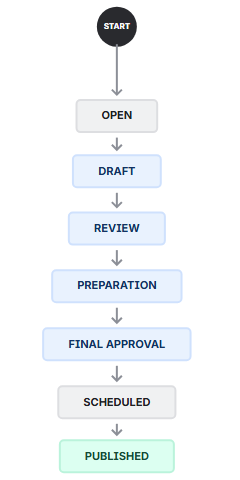
Marketing calendar - Marketing workflow
We suggest using automation to ensure proper work item allocation to the assignees. To do so, head over to the automation rules in your Jira settings and create the rules where you choose who will become the assignee each time the status of the work item is changed.
Add custom fields.
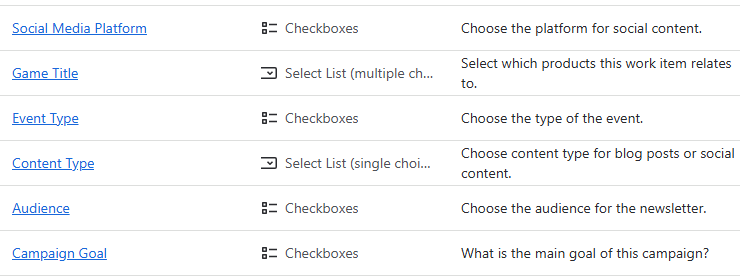
Now that our work types are implemented into the project, we could further diversify them into different sub-categories by creating custom fields. We opted to add two at most custom field per work type to demonstrate the functionality of our Calendar for Jira app, but, of course, there could be more.
Let’s imagine that this demo project belongs to a video game development company.
To associate all works with the different products created by this company we added Game Title custom field. This way, we could visually assess how much effort is put into each product by viewing the calendar grid.
For Campaigns (Jira Epics), we included a Campaign Goal field to clearly define the intended result of each marketing initiative. This helps to unify all related activities toward a single, measurable objective.
For Blog Post, we decided to add Content Type custom field to quickly make it transparent if there are any gaps in the engagement with the audience in the company’s official blog. It will be especially visible with the proper settings for our Calendar for Jira app.
Social Content received Social Media Platform custom field to ensure that the company’s presence across the internet is thorough. Content Type custom field was also associated with the Social Content work type.
For Newsletter, we opted to specify the Audience, with the multiple choices possible.
Finally, for the Event, we simply listed the options for the Type of Event the company organizes, whether it be something hosted entirely online or even merch sales.
Marketing calendar - Custom fields
Because these custom fields are associated with different work types, it is necessary to properly configure the screens and screen schemes so these options are available to choose from while creating an issue or editing it.
With such detailed setup, we are now ready to put it into use by creating our Marketing calendar!
Calendar Creation
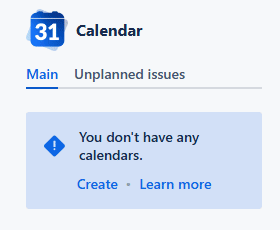
Open the Calendar for Jira app from the Jira Apps menu.
In the sidebar, find the Calendars menu and click the + create button.
Marketing calendar - Creating the calendar
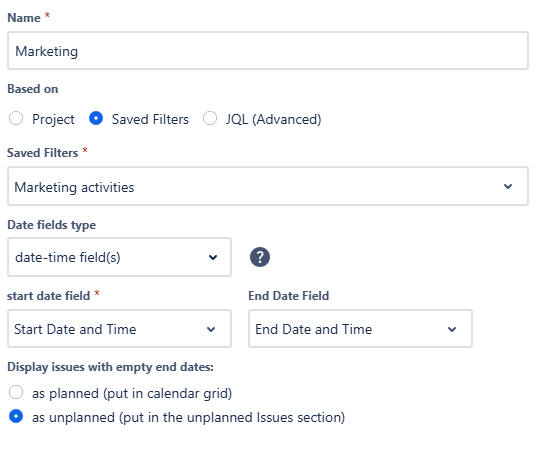
Give your calendar a name: simple Marketing will be more than enough.
Specify what the calendar is based on. For this case we can use pre-defined Saved Filters which include all marketing activities we’ve added to our demo instance, excluding the epics.
Because marketing is quite often planned by the hour, it is reasonable to use date-time field(s) as the date field type of your Marketing calendar.
Marketing calendar - Main settings
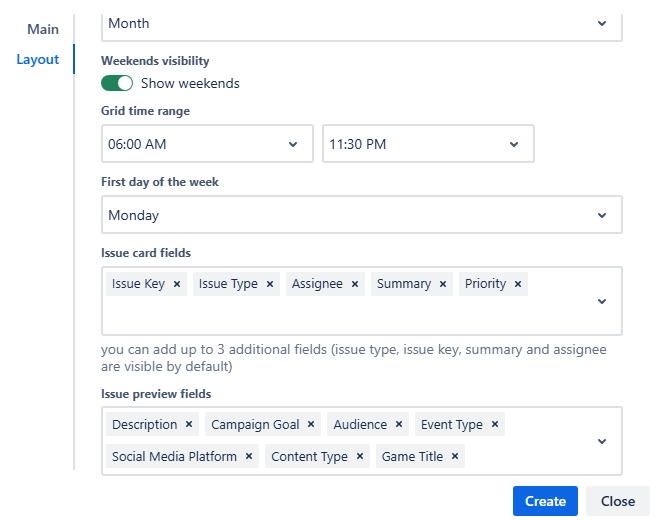
For the Layout settings, set the default view to Month View. This provides an excellent, high-level overview of all upcoming campaigns and content.
For the gaming industry, planning marketing activities on weekends is especially valuable, as a large part of the player base is most active on those days. To take advantage of this, make sure weekends are visible in your calendar.
For your issue card fields, we suggest displaying the Campaign this item belongs to by choosing the Parent option. This instantly links each task to its overarching campaign. We also recommend showing the item's Priority level for quick visual context.
The issue preview window is perfect for displaying additional details from your custom fields without cluttering the calendar view. We suggest selecting the most relevant custom fields you've created. The information in the preview will be displayed based on the specific work type you're viewing.
Marketing calendar - Layout view
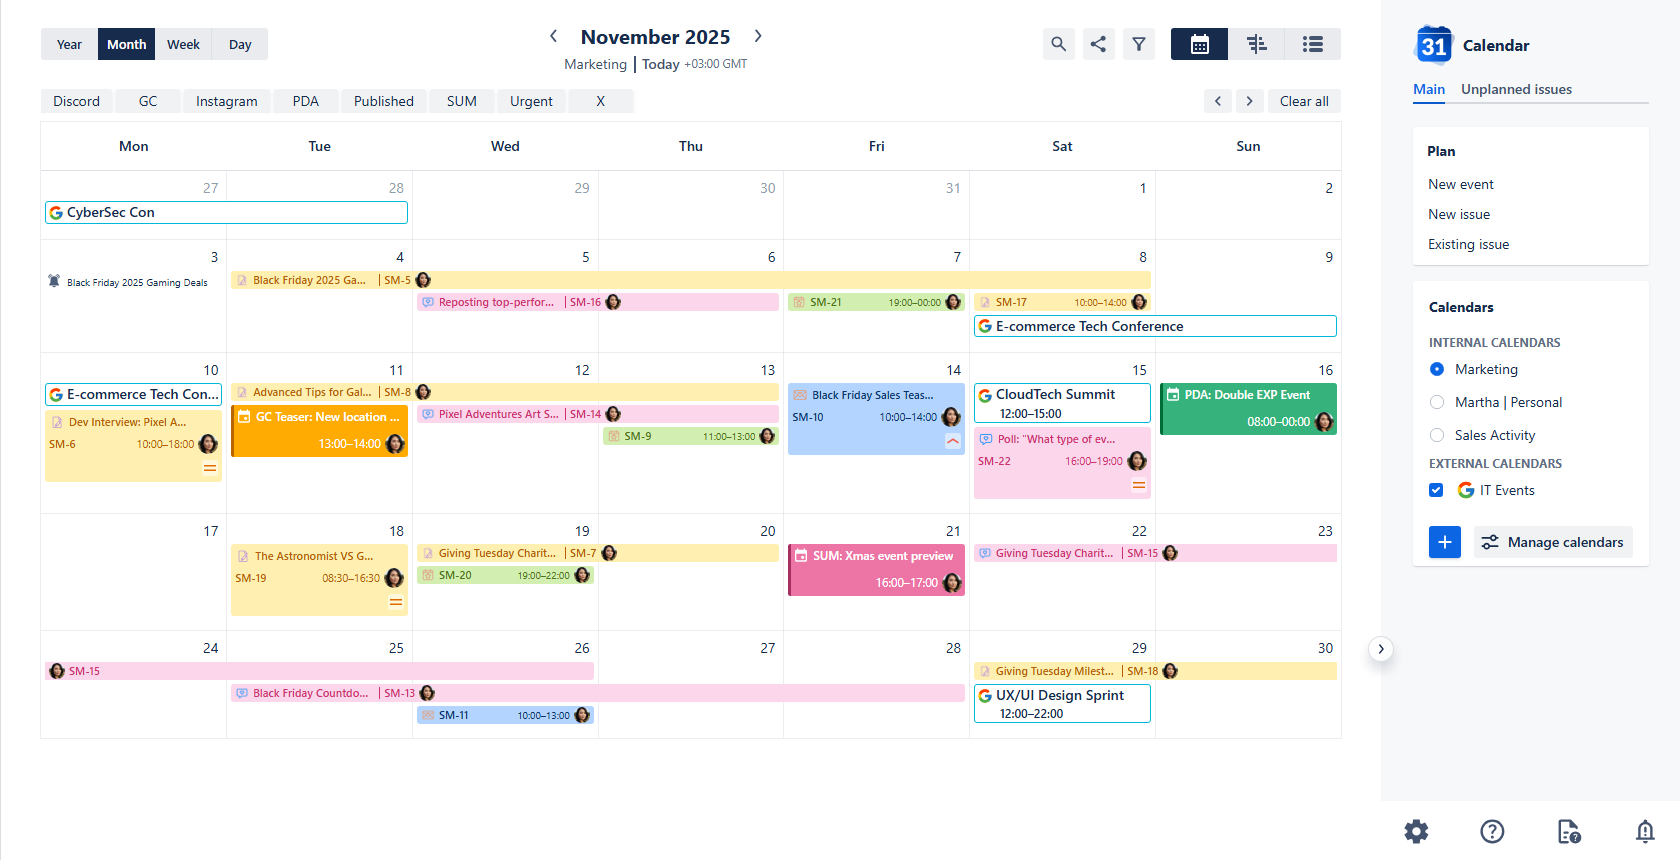
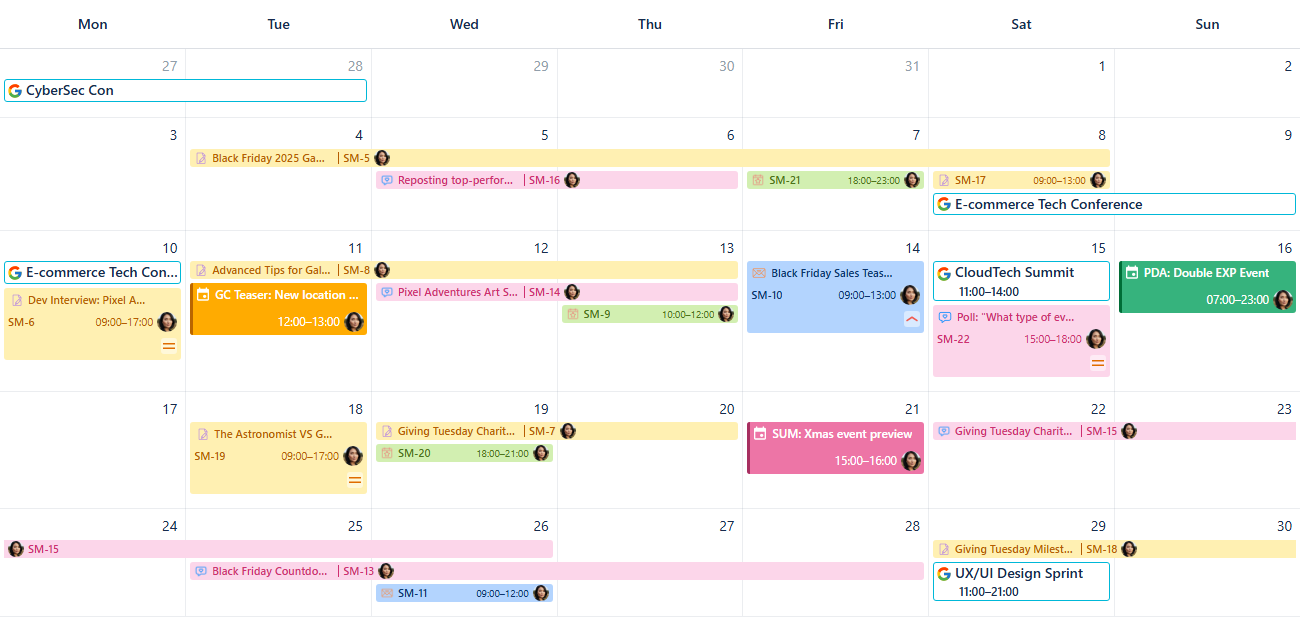
After confirming your settings, click Create. You will then see the initial look of your Marketing calendar:
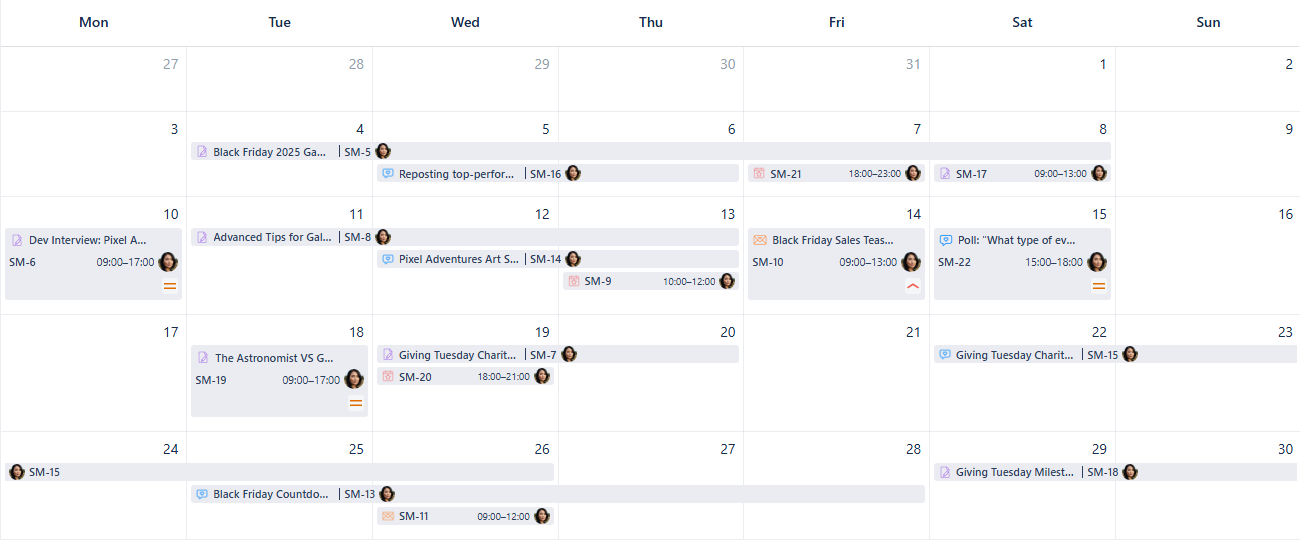
Marketing Calendar - First look
To bring more clarity to your calendar, let's explore the app's powerful display and filtering features.
Card colors for Marketing calendar
Applying colors to the various marketing activities is a great way to bring clarity to the calendar and make navigating it easier.
First, open the calendar's settings at the bottom of the sidebar and select the Card colors tab.
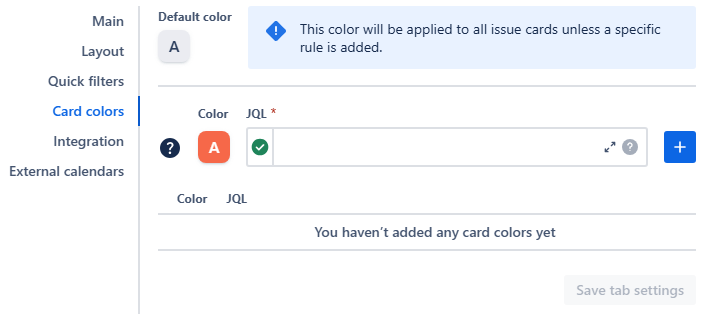
Marketing calendar - Card color settings
Using JQL statements to apply color rules is a great way to visually manage your calendar. For instance, you can highlight different work types to instantly see if your marketing efforts are balanced. This visual insight allows you to quickly adjust your strategy and ensure a balanced marketing mix.
Example: Yellow hue, the lightest shade: type = "Blog Post"
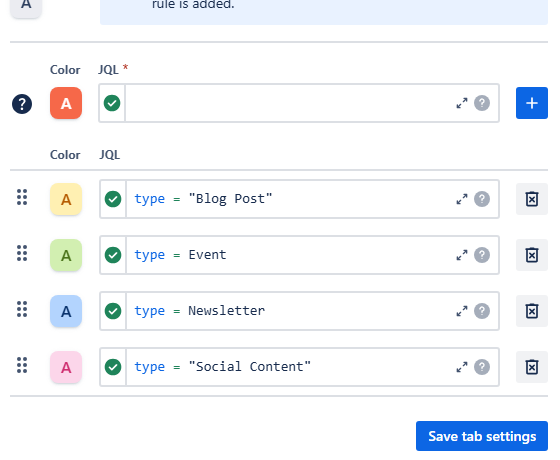
Marketing calendar - Card color rules added to the settings
Once you’re happy with all color rules added, click Save tab settings.
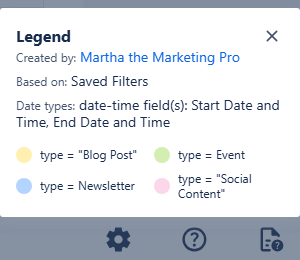
Other users are able to check the color rules by clicking the Legend button in the bottom of the sidebar:
Here’s how the card color feature will change the appearance of your Marketing calendar:
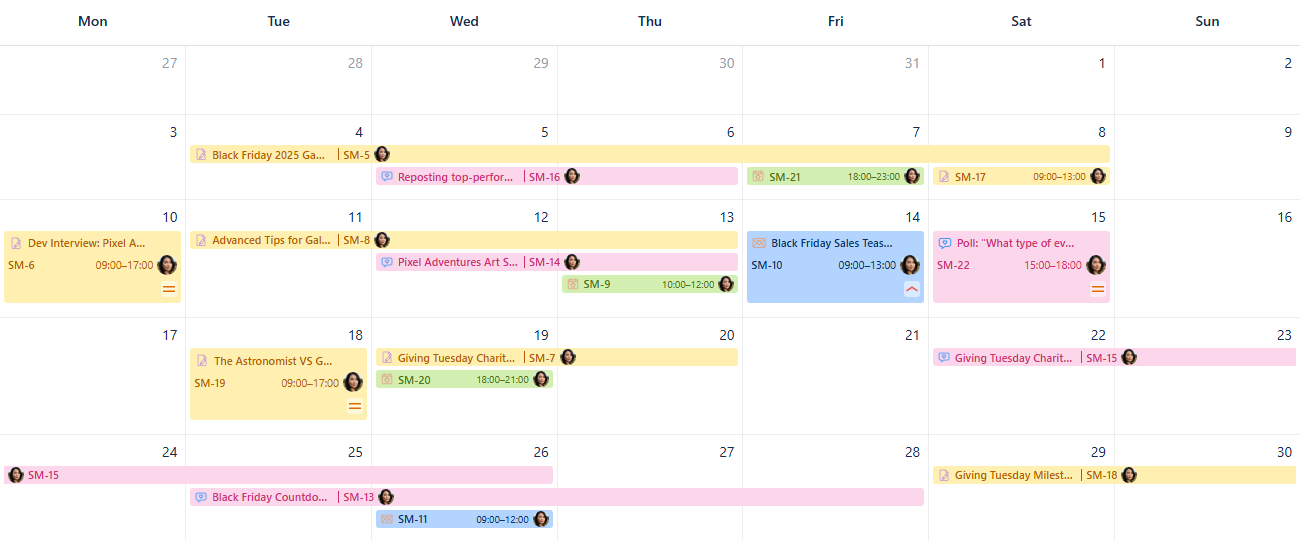
Marketing calendar - Card color rules applied
Make sure to check the coloring your cards page if you have any questions about this feature.
While color-coding is great for a high-level overview, Quick filters give you the power to instantly focus on specific information by hiding everything else. Let’s set those up as well!
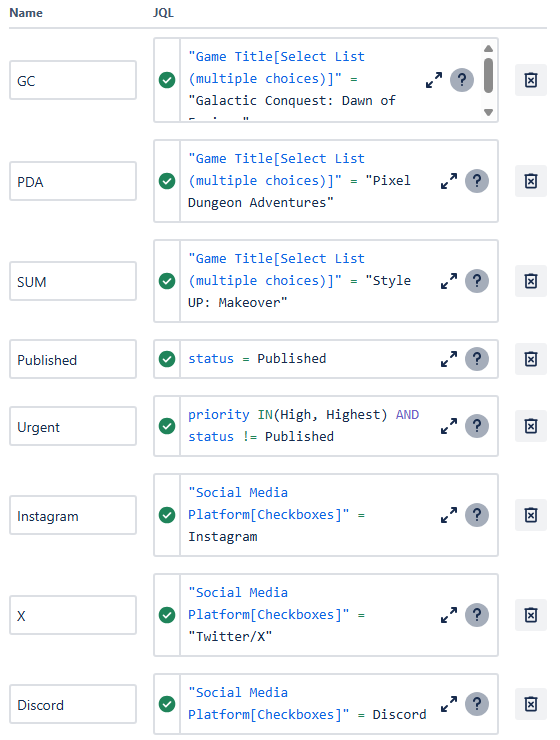
Quick filters for Marketing calendar
Navigate to the calendar's settings, then head over to the Quick filters tab.
There, you can use JQL to associate short, precise names describing what you’d like to isolate with the queries. Thanks to the variety of custom fields setup in this demo, we can display the work items based on the game title, highlight the issues which require immediate attention, and also isolate the activity on different social medias—all in one feature.
As you use JQL with custom fields, the hint feature will assist you by suggesting available custom field names and their possible values as you type.
Here’s how a quick filter setup could look like:
Marketing calendar - Quick filter rules added
After clicking Save tab settings, you will find your quick filter buttons right above your calendar grid, in the quick filter row:

Marketing calendar - Quick filters in place
Click one of the buttons to activate the filter. The calendar will then display the issues which adhere to the rules inlaid into that particular quick filter. Clicking the button again will deactivate the filter. By activating multiple quick filters at the same time, you apply an AND condition between them: the calendar will only display the work items that satisfy all sets of quick filter rules currently activated.
More info about how the filtering works within our Calendar for Jira app can be found here.
Connecting External Calendars
You can integrate external calendars like product launch schedules, industry events, or partner-related timelines into your Marketing calendar to provide valuable information to your team, product managers or content creators.
First, get the iCal link (.ics URL) for the external calendar. Find the detailed instructions on how to locate the ICS link here.
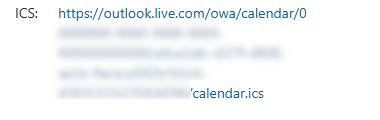
Marketing Calendar - Outlook .ics link
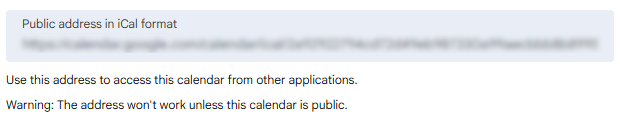
Marketing Calendar - Google .ics link
In your Calendar for Jira app, go to the calendar settings and choose the External calendars tab.
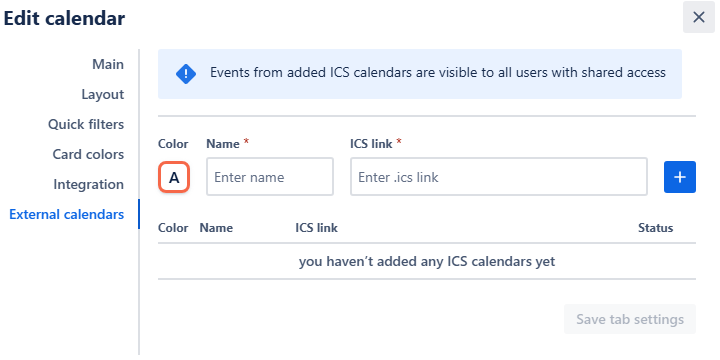
Choose a color hue and provide a name to your external calendar, then paste the iCal link into the ICS link field. Click the add + button.
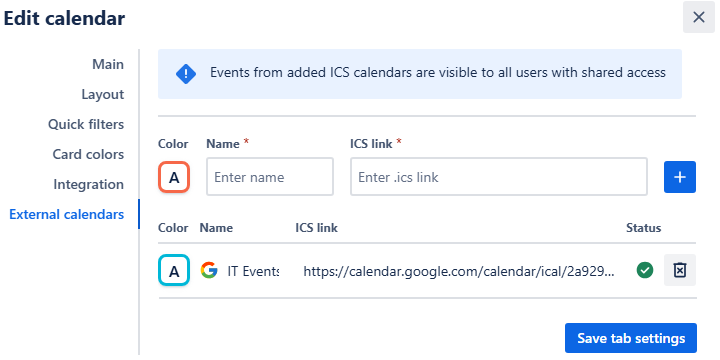
Marketing calendar - External calendar added
Click Save tab settings. The external events will then also appear on your calendar grid:
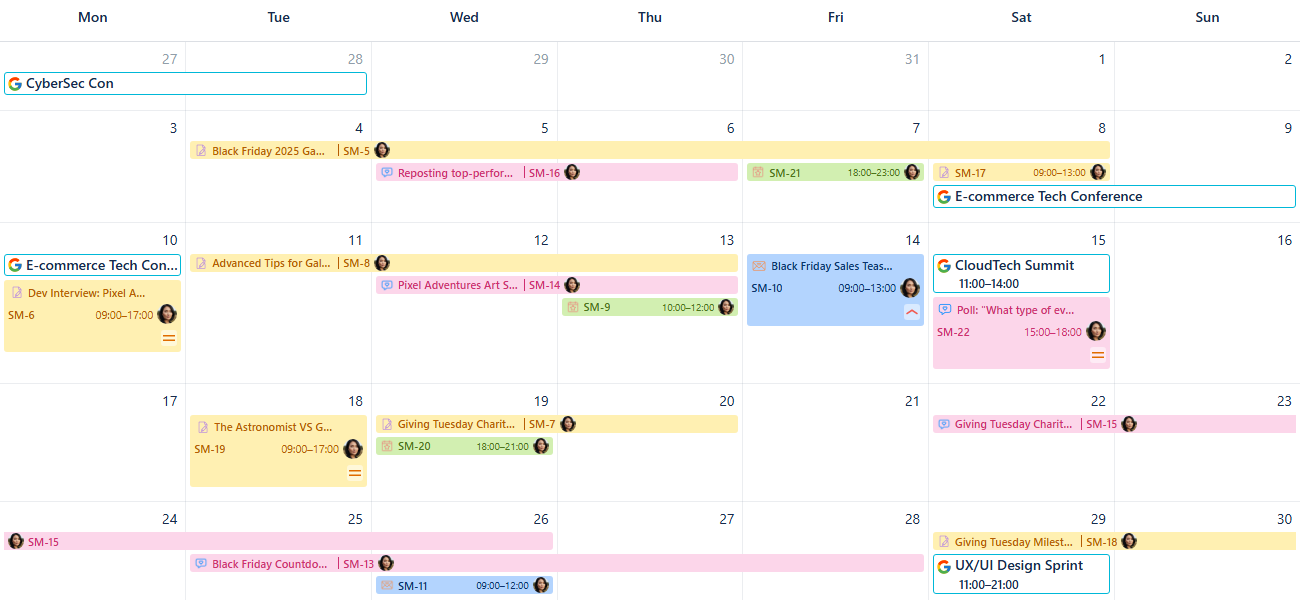
Marketing calendar - External events added onto the grid
The external calendar will then be visible in the sidebar under External calendars.
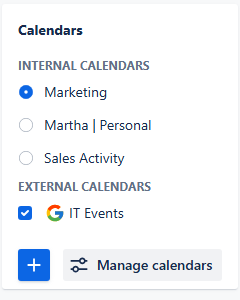
Marketing calendar - External calendar in the sidebar
Check the box next to its name—the external events will then also appear in your calendar grid. Uncheck it to hide the events of the iCal subscription.
To delete the external calendar, simply click the delete button to the right of the calendar’s name in the External calendars settings.
Creating Non-Jira Events
The Custom or Non-Jira Events (NJE) feature is great for scheduling important marketing activities that don't require a Jira issue. This could include team brainstorms, informal deadlines, or prep sessions for a major event.
To get started, click on the desired date on the calendar:
Marketing calendar - Picking a date
In the pop-up menu, select New Event. An event creation window will appear:
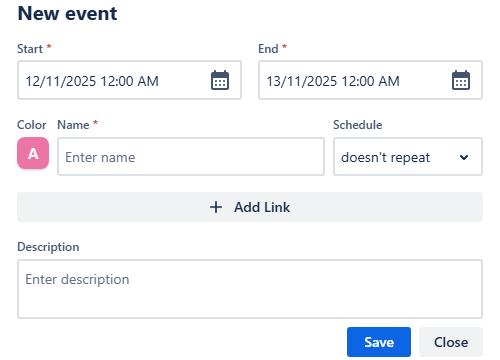
Marketing calendar - Non-Jira event
Fill in the dates and times, choose a color, and give the event a name. In gaming industry, this could convey a simple operation of turning a certain setting on or off on the servers (for example, pre-configured in-game events).
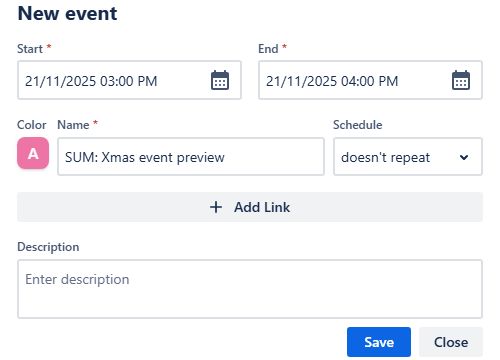
Marketing calendar - Adding the event
Add a description and click Save. The event will immediately appear on your calendar grid:
Marketing calendar - Custom events added
Adding Reminders
If your team uses our Reminder for Jira app by Teamlead, you can display these reminders directly on your calendar. This is an effective way to keep everyone on top of publishing deadlines or review stages.
To create a reminder directly from our Calendar, simply press the R-key to prompt the reminder creation window to appear:
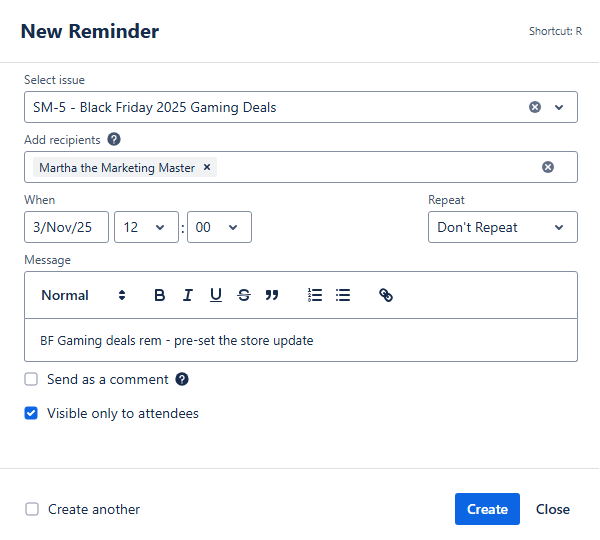
Marketing calendar - Adding a reminder
Alternatively, you can create the reminder from the main page of our Reminder for Jira app by Teamlead by clicking the + Add Reminder blue button:
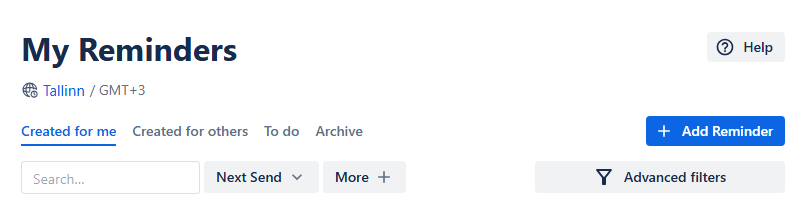
Marketing calendar - Creating a reminder from the Reminder page
Provide the necessary information and associate the reminder with a work item. After that, click Create, and the reminder will be added to your reminders list.
Once you have a reminder you’d like to display on your calendar grid, go to the calendar settings, and then to the Integration tab. In there, switch the Show the current user’s reminders toggle to on, turning it green.
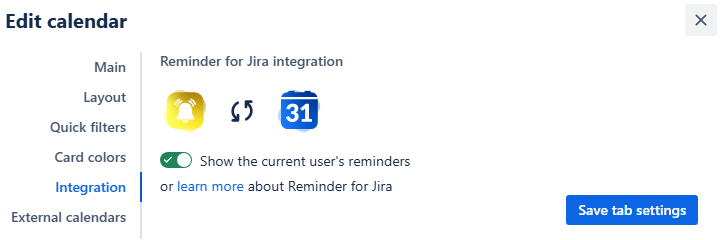
Marketing calendar - Turning the reminders on
Click the Save tab settings. Your reminders will then appear on the calendar grid alongside your issues:
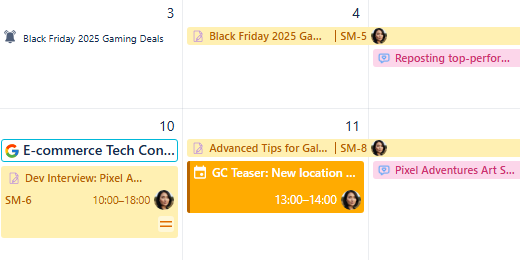
Marketing calendar - Reminders on the calendar grid
Sharing your calendar
After you’ve customized the calendar, you can share it with your team to improve collaboration.
On the calendar interface, find the Share button. It's located to the right of the Today link.

Marketing calendar - Sharing a calendar
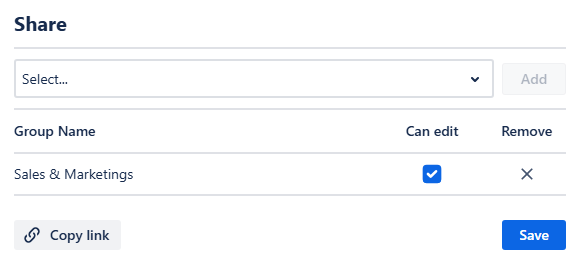
Click this button, and a share window will pop up.
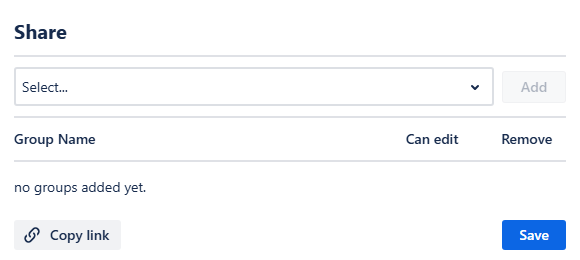
Marketing calendar - Share window
From this window, you can select the user group that represents your marketing team. After you do, click Add, and then choose if the group members should have editing rights by checking the box next to their name. This is useful if a campaign manager needs to make changes.
Marketing calendar - Sharing the calendar with a user group
You can also get a direct link to the calendar by clicking Copy link in the share window.
Finally, click Save. Your team members will be able to access the calendar from the Shared with me section of the Calendars menu.
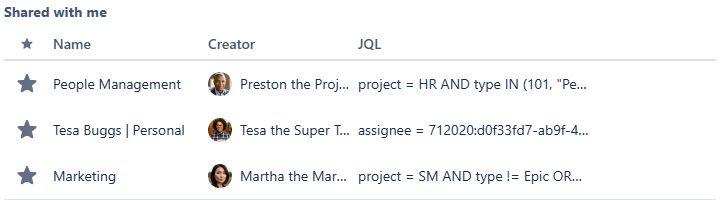
Marketing calendar - Displayed in Shared with me