.png)
Project Management
Project Management Calendar
Use case description: The Project Calendar is used to track project tasks, including key deadlines, stakeholder meetings, and release dates. It gives project managers and leadership a comprehensive view of cross-team activities and timelines, which helps with better planning and clearer communication around project progress.
Primary Actor: Project Manager or Program Manager.
Calendar Shared With: Cross-functional teams, stakeholders, execs.
This guide provides a walkthrough for setting up a Project Management Calendar using the Calendar for Jira app. Its core function is to help you track project tasks and key deadlines. While the project setup steps aren’t mandatory, a quick review can help make the overall experience smoother.
Create relevant work types:
For this use case we opted to utilize two distinct work types: Task and Review. Tasks represent the discrete, actionable units of work required to produce the project's deliverables. They are the core activities that team members are assigned to complete.
Reviews represent the critical quality control and feedback cycles necessary to ensure the work (Tasks) meets the required standards, scope, and objectives before being deemed complete or moved to the next phase.
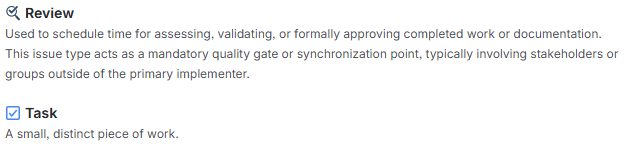
Project Management - Work types
Alternatively, you could integrate the review step directly into the Task workflow. Add an In Review status (status category In Progress) and use automation rules to reassign the task to the designated reviewer when it reaches that stage.
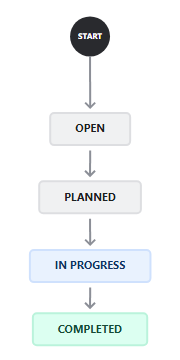
Set up workflows for issue types:
Both work types will follow a typical workflow for project tasks: Planned (status category To Do)→ In Progress (status category In progress) → Completed (status category Done). You can use a custom workflow or an existing one that follows this general progression.
Add Custom Fields (Optional)
To optimize your project calendar and improve its sorting and filtering capabilities, it's a good idea to use custom fields. A Project Manager relies on Team assignments to effectively manage workload across all groups. This visibility is key to accurately assessing team capacity and ensuring balanced effort toward achieving a single project goal. You can either utilize the built-in Team configuration provided by Jira, or create your own field:

Project Management - Team custom field
Now that the preliminary setup is complete, let’s build our project calendar!
Calendar creation
Open the Calendar for Jira app from the Jira Apps menu. In the sidebar, find the Calendars menu and click the + create button.
Project Management - Calendar creation
Provide a calendar with a concise name. Then, specify what the calendar is based on. Our goal is to track the tasks and reviews related to projects of our interest. Besides that, seeing our team members' availability would be also beneficial for accurate task assignment. Since our query is rather complex, a good choice would be setting up the calendar based on JQL:
(project = HR AND type IN(Vacation, "Business Trip")) OR (project = CALCL AND type IN(Task, Review))
This ensures the calendar displays only active project tasks and planned absences, keeping the view uncluttered by excluding completed items.
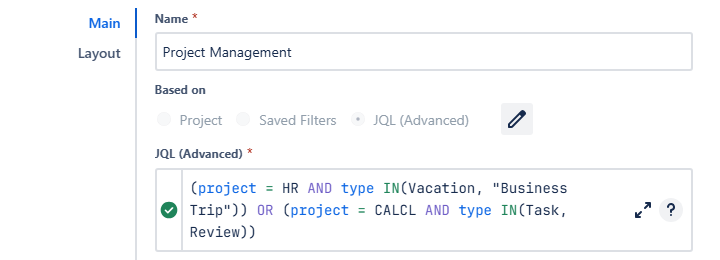
Project Management - Main settings
Select Date field(s) option for your Date type fields, and choose which fields will act as Start Date Field and End Date Field. Then, choose how the work items in which the End Date Field is empty will behave:
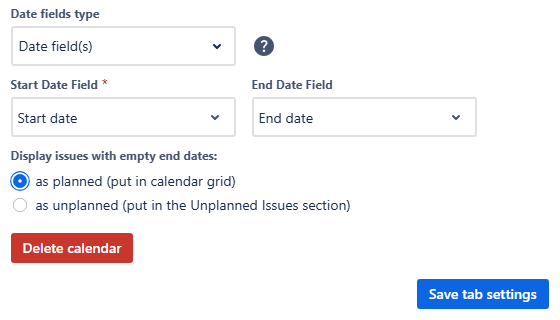
Project Management - Main settings
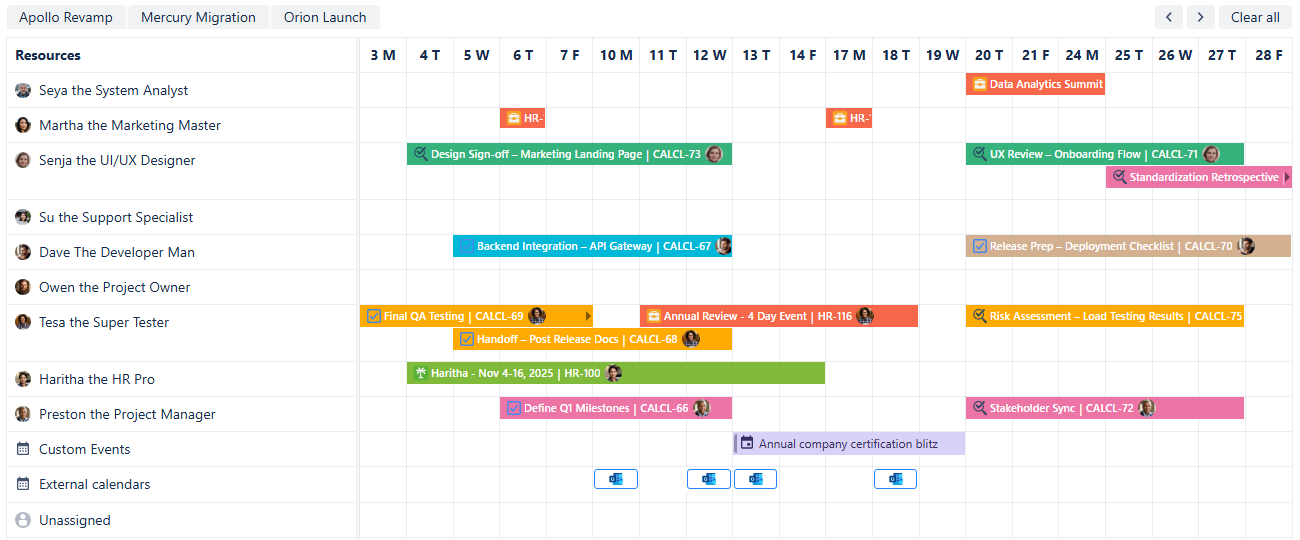
For the Layout settings, set the default view to Timeline Month View. This view is perfect for visualizing project tasks and resource allocation. Hide the weekends and set your Grid time range within the regular working hours.
Because the Timeline view prioritizes resource management, the issue cards are kept concise, showing only the default fields (issue type, key, summary, and assignee avatar). If you need more data visible on the calendar, configure the Issue preview fields to include any additional information.
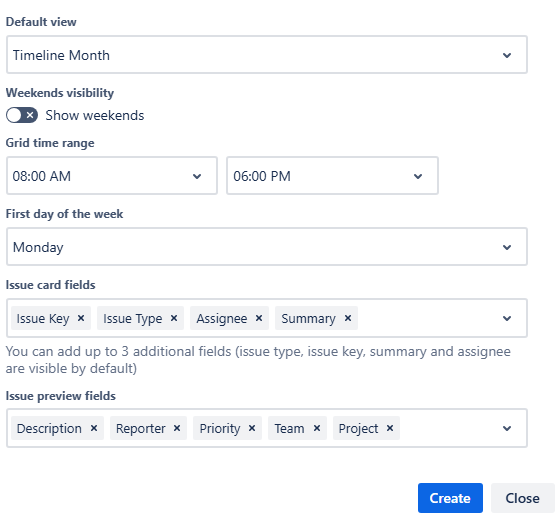
Project Management - Layout settings
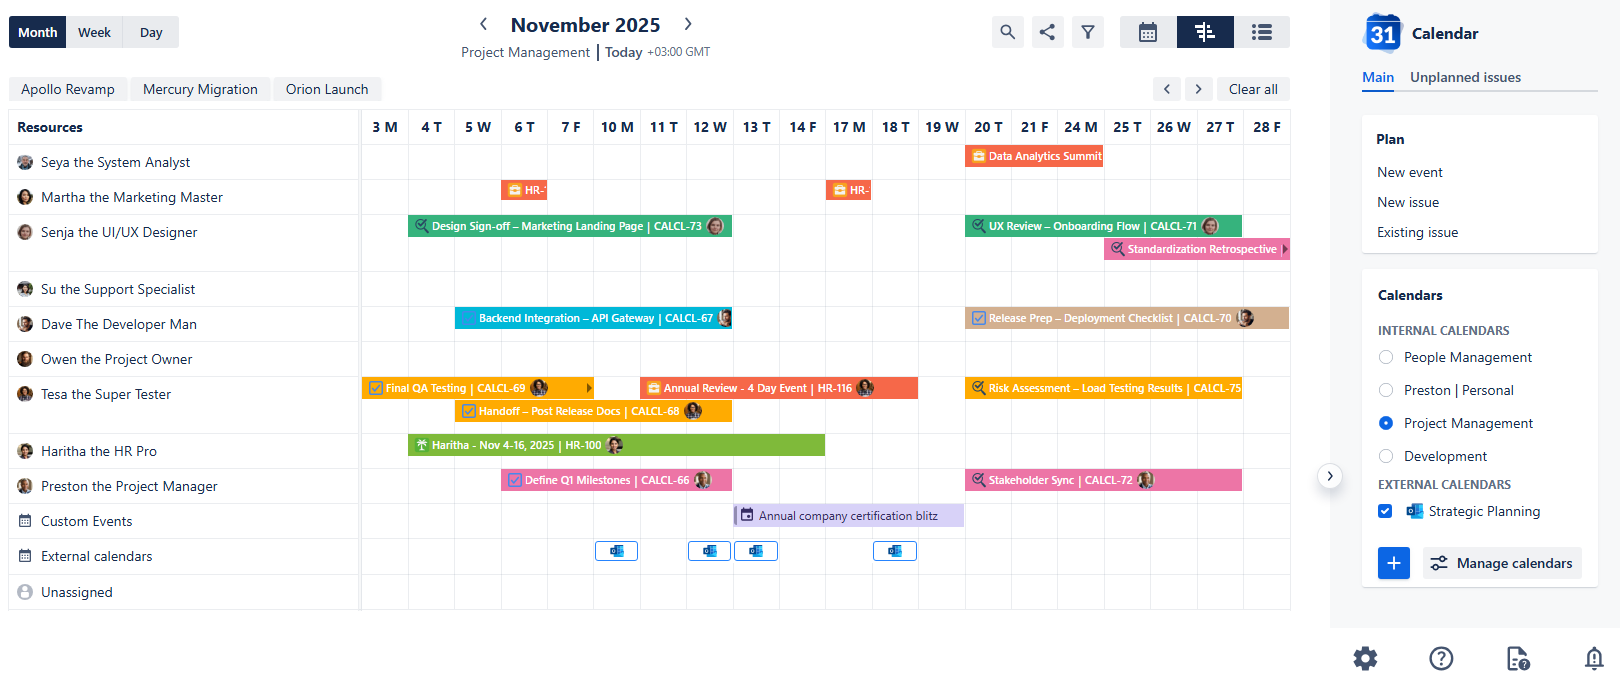
After confirming your settings, click Create. Have a look at your freshly made calendar:
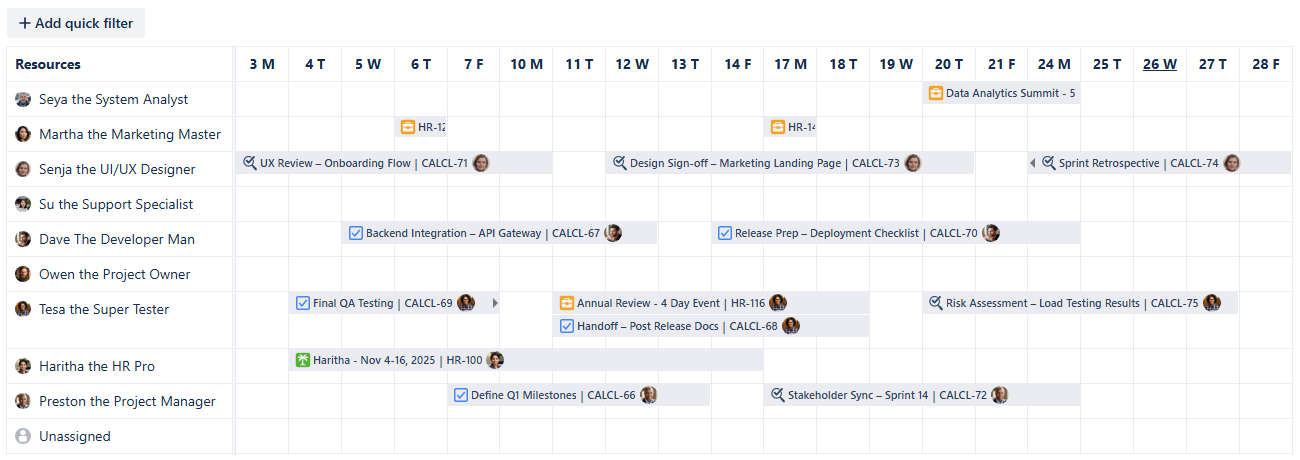
Project Management calendar - First look
Now it’s time to explore our Calendar for Jira app’s functionality to enhance your planning productivity!
Card Colors for Project Management calendar
Adding color coding is a great way to make your calendar more readable and to quickly identify tasks by team or priority. To showcase the calendar’s capabilities, let’s assign the colors to the teams.
First, open the calendar's settings at the bottom of the sidebar and select the Card colors tab:
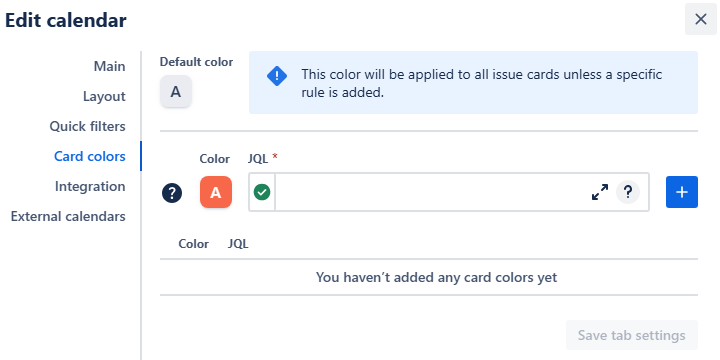
Project Management - Card color settings
Use JQL statements to apply color hues based on work properties. When using custom fields, simply begin typing the field name, select the full name hint to insert the field in JQL format, and then select the desired value from the subsequent options hint after the equals sign. Click the + button to add each rule to your list.
Project Management - Adding color rules to the calendar
Don’t forget to provide the absence-related work items with their own hues. 🙂
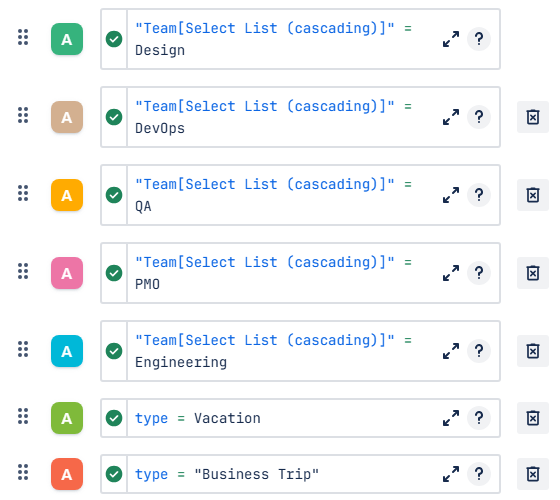
Project Management - Color rules added
Once you’ve added the rules you wished to, click Save tab settings to apply the changes. Your calendar will then change its appearance:
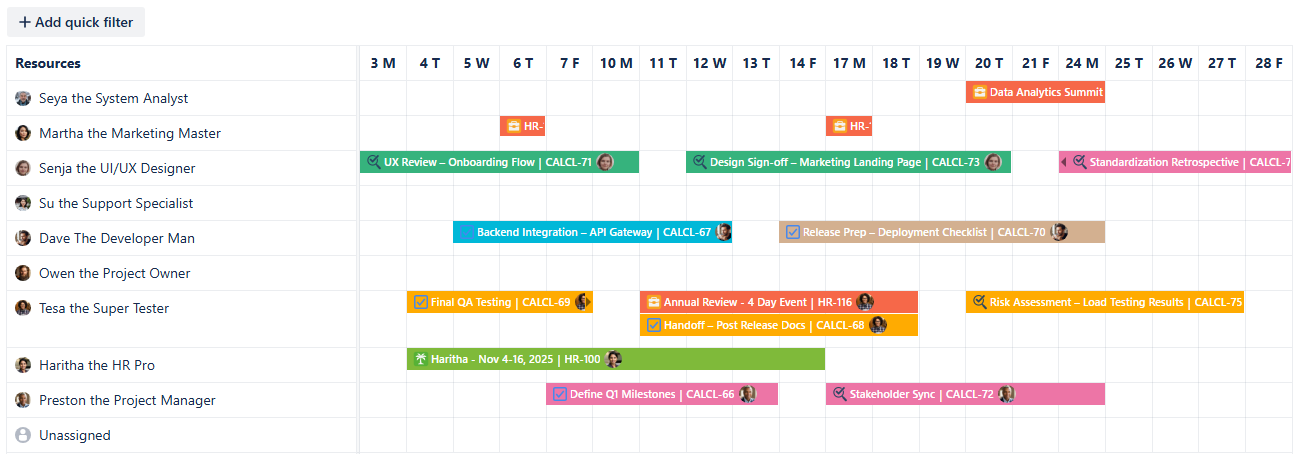
Project Management - Color rules applied
You can check the color meanings using the Legend button in the bottom of the calendar’s sidebar:
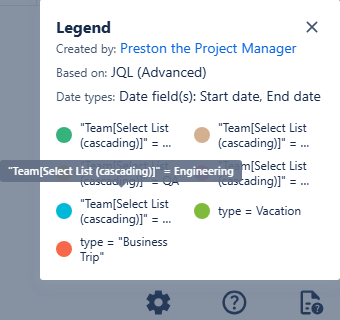
Project Management - Legend
By adding color rules based on the Team field, you can immediately identify which team's work an individual employee is executing, regardless of their primary team assignment. This instantly clarifies cross-team dependencies and workload distribution.
Quick Filters for Project Management calendar
Quick Filters are vital for effective project management. They leverage JQL queries to instantly isolate the work items a PM needs to focus on in the moment, allowing for dynamic triage without creating a separate calendar view.
To setup own quick filters, navigate to the calendar's settings, then go to the Quick filters tab:
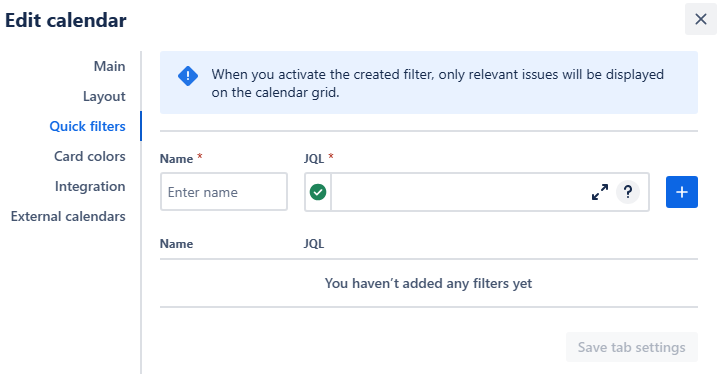
Project Management - Quick filter settings
We will implement quick filters that segment the calendar by projects.
Note: While this use case leverages a custom field for project identification, remember that in standard practice, filters should target the native Jira Project attribute for more efficient isolation of work items.
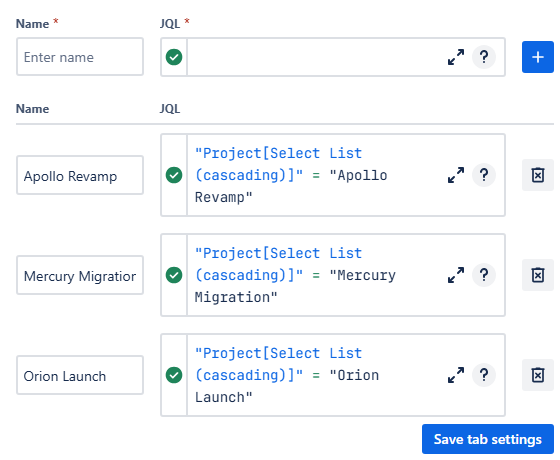
Project Management - Quick filters added
Click Save tab settings to finalize your filters. Here’s what they will look like above the calendar grid:
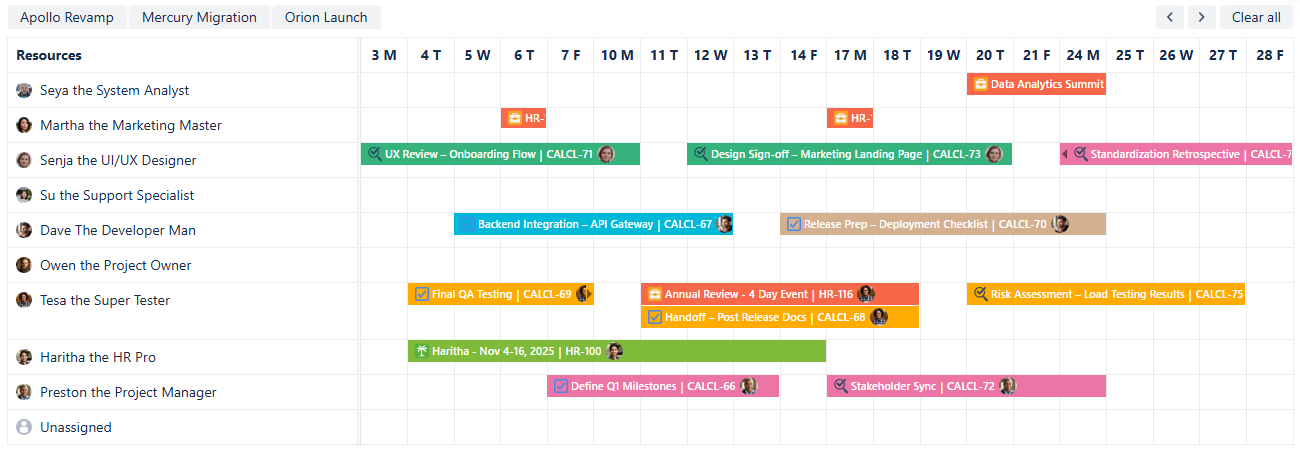
Project Management - Quick filters added
Click on one of the filters to activate it. The quick filter button will then darken, indicating it is switched on. To deactivate it, click on the filter again, and the calendar will go back to its default view. Alternatively, you can click Clear all button to the right side of the quick filter row, and all filters will be deactivated.
Project Management - Quick filters in use
Connecting External calendars to Project Management calendar
For a more complete view of your project’s schedule, you can integrate external calendars like executive calendars and strategic planning timelines.
First, get the iCal link (.ics URL) for the external calendar. Detailed instructions on how to obtain the link can be found here.

Project Management - Outlook link
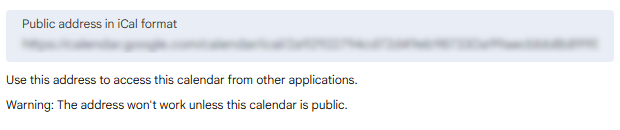
Project Management - Google Calendar link
In your Calendar for Jira app, go to the calendar settings and choose the External calendars tab:
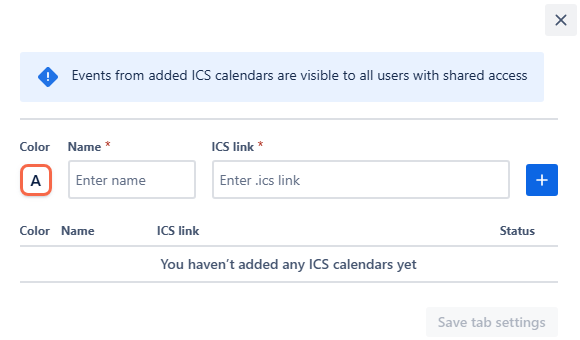
Select a color for the external calendar, give it a name, and paste the iCal link into the ICS link field. Click the add + button:
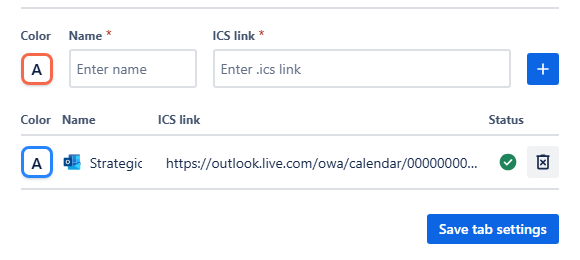
Project Management - External calendar added
Click Save tab settings. After that, the events from the external subscription will appear in their own row. To see the details of the event, simply hover your mouse over the event’s icon:

The external calendar will also be visible in the sidebar under External calendars:
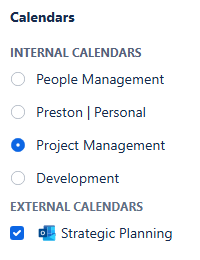
Project Management - External calendar in the calendars menu
To hide the events originating from the external calendar, simply uncheck the box next to its name. The events will reappear once you check the box again.
Creating Non-Jira Events
The Custom or Non-Jira Events feature is great for scheduling important project activities that don't need a Jira issue. You can use them for project activities that consume time but don't require backlog management—such as internal prep sessions, buffer days, or meeting blocks. You can also use this tool to visually mark a significant drop in productivity caused by external factors. This keeps your Jira issue list clean while ensuring every minute of your team's schedule is accounted for and visible on the calendar.
To get started, click on the desired date on the calendar:
Project Management - Choosing a date
In the pop-up menu, select New Event:

Project Management - Pop-up menu
Once you click it, a new window will appear, in which you will configure your future custom event details:
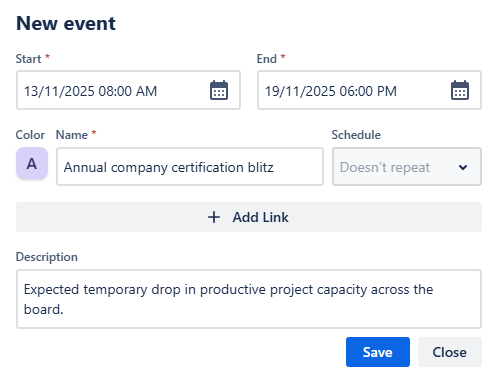
Project Management - Adding a custom event
Fill in the start and end date-times, choose a color, and give the event a name. Provide a link, if it is needed, and a concise description, then click Save. Your custom event will then appear on the calendar grid:
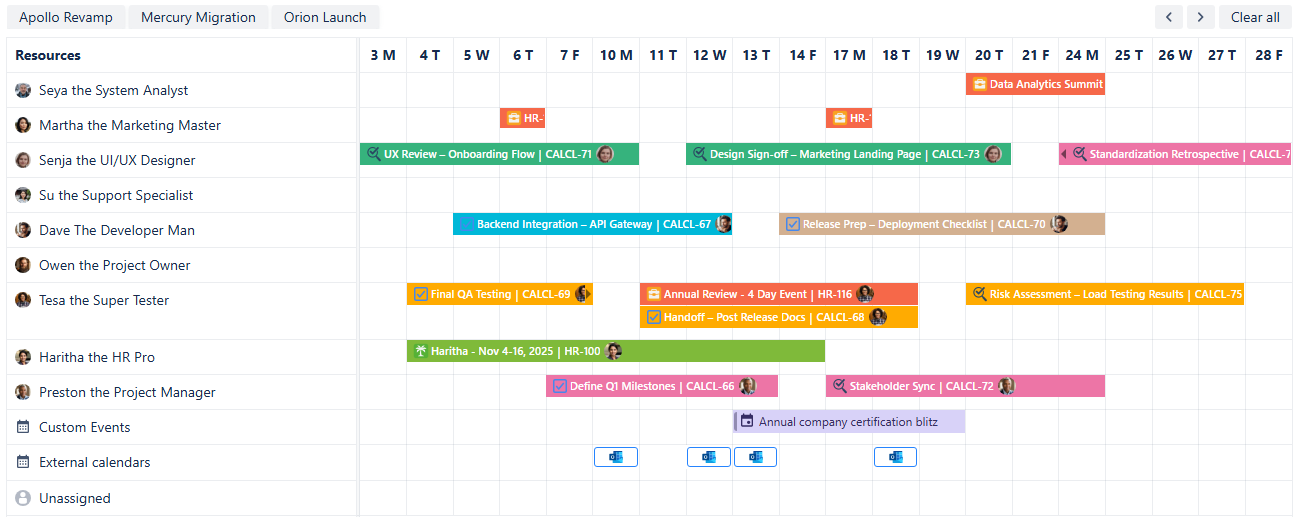
Project Management - Custom events added
Providing such detail to the project management calendar allows teams to adjust their work time proactively, helping them to mitigate delays caused by external factors and stay aligned on achieving common goals.
Project Management - Calendar adjusted
Sharing your Project Management calendar
After you’ve customized the calendar, you can share it with your cross-functional teams, stakeholders, and executives to improve future collaboration.
To do so, on the calendar interface, find the Share button. It's located to the right of the Today link, between the Search and Instant filters buttons. Click it, and a share window will pop up.
Project Management - Sharing a calendar
From this window, you can select the user groups with which you would like to share the calendar. Click Add, and then choose if the group members should have editing permission by checking the box next to their name.
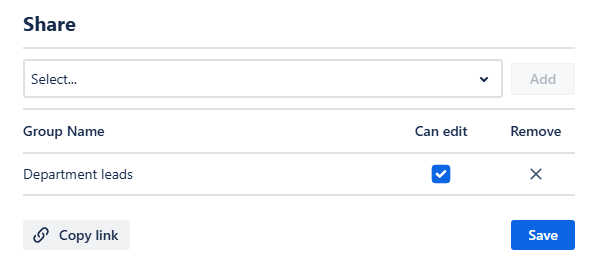
Project Management - Sharing a calendar with department leads
Note: Editing rights grant users the ability to modify card color rules, quick filters, external calendars and integration. Only the calendar’s creator has access to Main and Layout settings.
Finally, click Save. The selected groups will be able to access the calendar from the Shared with me section of the Calendars menu:
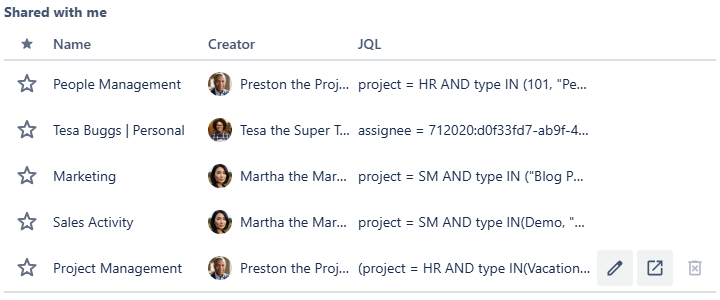
Project Management - Shared with me calendars