.png)
Personal Calendar
Personal Calendar
Use case description: This calendar supports individual users in managing their personal work tasks and reminders. It’s designed to help team members organize internal responsibilities, small tasks, and recurring activities that don’t require full Jira workflows. Items can be color-coded and filtered for personal productivity, and users can create private non-Jira events for added flexibility.
Primary Actor: Individual team member.
Calendar Shared With: Private or optionally shared with manager or team.
This manual guides you through setting up a Personal Calendar using our Calendar for Jira app. Its primary goal is to help you consolidate your individual tasks and reminders from across all your projects into a single, unified view. Since the calendar's purpose is to gather all of your work in one place, a prior setup is not required.
Calendar Creation
Let's create our Personal calendar.
Navigate to our Calendar for Jira app through the Jira Apps menu.
In the right-hand sidebar, find the Create button within the Calendar section.
Personal calendar - Calendar creation
If you’re planning to share this calendar with your team, it would be wise to indicate your own name in the calendar’s name to help others locate it without trouble. Otherwise, go wild, this is your personal planning page!

Personal calendar - Giving a name
When specifying what the calendar is based on, you can select the JQL option. This allows you to create a calendar that displays issues based on any Jira Query Language statement. For example, you can choose to display all issues in which you are the assignee across all projects you have access to. As you type a name after the assignee property, the field will provide you with helpful suggestions.

Personal calendar - What it is based on
To avoid crowding the calendar with events spanning their entire duration, in this use case we selected Due Date as the Date field type of our calendar. That way it will be easier to locate the tasks which require more attention to complete them on time.
In the Layout settings of your Personal calendar, choose List View for the default view of your calendar.
Since it’s a personal calendar, it makes sense to keep the weekends visibility on and select the widest grid time range possible—it will allow you to use the calendar for the past-working hours planning, if it’s required.
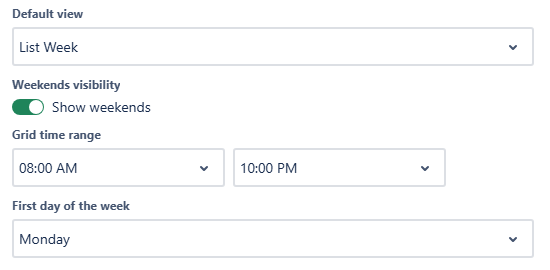
Personal calendar - Layout settings
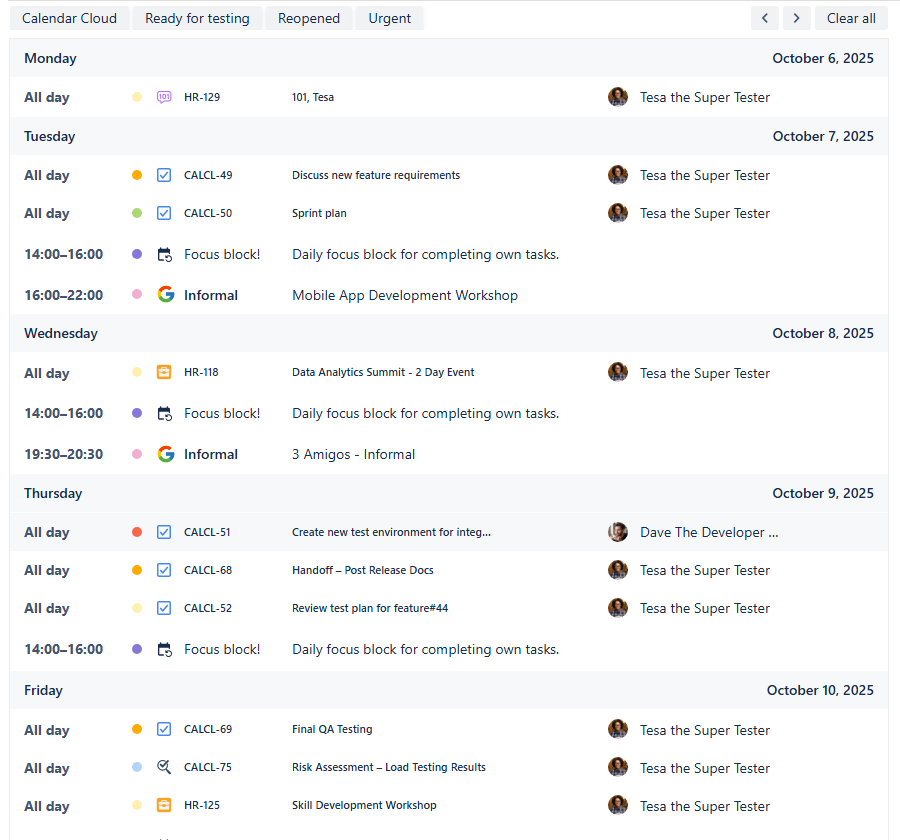
The List view is designed to help you focus on the main details of your work items by providing a streamlined, uncluttered display.
Because of this, adding more fields to the Issue card fields won't affect this specific view. If you want to have quick access to more information, simply add the fields you're interested in to the Issue preview fields.
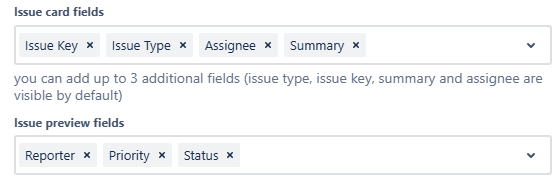
Personal calendar - Layout settings
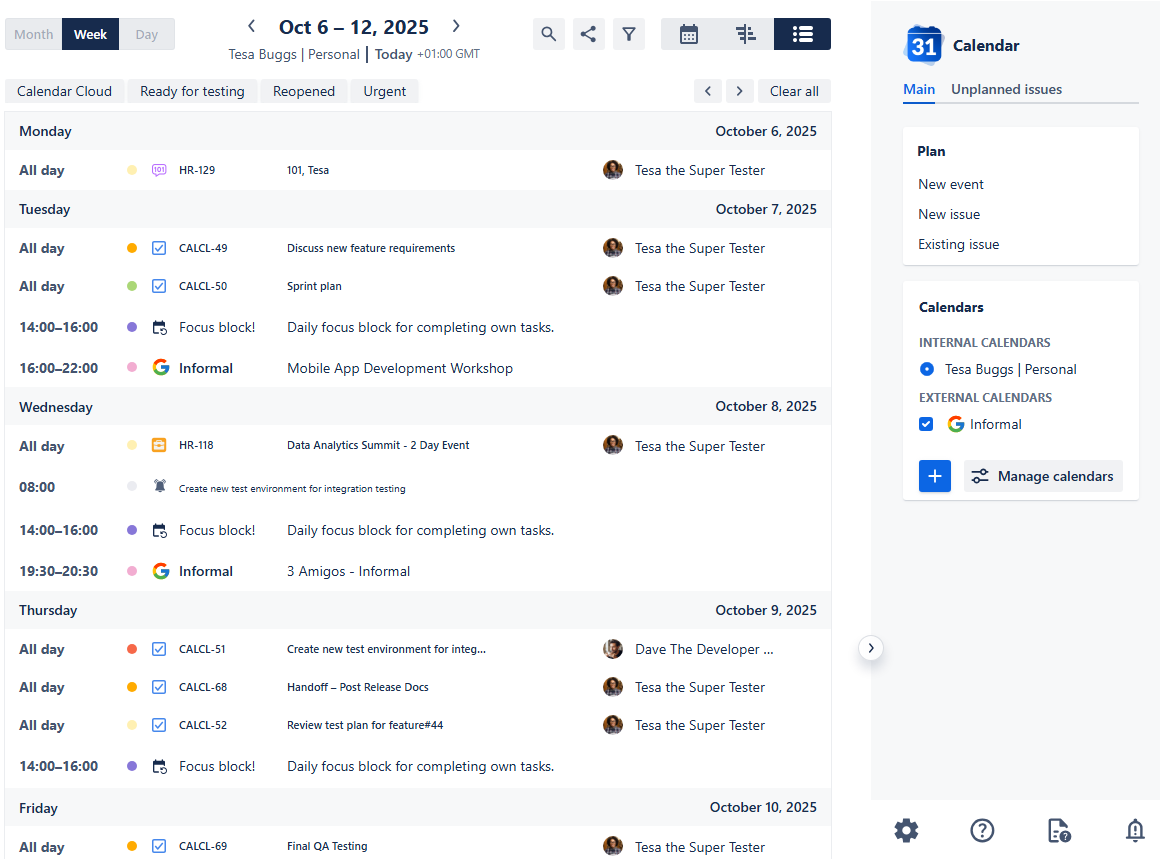
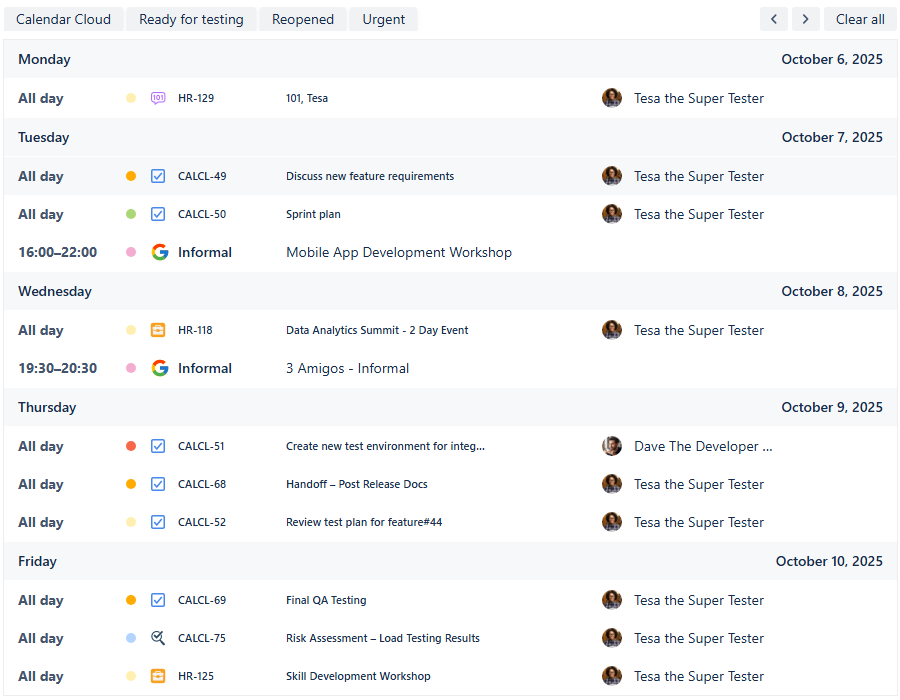
Once you’re satisfied with the configuration of your personal calendar, click Create. You will be greeted with a view similar to this:
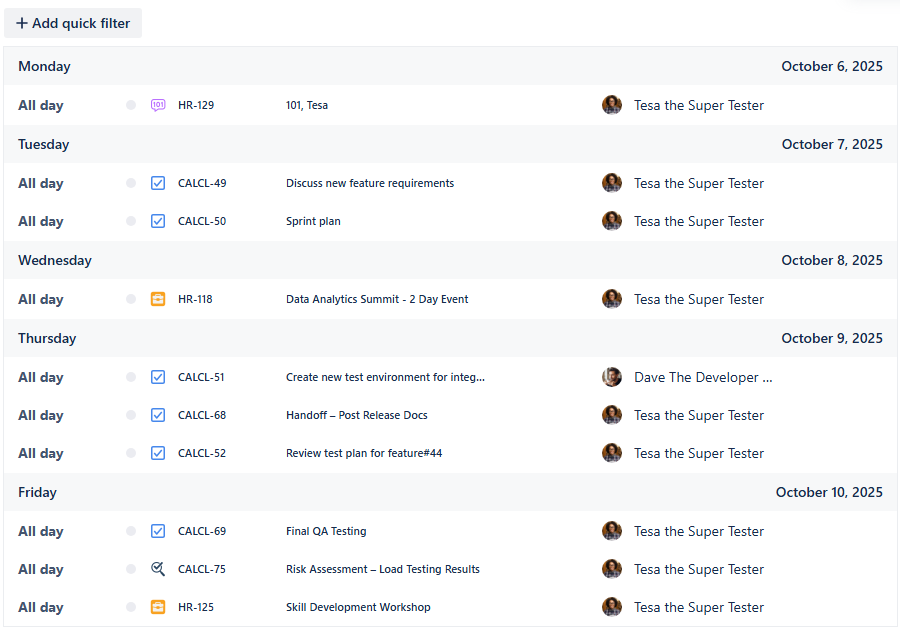
Personal calendar - First look
Let’s add clarity to this task list by utilizing the full functionality of our Calendar for Jira app!
Card Colors
Using color coding for the priority levels will make your calendar easier to read and help quickly identify task which require urgent attention. To add the color to the markers next to the each work item, navigate to the calendar's settings in the bottom of the right-hand sidebar, then go to the Card colors tab.
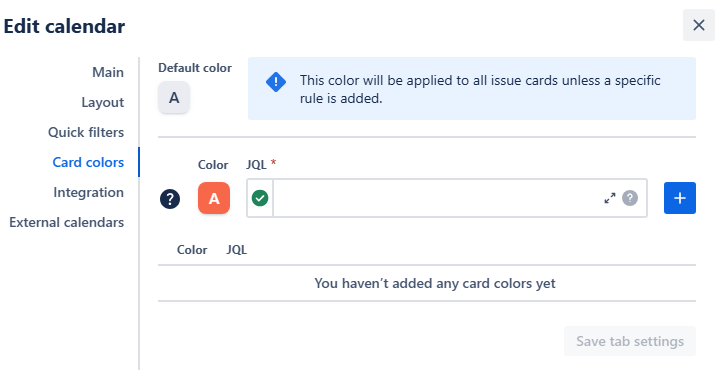
Personal calendar - Card color settings
Use JQL to associate color hues you’d prefer with the works' properties.
Example: Orange hue, JQL: priority = High
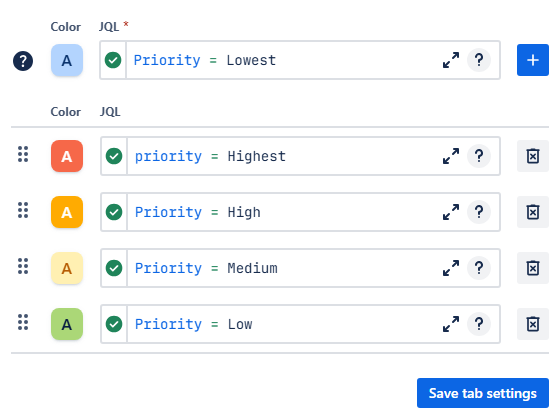
Personal calendar - Adding color rules
Click the + button to add each rule into the rule list. Once all rules are added, click Save tab settings. Upon saving, your calendar’s markers will go from grey to various hues depending on the priority level:
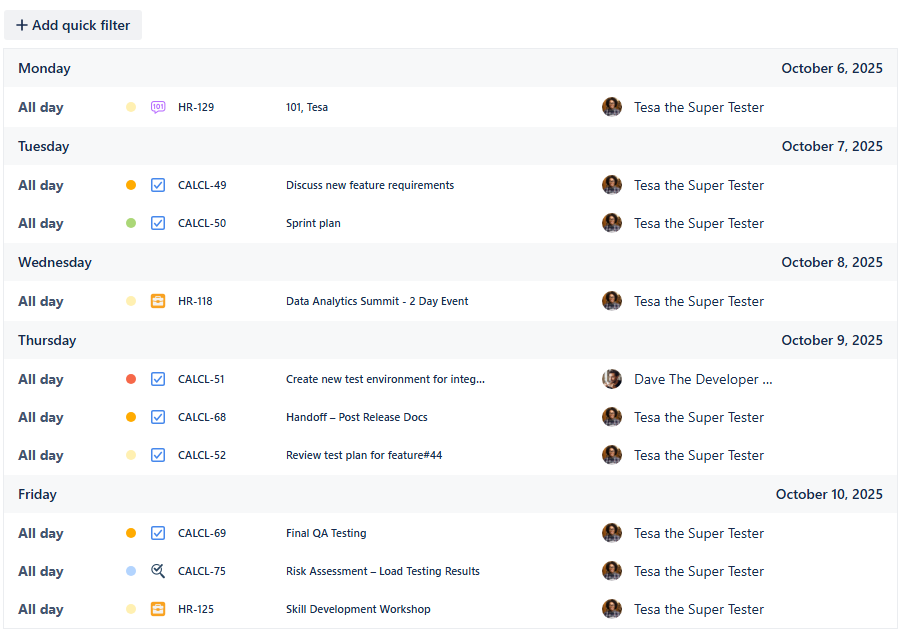
Personal calendar - Color rules applied
You can preview the color rules using the Legend button in the bottom of the sidebar:
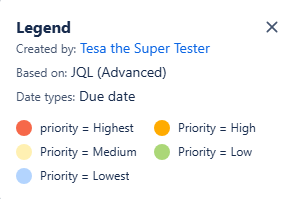
Personal calendar - Legend & Color rules
Quick Filters
Utilizing quick filters allows you to access work items' information based on any supported JQL query, enhancing personal productivity. Since your calendar aggregates work items from multiple projects, it’s crucial to create filters that help you segment that information. Another option could be tracking specific statuses related to your specialty—for example, status Reopened would be of a high interest to someone working in QA.
To set quick filters up, navigate to the calendar's settings and then to the Quick filters tab.
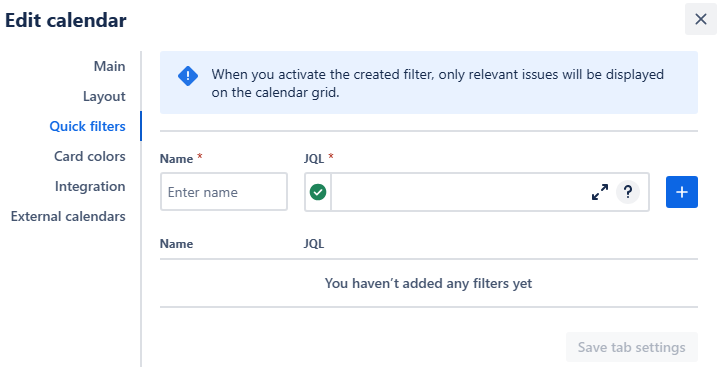
Personal calendar - Quick filters settings
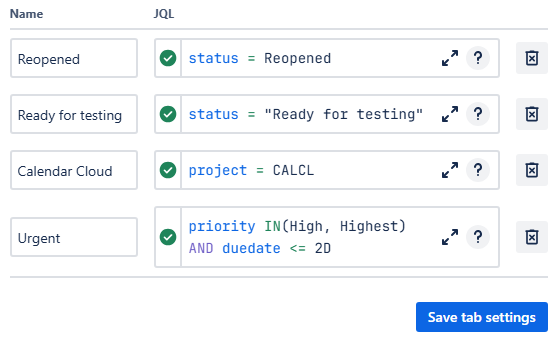
Create filters for different projects your work items belong to, and add additional filters based on the status of your interest:
Personal calendar - Adding quick filters
Example: status = Reopened
Example: project = CALCL
Example: priority (High, Highest) AND duedate <= 2D
You might think it's unnecessary to create quick filters for Priority & Due Date combinations since this information is already visible on the calendar. However, the true value of these filters isn't just seeing the data—it's reducing clutter to focus on urgency. Creating these filters enables you to instantly narrow your view and efficiently concentrate on the tasks that need your attention right now.
Click Save tab settings after adding your filters. Here’s how they should look:
Personal calendar - Quick filters added
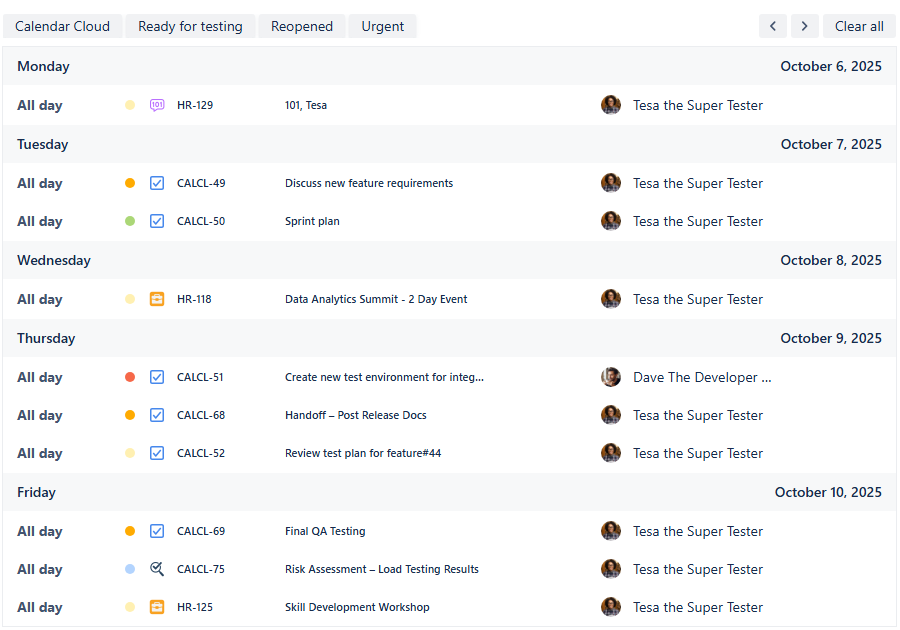
Click on one of the quick filter buttons to activate it. The button will go dark, indicating that the filter is active. Click it again to toggle it off. Activating multiple filters at the same time will activate an AND condition between these filters—only the items which adhere to both of the filters will be shown.
Connecting External Calendars
Integrate your Google or Outlook calendars for a complete view of your schedule. You can connect your corporate calendar or another personal calendar within our Calendar for Jira app to see how busy your day is all in one place.
First, obtain the iCal link (.ics URL) for your external calendar. You can find detailed instructions on how to obtain an ICS link here.
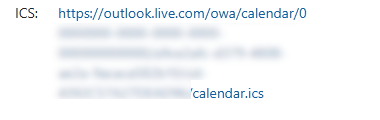
Personal calendar - Outlook calendar link
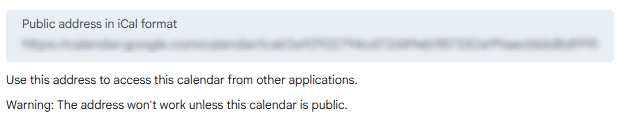
Personal calendar - Google calendar link
In your Calendar for Jira app, go to calendar settings and select the External calendars tab:
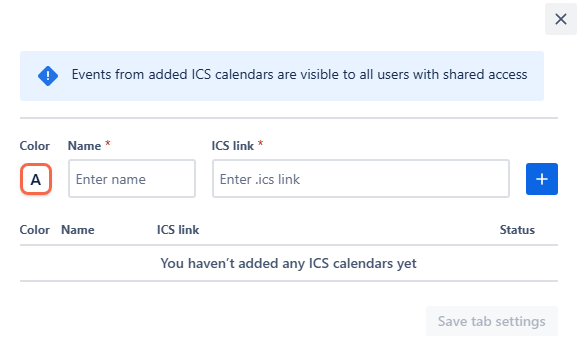
Personal calendar - Adding external calendars
Choose a color for your external calendar, give it a name, and paste the iCal link into the ICS link field. Click the add + button.
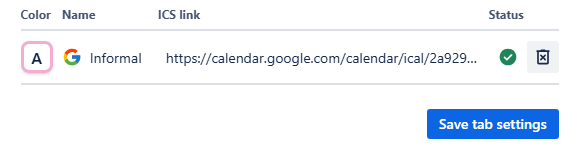
Personal calendar - External calendar added
Click Save tab settings. The events from your external calendar will appear in the sidebar under External calendars:
Personal calendar - External events added to the grid
Creating Non-Jira events
As the primary, and potentially sole, user of the Personal calendar, you'll find our Custom or Non-Jira Events (NJE) feature particularly useful. It allows you to plan your working hours, designate focused time for your own responsibilities, or even serve as a great personal reminder tool that doesn't require creating any work items. Plus, it can help you prioritize your wellbeing by pre-planning breaks!
To get started, head over to the Planning menu in the right-hand sidebar.
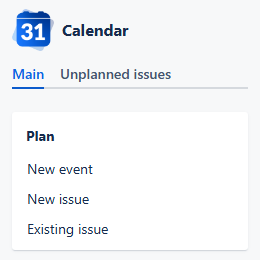
Personal calendar - Planning menu
In there, click New event—it will prompt the event creation window to open:
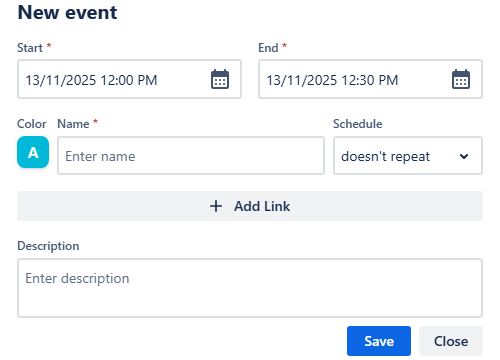
Personal calendar - New event window
Select the Start and End dates and time slots in their respective fields, pick a Color for your focus block. Enter a Name for the event, for example, Deep focus.
Choose if you want your focus block to not repeat, repeat weekly or daily. Upon using the reoccurrence option, another field will appear—Ends on. Mark when you’d like the reoccurrence to stop.
If you wish to add a URL to your focus block—it could be the link to the issue you’re going to work on—click + Add link to include it into your NJE. Provide details in the Description field:
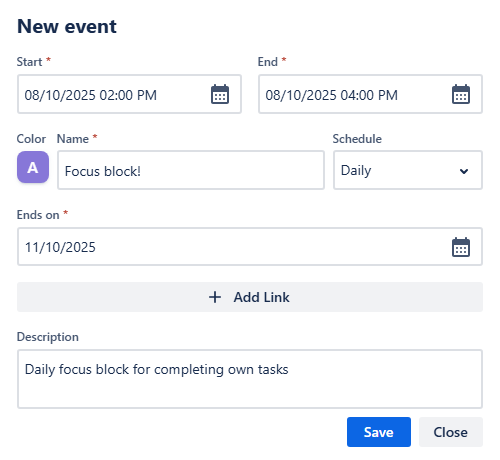
Personal calendar - Creating new event
Once you added all the info needed, click Save. Your focus block then should appear right in your calendar:
Personal calendar - Custom events added
Adding reminders
As integration feature of our Calendar for Jira app we allow the reminders from our Reminder for Jira to be displayed in your calendars. If you so happen to use two of our apps, here’s how to make them work together:
Head over to the calendar settings and then go to Integration tab:
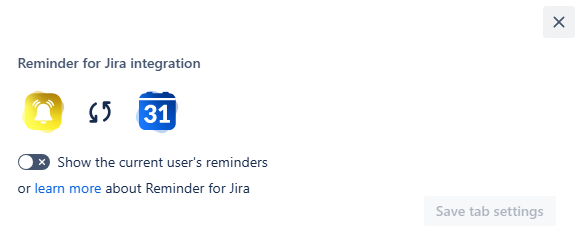
Personal calendar - Reminder integration
In there, switch the toggle on Show the current user’s reminders. Once you do that, it will change the color to green:

Personal calendar - Reminders toggled on
Click the Save tab settings. Your reminders should appear on your calendar list alongside your issues:
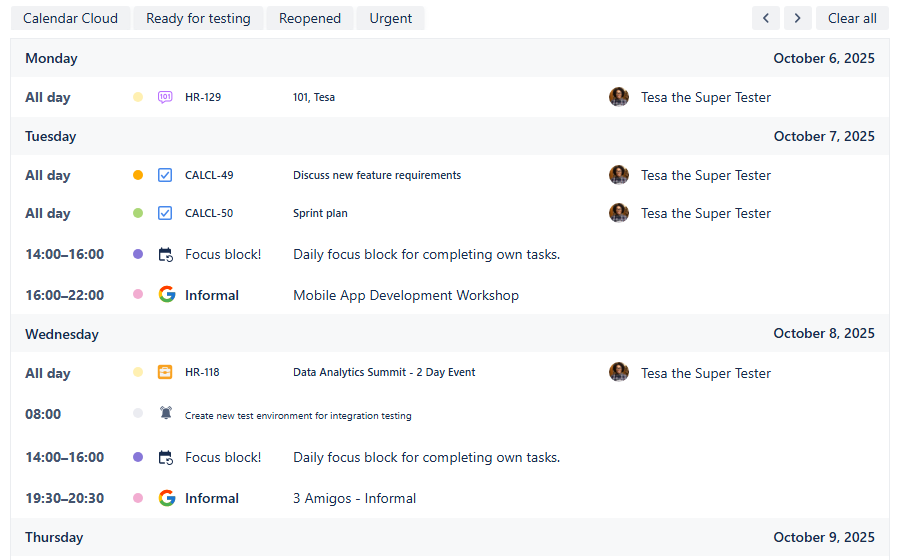
Personal calendars - Reminders added
Sharing your calendar
After customizing your calendar and ensuring everything works the way you’d like it to, you have an option to share it with your team to further enhance the collaboration process. To do so, follow these steps:
On the calendar interface, locate the Share button. It's positioned to the right of the Today link between the Search and Instant filters buttons.

Personal calendar - Locating the share button
Click this button—it will prompt a share window to appear.
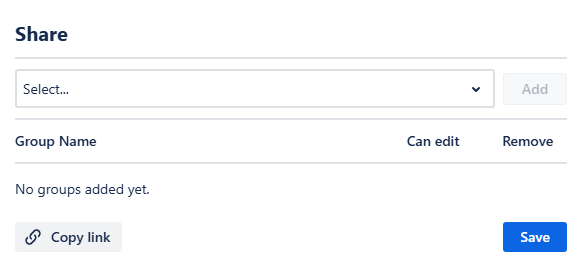
Personal calendar - Share window
In this window, you can select the user group that defines your team. Click Add, then choose if the people in your team should have the permission to make changes in your calendar by checking the box next to the user group’s name, if needed. Since this is your personal calendar, you are more than justified to leave permissions as View only.
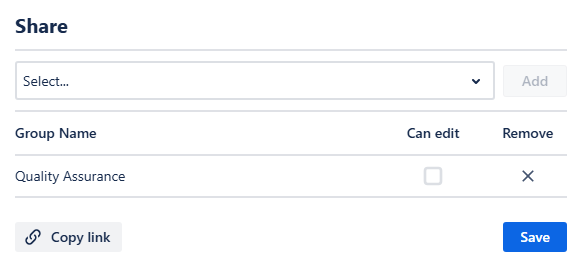
Personal calendar - Adding your team
Finally, click Save. Your team will be able to find your calendar in the Shared with me section of the Calendars menu. Alternatively, you can share a link to your calendar’s page by clicking Copy link in the share window and sending it manually.
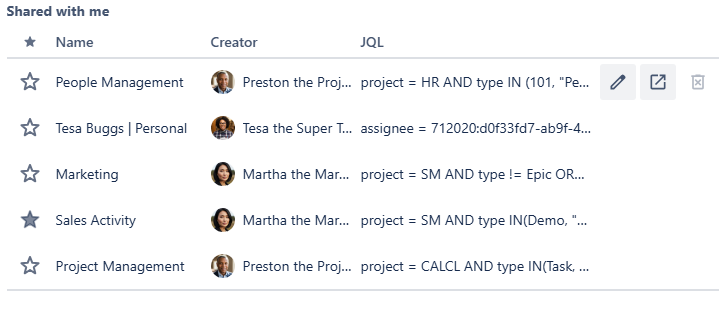
Personal calendar - Shared with me calendars