Imagine your company occupies several floors in the building, each with its own conference rooms. Let’s assume, for the sake of this example, that you store values in Select list (cascading) custom field.
With field set up you still need to be able to allow users to book theese conference rooms and avoid double bookings. Let’s see how our app can help with that.
1. Install the App
Begin by installing the app. Once installed, you can proceed with the initial setup.
After installation, the Booking for Jira section will appear in the Administration → Manage Apps menu, Teamlead section.
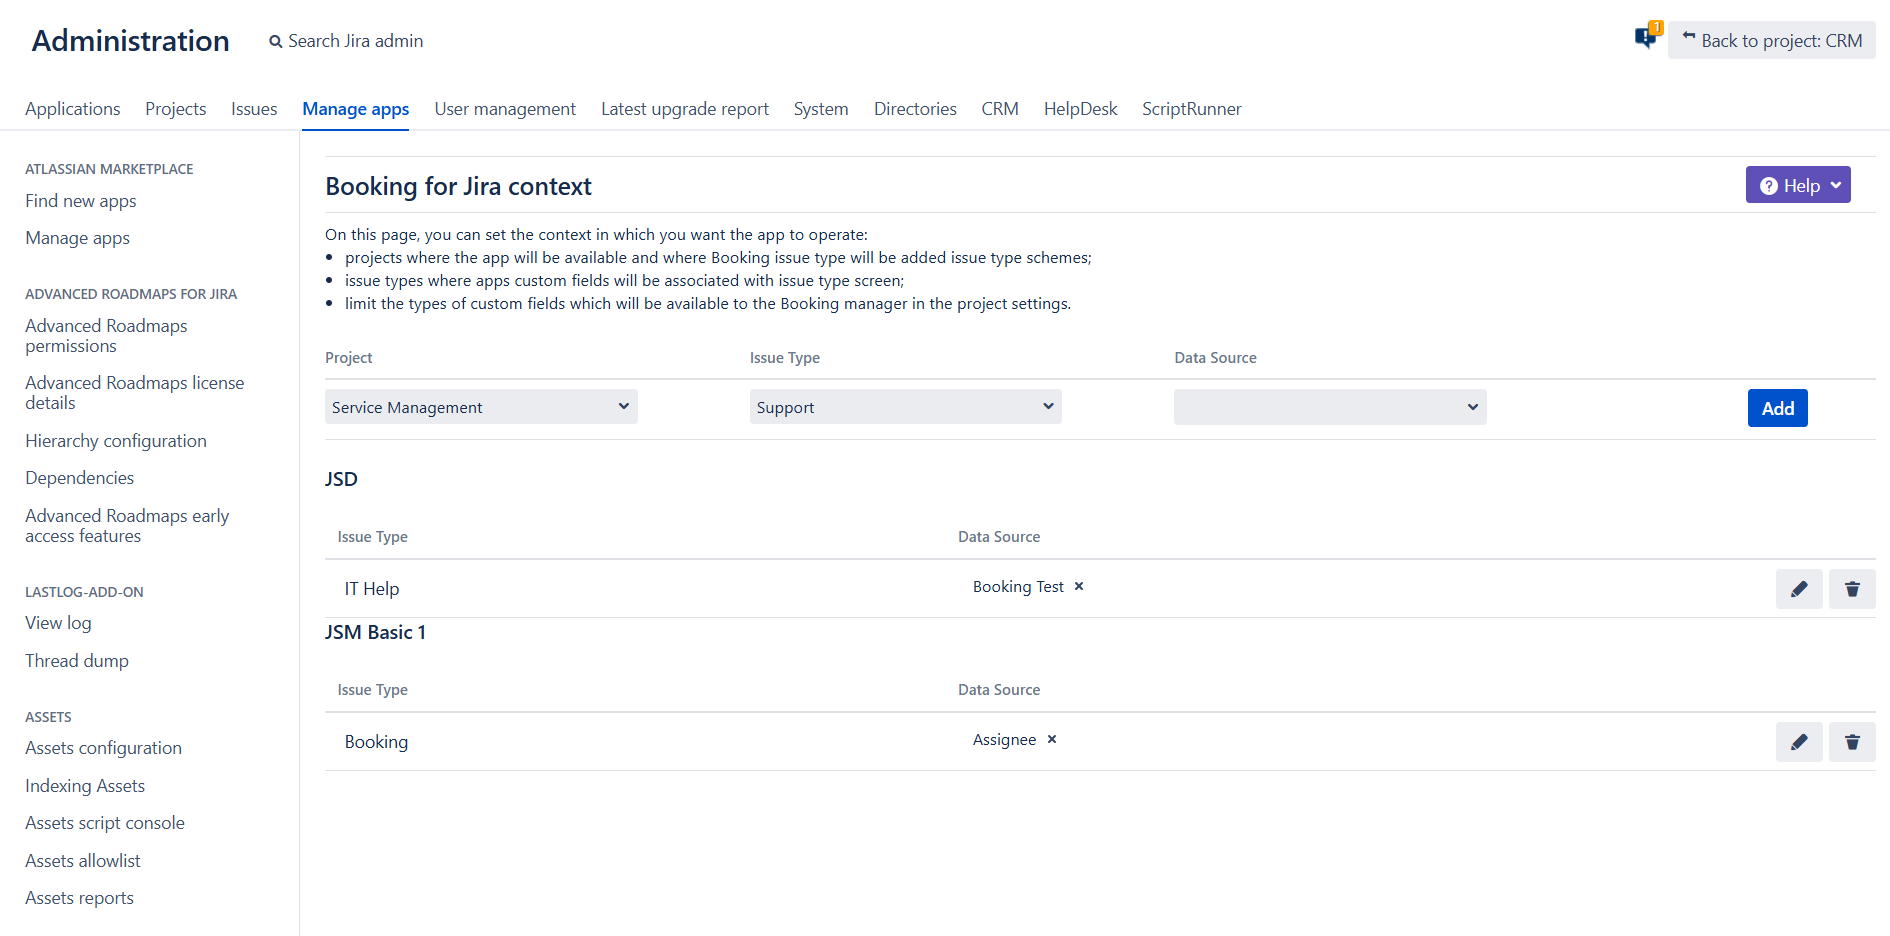
2. Initial Setup
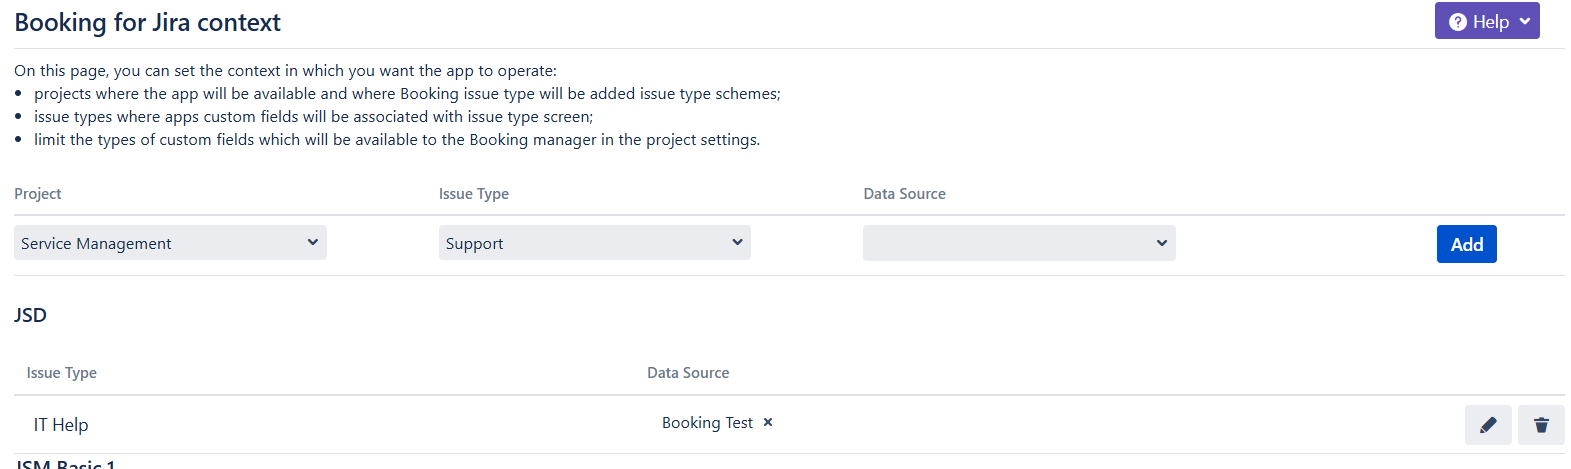
Step 1: Select the JSM Project
Choose Jira Service Management (JSM) projects where the booking portal will be used. The app will become available in these projects.
Step 2: Configure Initial Permissions
Set up initial permissions within the project. By default, only members of the group jira-administrators and users with the role Administrators can configure settings, but app’s project configuration can be delegated to colleagues.
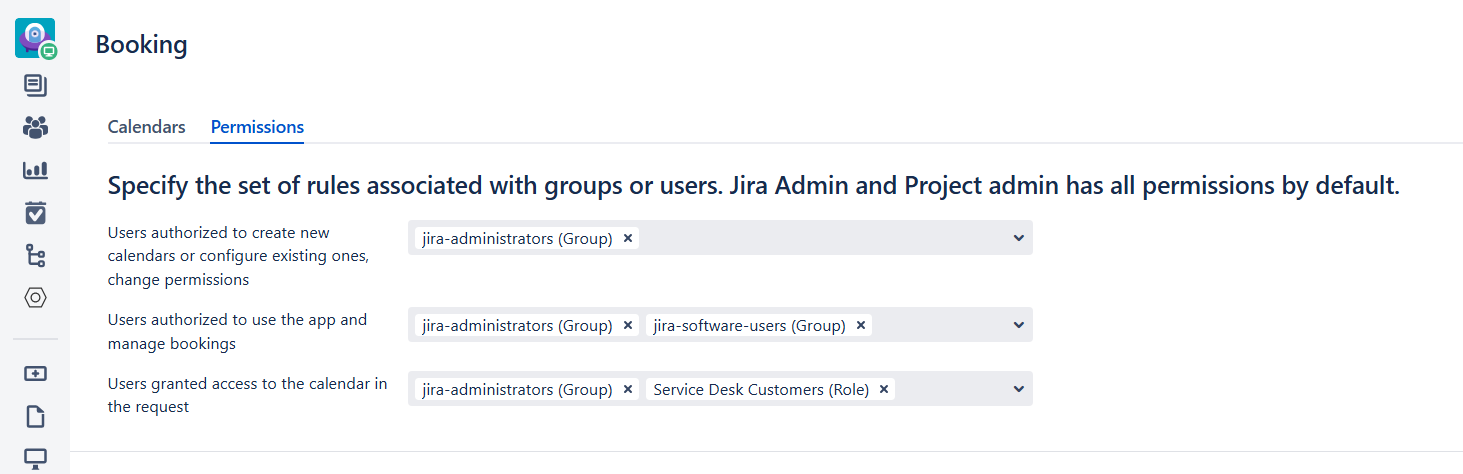
Overview of Roles:
-
Jira Administrator: Users with global permissions, either as Jira Administrators (most admin functions) or Jira System Administrators (full admin access). They manage global settings and can perform all actions of other roles.
-
Booking Manager: Standard Jira users who can create and edit calendars and manage app’s project permissions.
-
Agent: Standard Jira users authorized to use the app and handle booking requests.
-
Customer: JSM portal customers who can access the calendar in a request, view booked dates, and select times/objects.
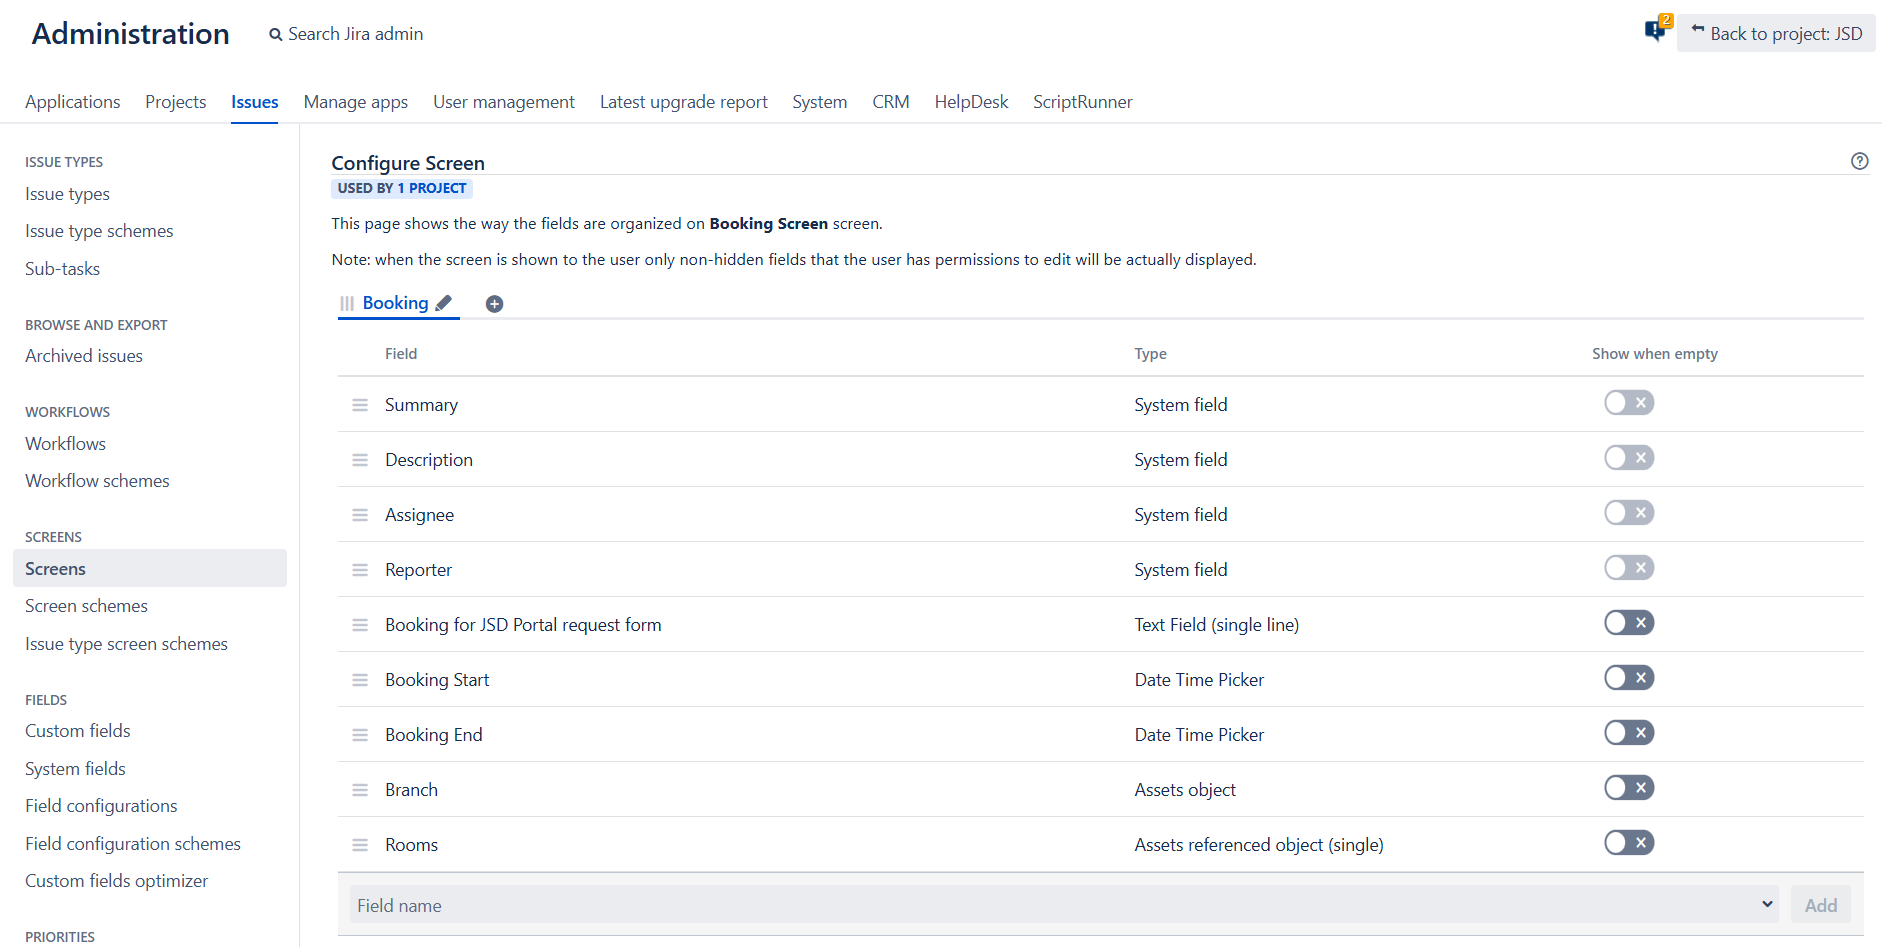
3. Add Relevant Fields to the target Issue Type
To ensure the app and Jira function correctly, you'll need to add custom fields that store target values to your issue screen. Keep in mind that we don’t need this custom field on the Request creation screen to prevent users from manually changing the selected object in the calendar.
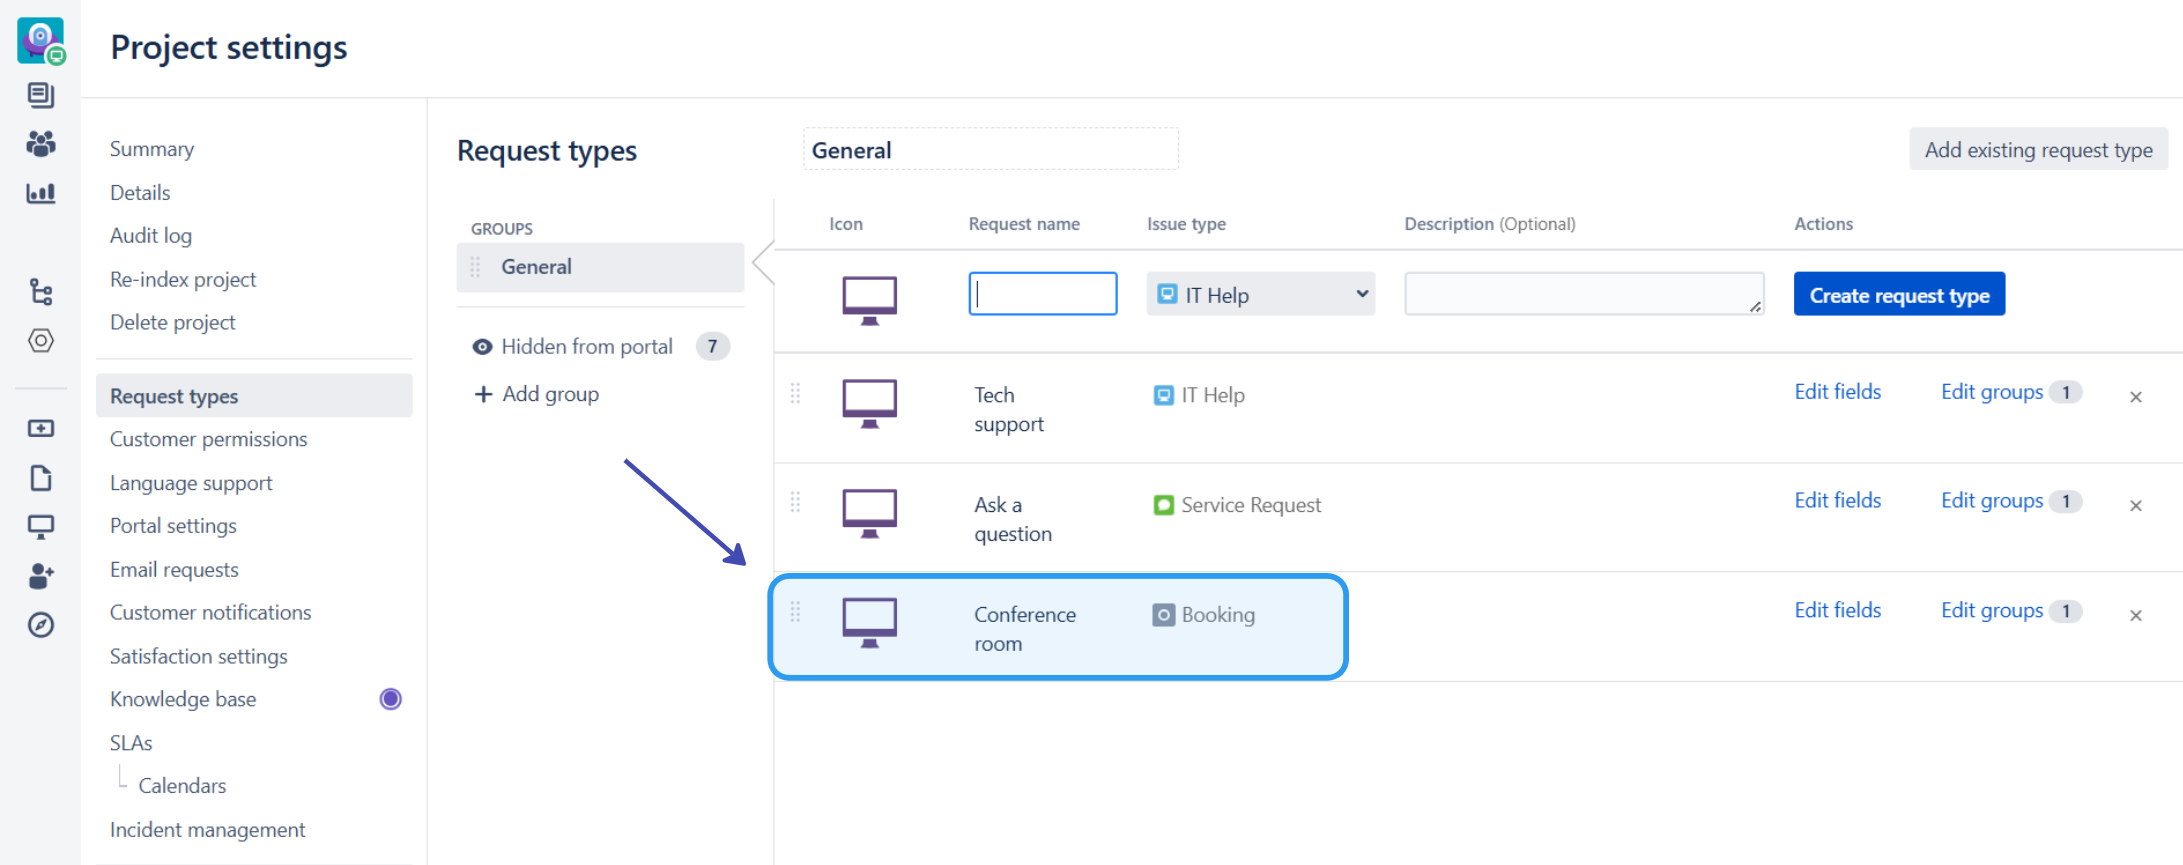
4. Create a new request type (if one doesn’t already exist)
For detailed instructions on setting up request types, refer to Atlassian documentation. Ensure the following:
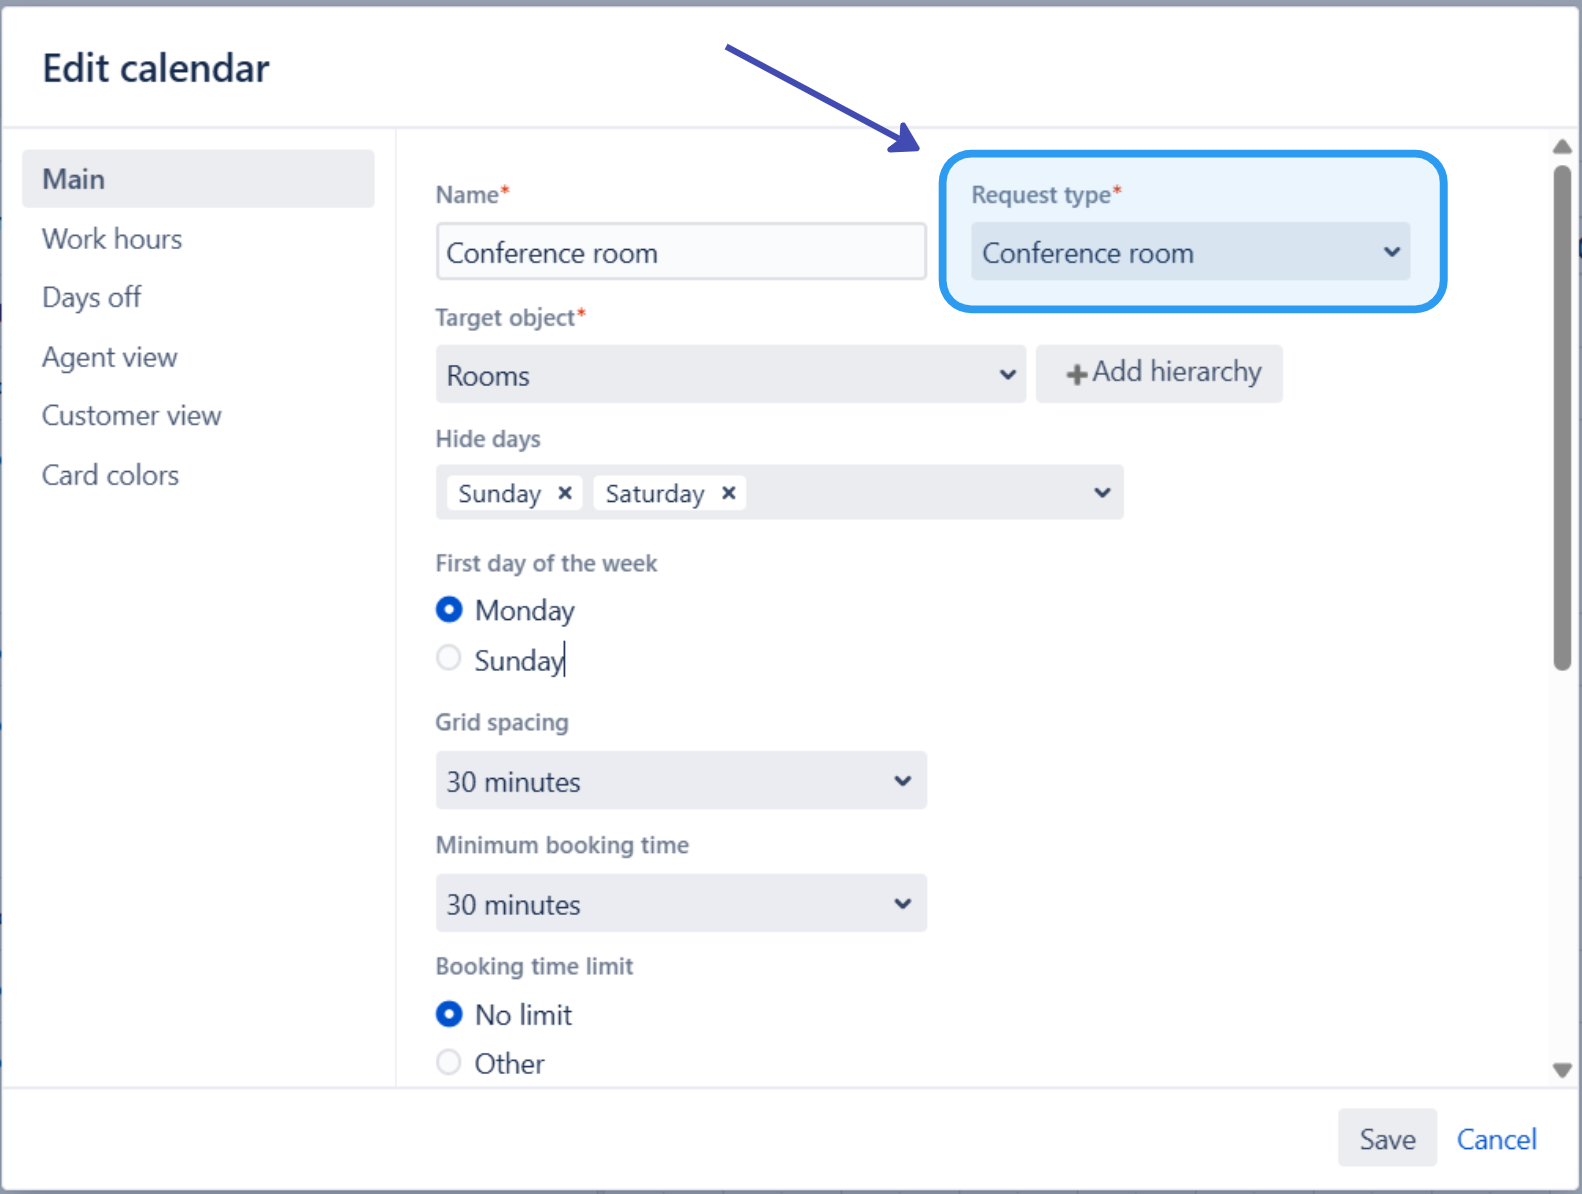
5. Create a Calendar
For more detailed information, you can refer to the documentation. Here, we'll focus on the key aspects and main settings. To configure the calendar, follow these steps:
-
Choose Request Type.
Fields such as Booking Start, Booking End, and Booking Calendar will be automatically added to request screen after calendar creation. -
Check if necessary fields are added: Ensure the fields Booking Calendar, Booking Start, Bookings End are included in the request type.
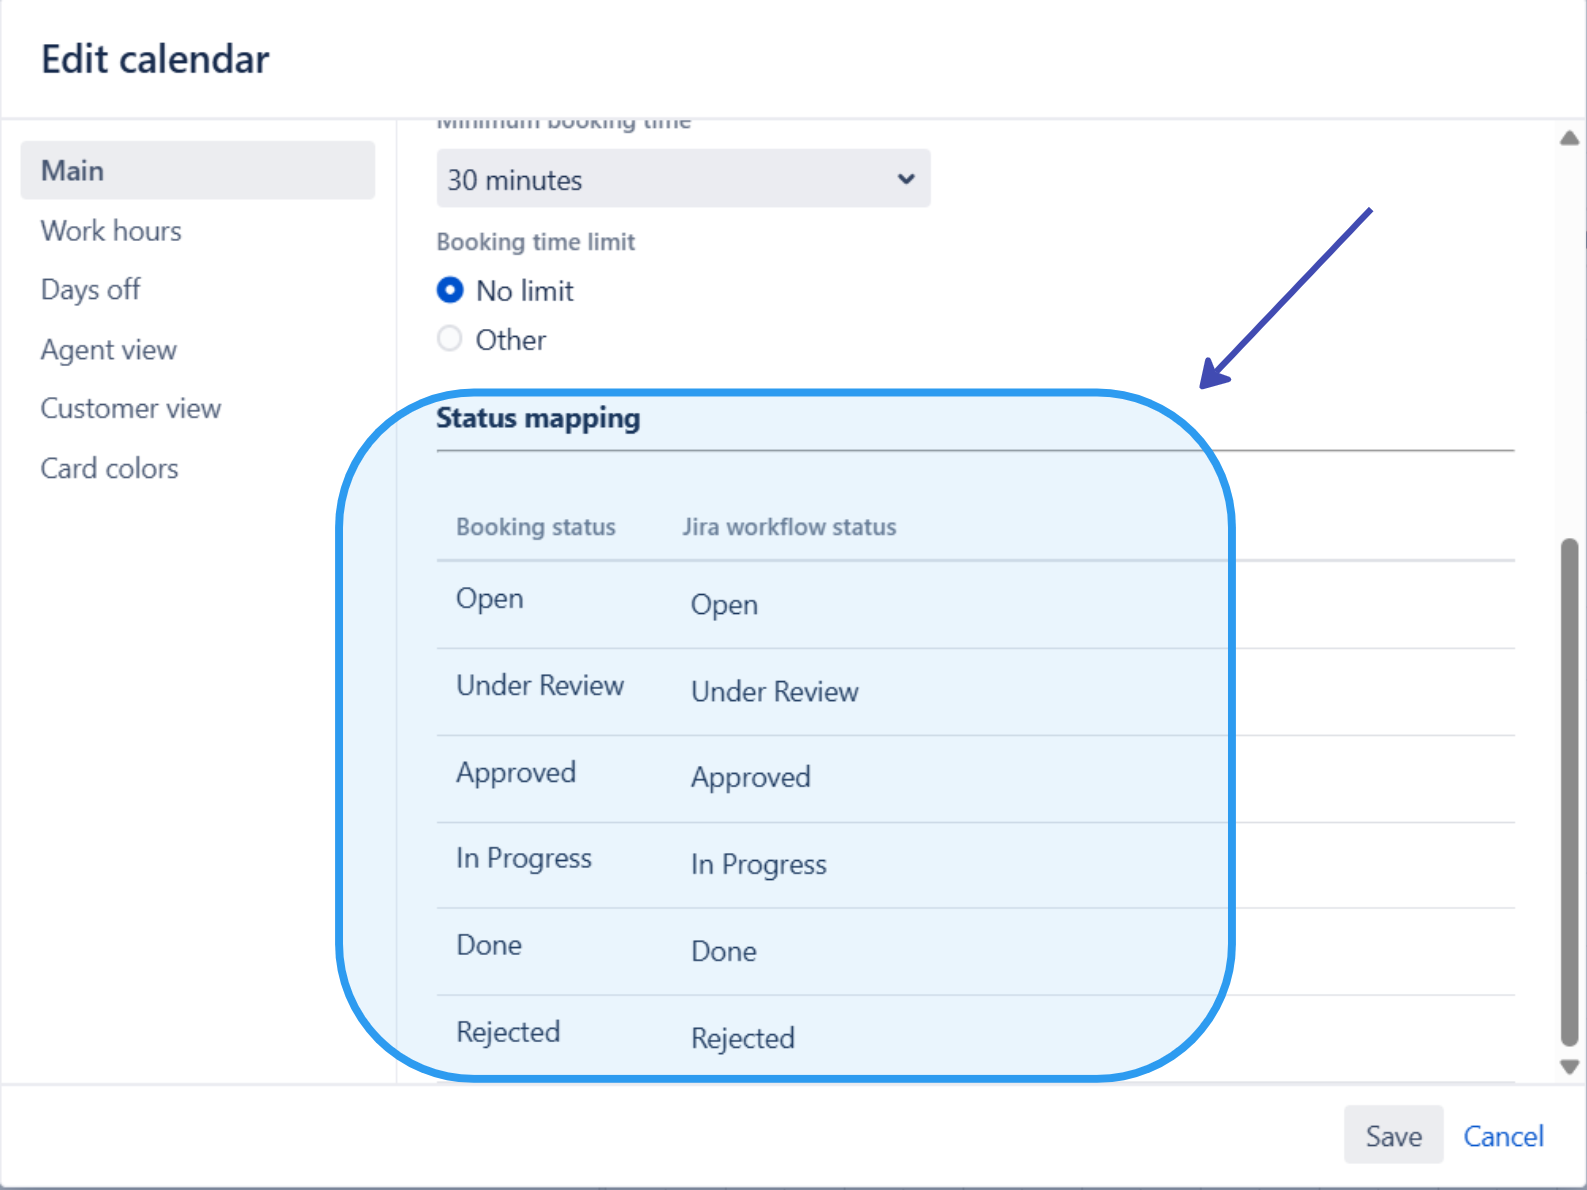
6. Map statuses of the issue type.
Map statuses that you have in your workflow to the appropriate status categories in the app. More on that here.
6. When configuration is complete you can check the result:
