After installing the app, follow these steps to ensure it functions correctly:
-
Configure admin’s settings.
-
Set up initial permissions in the project.
-
Add relevant fields to the chosen request type.
Admin’s settings
Once the app is installed, you'll find the "Booking for Jira" section under Administration → Manage Apps, in the Teamlead section.
Here, you'll have Context settings.
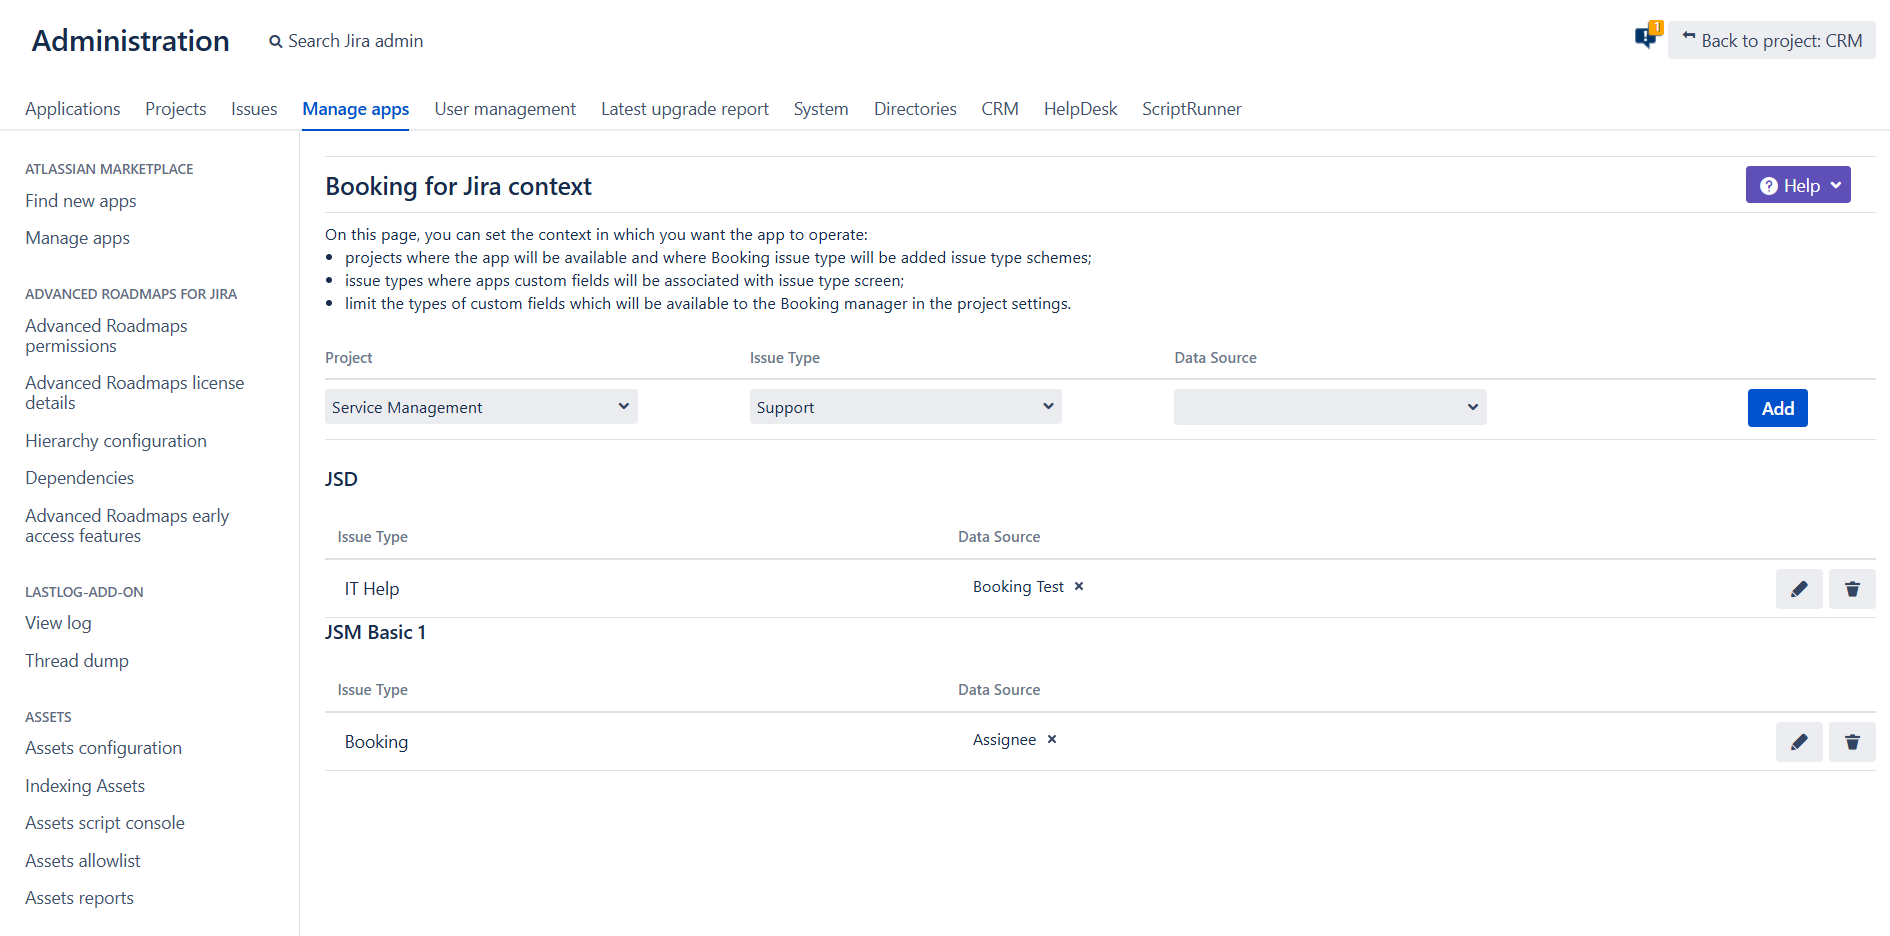
As an administrator, you have the ability to configure the context, which determines where and how the app will be accessible:
In chosen projects:
-
The app will be enabled and accessible;
-
If you select the Booking issue type, it will be automatically added to your chosen issue type schemes.
-
Whenever the Booking issue type with Booking Test custom field are added to the context, the Booking Test Request type is also created (as hidden from the customer portal).
-
All of the app’s custom fields will be linked to the screens for whichever issue types you select.
-
When configuring the calendar, the Booking Manager will see only the custom fields selected in the Data Source section.
Chosen issue type context determines which issue types will be used in the app and following custom fields are automatically added to the screen scheme of the chosen issue type:
-
Booking Start
-
Booking End
-
Booking Calendar (allows your users to see booking calendar on customer portal)
Although the issue types with the relevant fields will be available in the selected projects, you still need to set up the request types to suit your needs.
Data Source
We understand that Jira instances often contain numerous custom fields. To streamline the experience, we’ve added the option to narrow down which type of custom fields the Booking Manager can access as data sources within project configuration.
Simple example:
In a booking app, you can display resources on a calendar timeline view. The app offers support for various custom fields, such as Single List Cascading, Single List (single choice), User Picker (single user), Group Picker. For instance, if you use the Single List Cascading field to store objects that customers need to book, your colleagues configuring the calendar will only be able to select among fields (chosen in the context). This simplifies the configuration process by narrowing down the options to relevant fields.
Initial permissions configuration
Once the project's context is configured, users in the jira-administrators group and users with the role Administrators will have the ability to manage permissions at the project level by adding jira groups or Jira roles as needed, ensuring that the right users have appropriate access to manage and interact with the app.
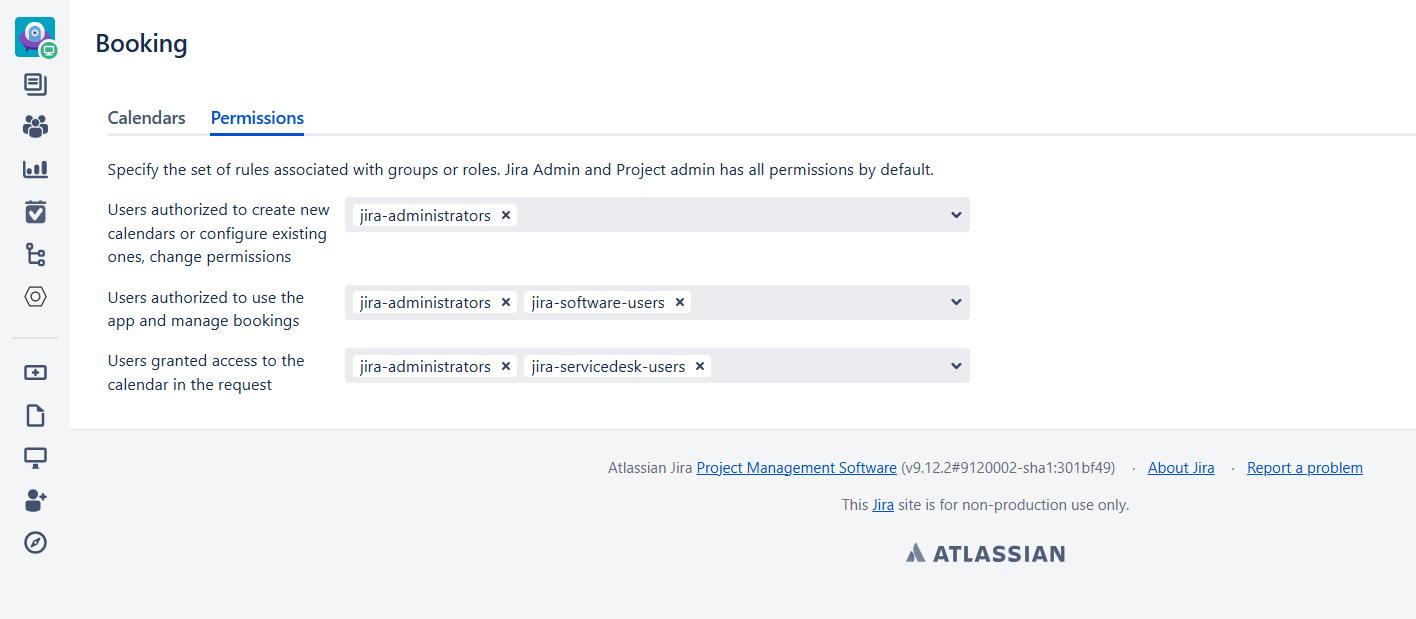
There are three levels of permissions in the app:
-
Users authorized to create new calendars or configure existing ones, change permissions
(Booking Manager): This role is designated for users who handle the app’s configuration on a project level. Booking Managers have the authority to create new calendars, modify existing ones, and adjust permissions as needed. They can also perform actions that are reserved for Agents and Customers, ensuring that the app is set up and functioning according to the project’s requirements. -
Users authorized to use the app and manage bookings (Agent): Users assigned the Agent role are responsible for handling bookings made by customers. Agents have access to the app’s calendar and are tasked with managing and overseeing all booking-related activities. They play a crucial role in ensuring that bookings are efficiently handled and that any issues are resolved promptly.
-
Users granted access to the calendar in the request (Customer): Customers are users who are registered on the JSM portal. They are granted access to the calendar through their requests, allowing them to view and interact with the booking schedule. This role is focused on end-users who engage with the app to make or view bookings.
After appointing a Jira group or role as the Booking Manager, the selected users will be able to configure permissions further.
Members of the jira-administrators group and users with the role Administrators are automatically granted these permissions by default and cannot be excluded.
Issue Type Configuration
The "Booking" issue type includes only the essential fields, which can be further customized.
If you add a project to the context, the necessary custom fields (Booking Start, Booking End, and Booking Calendar) will automatically be added to the issue screen.
However, there's one more step required:
In the app, resources are displayed on a calendar timeline and support additional custom fields such as Single List Cascading, Single List, User Picker (restricted to users with roles in the current project), Group Picker.
To guarantee correct operation of both the app and Jira, any field that holds the objects to be booked must be present on the issue’s view screen—but kept hidden on the request‑creation screen to prevent users from manually changing the selected object in the calendar. To add fields to the request type, they must be among the fields available in the linked issue type. For detailed instructions on how to Customize the fields on a request type, refer to the Atlassian documentation.
Once the initial steps are completed, the users you’ve granted access as Booking Managers can proceed with further configurations.