.png)
Vacations & Business Trips (HR Calendar)
Vacations & Business Trips Calendar
Use case description: This calendar is designed to provide a clear overview of employee availability across the organization. HR can track scheduled vacations and business trips using dedicated issue types, while team leads and managers can check availability before scheduling important meetings or deliverables. It improves transparency and streamlines the time-off request and approval process.
Primary Actor: HR Manager or HR Assistant.
Calendar Shared With: Team leads, project managers, department heads, all staff.
To prepare the demonstration of this use case of our Calendar for Jira app, we created two separate issue types called Vacation and Business Trip and added workflows for both of them. We will share the setup steps and configuration. Feel free to use it, if you’d like!
Create the respective issue (work) types.

Work types - Vacation & Business Trip
Create the workflows for the issue types.
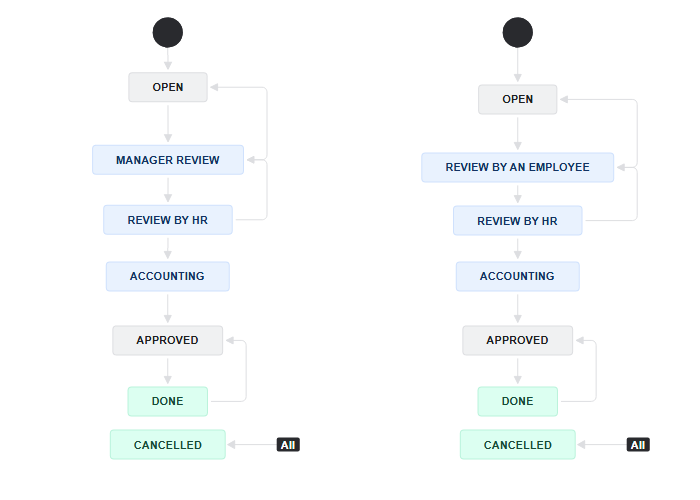
Workflows - Vacation & Business Trip
The process for vacation requests is quite straightforward. An employee initiates the request by creating an issue (status Open, category To Do). This issue then moves through an approval chain, typically starting with their manager and then proceeding to HR (status Manager Review to status Review by HR, category In Progress). In cases of paid vacation where an advance payment is required, an accountant might also be involved in the approval process (status Accounting, category In Progress).
Business trip requests operate similarly, but with a slight twist. Instead of the employee initiating the request, it's the manager who proposes the business trip to the employee (status Open, category To Do). The employee must then agree to the trip before the issue is forwarded to HR for their approval (status Review by an employee to status Review by HR, category In Progress). Like in the Vacation’s workflow, an accountant could be invited into the approval process, if necessary.
Once a vacation or a business trip request gets all the necessary approvals, the works can then be marked as approved (status Approved, category To Do—because it is yet to happen). After the planned vacation or the business trip is finished, the work is marked as complete (status Done, category Done).
A key feature of both the vacation and business trip workflows is their flexibility. Users can send an issue back at nearly any step in the process, and cancel it altogether at any moment. This allows for easy change requests or corrections if any details need to be adjusted or if the request is no longer valid.
Add custom fields.

Department - Custom field

Primary work location - Custom field
To optimize your Vacations & Business Trip calendar, we recommend utilizing custom fields. These fields are invaluable for sorting and filtering the issues by the organizational details. For this case, we opted to use department and primary work location fields.
The department field allows for quick identification of requests by department, making departmental-level planning and resource allocation easier. Primary work location field aids in preventing scheduling conflicts—it helps you identify the timetable overlaps between the employees who are not supposed to be absent at the same time. This way critical operations remain uninterrupted.
With this step our issue (work) setup is officially done.
Now, let’s learn how to use our Calendar app!
Calendar creation
Let’s begin by creating our Vacations & Business Trips calendar. Follow the link to our application through the Jira Apps menu.
From there, navigate to the Calendars menu in the sidebar and click Create button.
Vacations & Business Trips - Creating a calendar
We will name this calendar Vacations & Business Trips and use JQL to specify what it is based on.
Tip: if you aren’t very confident with JQL, we have a quick shortcut for generating JQL without having to write it manually.
You can then copy-paste into the calendar settings:
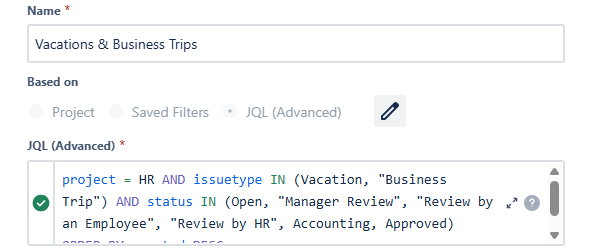
Vacations & Business Trips - Creating calendar
When configuring your calendar, you'll want to display only the most relevant work items for Vacations and Business Trips. There's no need to clutter your view with requests that are Cancelled or already Done. To achieve that, you can either list all the statuses you’re interested in, or exclude the Cancelled and Done works with the NOT IN operator:

Vacations & Business Trips - Creating calendar: alternative JQL
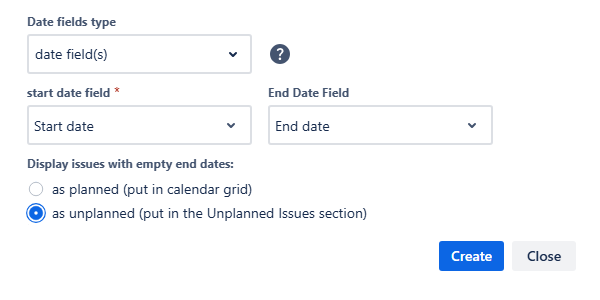
To accurately place work items on your calendar grid, you'll need to specify which date fields the calendar should use. In this case, since we operate in days rather than hours, date field(s) is the most intuitive option. Simply choose Start date and End date as the fields defining the calendar.
Note: Only the Start date field is strictly required.
Calendar creation - Main
For the layout settings we decided to go with the year default view for more transparency regarding the employees' leaves. The rest of the choices are shown down below:
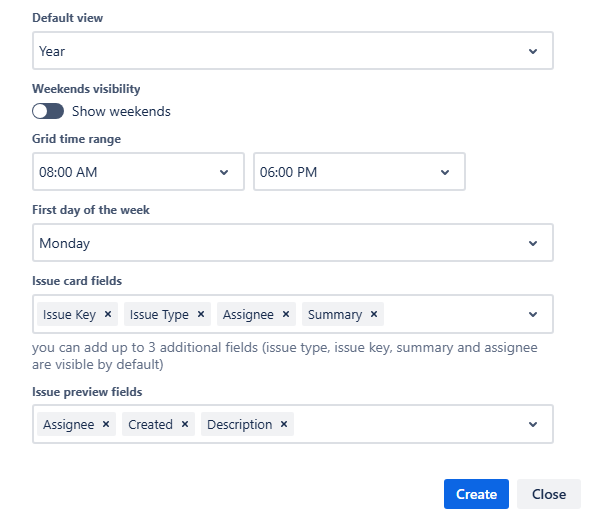
Calendar creation - Layout
Once you’re satisfied with your selection, hit Create button in the bottom right corner of your calendar creation window.
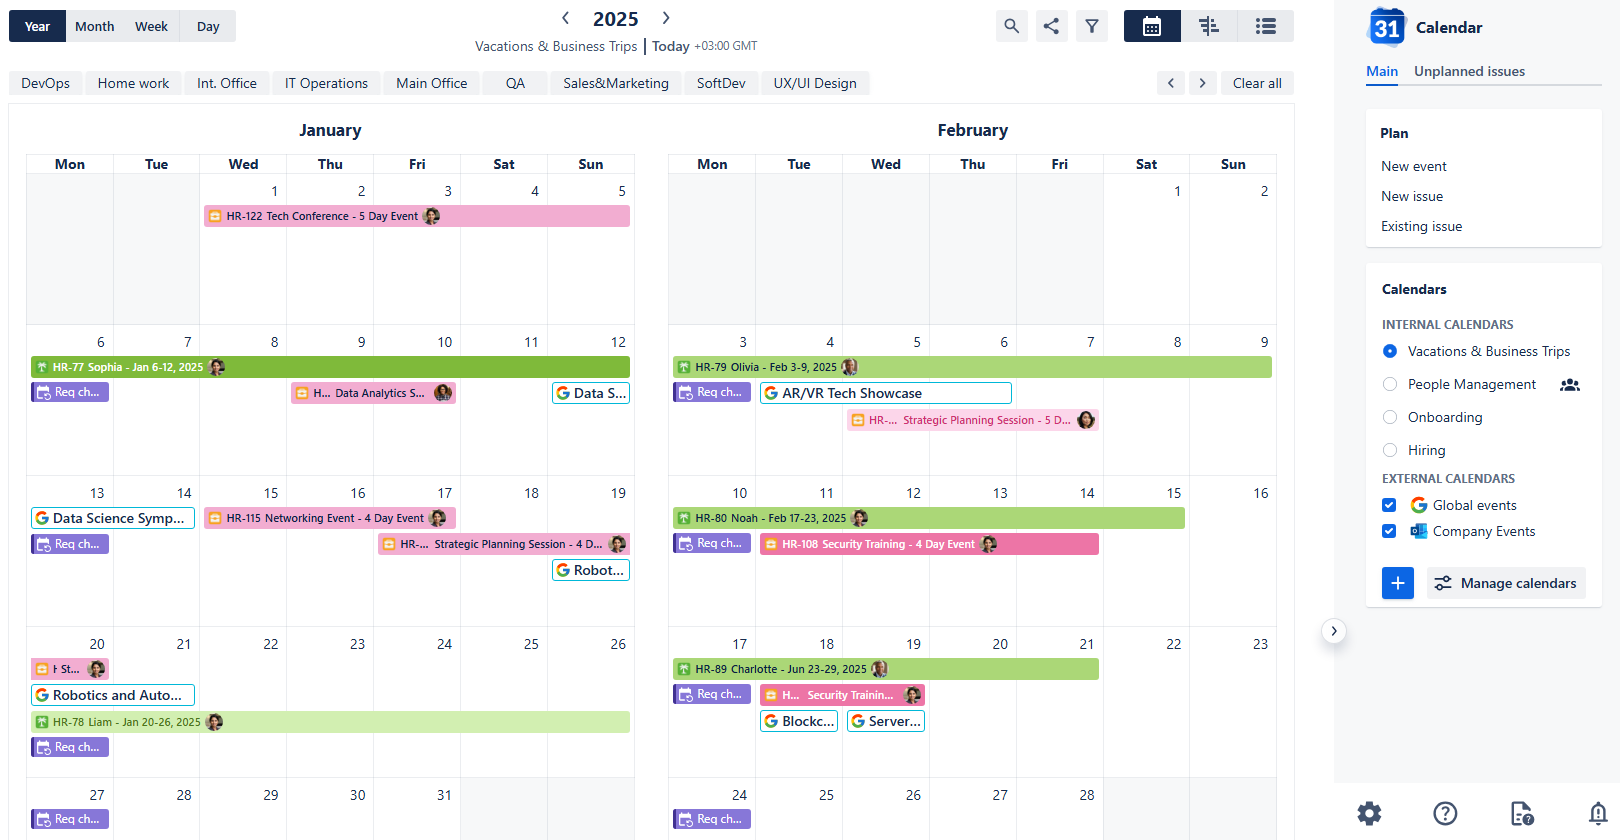
Upon creation our calendar will look like this:
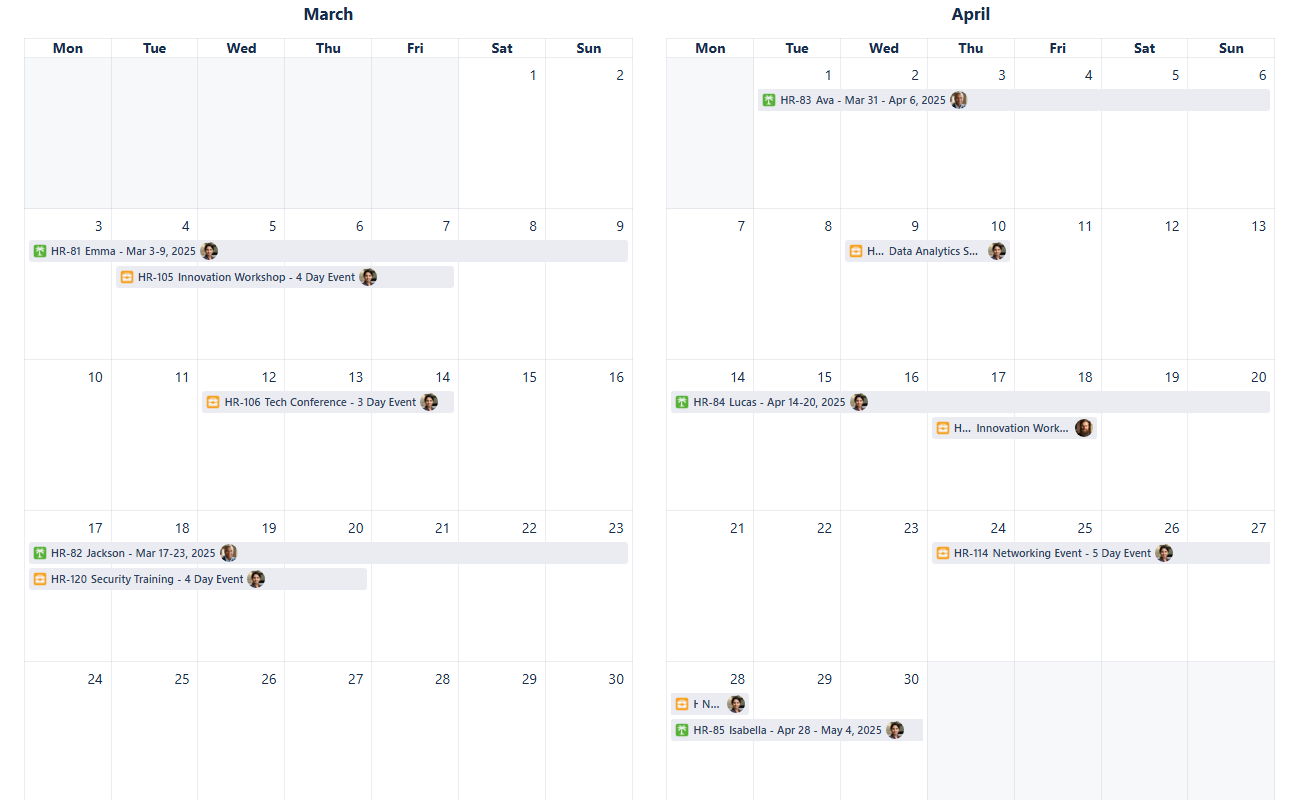
Vacations & Business Trips Calendar - First look
As you can see, without any distinction between the works it’s not so easy to read the calendar, even with our amazing issue icons. Thankfully, our Calendar for Jira app provides more than enough functionality to make the calendar navigation easier.
Let’s start off with adding some color!
Card colors for Vacations & Business Trips calendar
Navigate to the settings of our current calendar in the bottom of the sidebar:

In the settings, move to the Card colors tab.
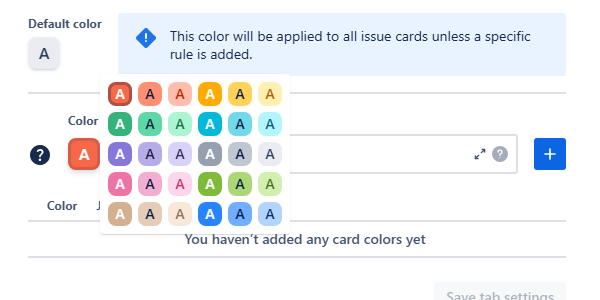
Calendar editing - Card colors
Here you can use JQL to associate specific colors with the works' properties you wish to highlight. Out app provides a generous amount of color schemes—for example, for the vacations let’s choose the green color scheme.
We can use the different shades of green to differentiate between the works' statuses:
For the just made vacation requests with the status Open let’s choose the palest shade of green:

JQL: issuetype = Vacation AND status = Open
Similarly, for the vacation requests which are being reviewed we can choose the middle option—the more saturated one. Since our workflow identifies all of the review statuses as In progress, we can use a status category instead:

JQL: issuetype = Vacation AND statusCategory = “In Progress”
Lastly, for the vacations that had been Approved we can use the brightest shade of green in our palette:

JQL: issuetype = Vacation AND status = Approved
For the Business Trip works we can choose pink shades:
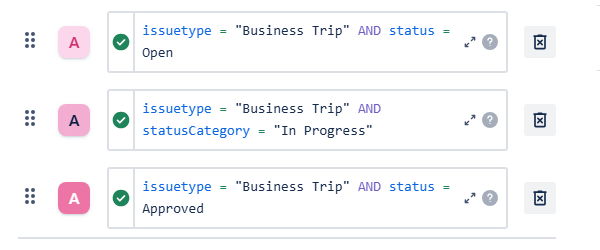
Calendar settings - Card colors: Business Trip works in pink ✨
After applying the settings our calendar will change its appearance:
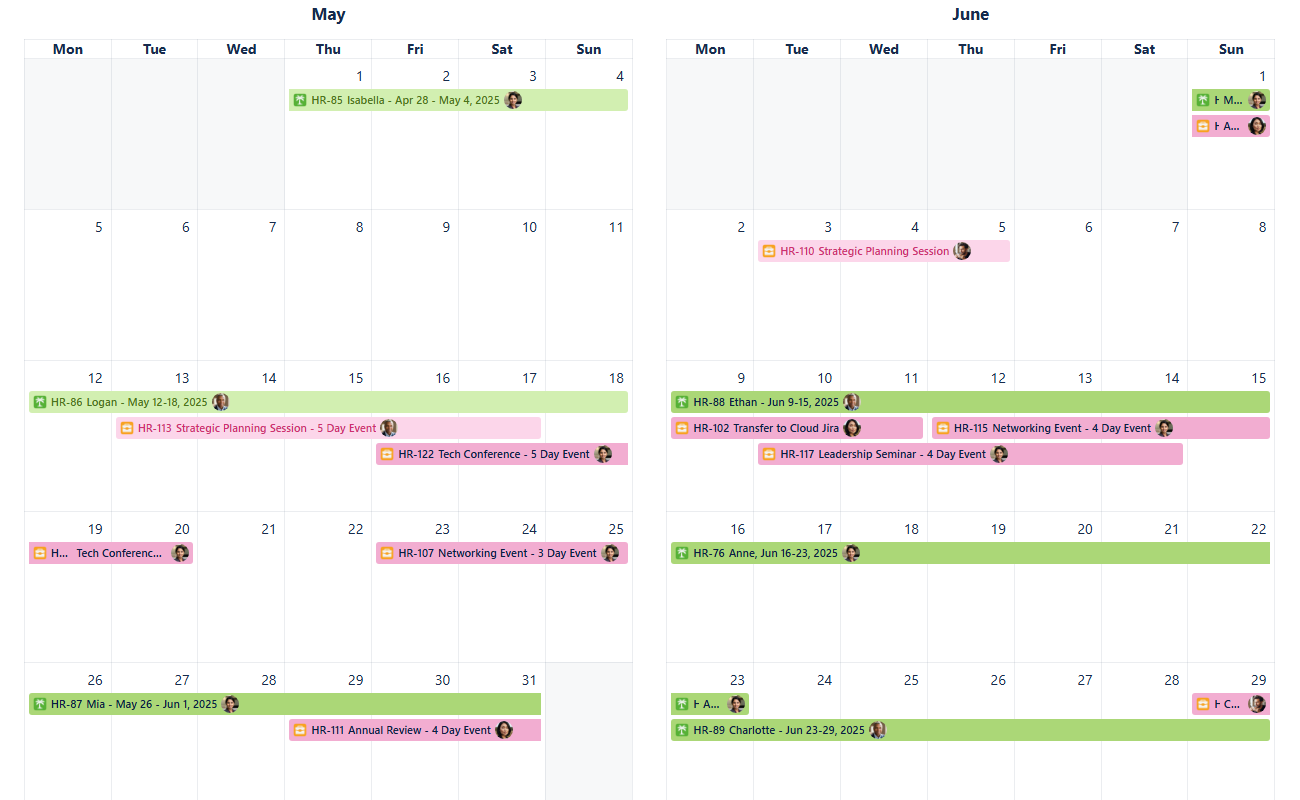
Vacations & Business Trips - Card color rules applied
To quickly preview the Card color settings (for example, if you are checking the calendar created by another person and wish to know what different colors mean) head over to the bottom of the sidebar and click the Legend button:
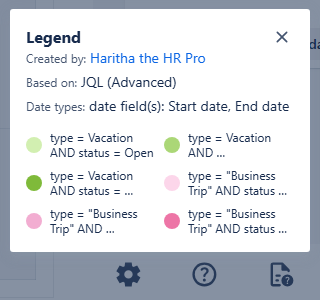
Vacations & Business Trips - Legend and card color rules preview
You can see the entire JQL associated with the specific color by hovering your mouse cursor over that color.
Now that our calendar is much easier to read, we can also utilize our Quick filters for accessing the information based on the custom fields we’ve created earlier.
Quick filters for Vacations & Business Trips calendar
Again, navigate to the calendar’s settings and then move to the Quick filters tab.
Let’s create quick filters for our departments and primary work locations.

Vacation & Business Trip - Quick filters added
JQL supports the use of earlier created custom fields and gives hints in their usage. It also brings up the possible options if your custom field is of a select type.
After adding a variety of quick filters and clicking Save tab settings, our Quick filters row located above the calendar grid will look like this:

Vacations & Business Trips - Quick filters
Clicking on one of the options will prompt the calendar to display the issues that satisfy the selected criteria.
Note: When you choose more than one quick filter, an AND operator is applied to them. This means that for an issue to be displayed, it has to meet the conditions of all selected filters.
This works well if you pick filters that define different aspects of your issues. For example, if you choose filters for both location and department, the displayed issues will satisfy both conditions. It will also work if your setup has non-mutually exclusive parameters, where, instead of a single select choice you have multiple choice or checkboxes used.
Example: Choose DevOps and Int. Office quick filters. The calendar then will show vacations and planned business trips only for people who are in the DevOps department and are located in the International Office.
However, if you pick filters that define the same parameter in a way that creates a conflict, no issues will be displayed. This often happens because an issue cannot fulfill mutually exclusive conditions at the same time.
Example: Choose DevOps and QA quick filters. You've selected two different departments, and in our setup, an issue cannot belong to both at once. Therefore, no issues will be displayed.
Example: Similarly, create quick filters based on JQL—issuetype = Vacation AND issuetype = "Business Trip"—no issues will be shown, as an issue cannot be both types simultaneously.
Keep in mind that with custom fields, how well quick filters combine depends on your specific setup. You won't be able to combine issues based on properties from the same field that can't logically co-exist on a single work item.
Connecting external calendars
Effective planning often requires looking beyond your internal Jira data. Our Calendar for Jira app allows you to seamlessly integrate external calendars, providing a holistic view for future planning. By connecting an external calendar displaying upcoming industry events, you can cross-reference it with your Vacations & Business Trips calendar to later decide who’s going to attend said events.
To integrate a calendar from services like Outlook or Google Calendar, you'll need its link in the iCal format (the URL typically ends with .ics).
In this demonstration, we'll walk through adding a calendar from Google Calendar:
Open Google Calendar and navigate to the Settings menu (usually found in the top-right corner of your screen).
Vacations & Business Trips - Adding external calendar
In the left-hand sidebar of the screen navigate to the settings of the calendar you wish to export in the Settings for my calendars section.
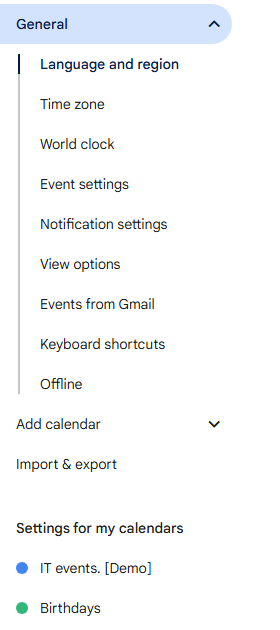
Google calendar - Settings
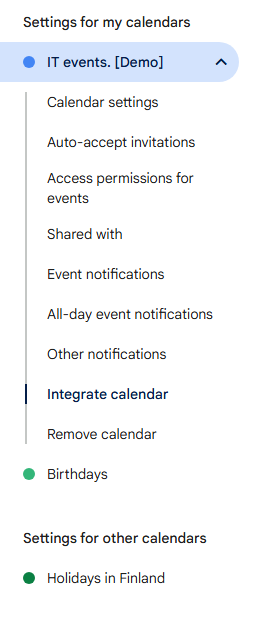
Google calendar settings - Settings for my calendars
From there, head to Integrate calendar section.
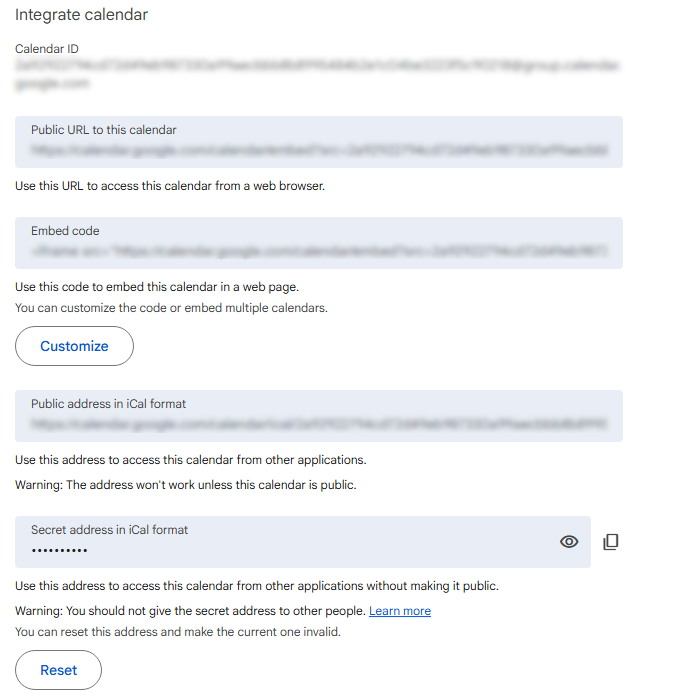
Google calendar settings - Settings for my calendars - Integration settings
In here you will find Public address in iCal format—the link you need to copy.
Note: The calendar must be public for this address to work in our Calendar for Jira App (and anywhere else). To make it public, head to Access permissions for events section of the calendar’s settings and allow public access.
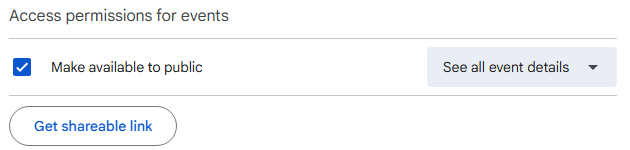
Google calendar settings - Access permissions for events
Once you have your link, head back to our Calendar App for Jira.
Navigate to your calendar settings in our app and then head over to External calendars tab.
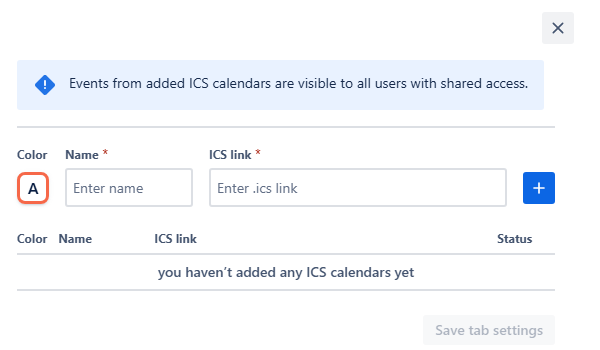
Vacation & Business Trip - External calendars
Similarly to Card colors and Quick filters, fill in the required fields. Choose the color for displaying this external calendar, then give your external calendar a name and paste the link you copied from the Google Calendar into the ICS link field. Click the add + button. Don’t forget to Save tab settings.
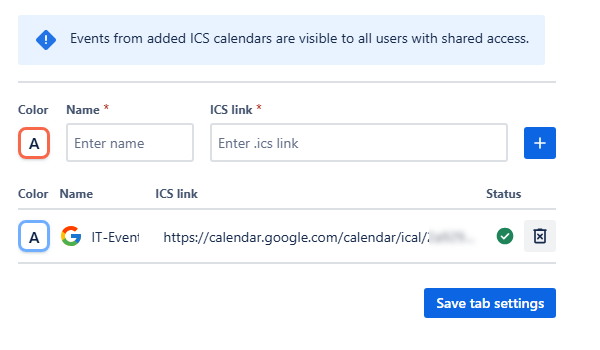
Vacations & Business Trips - Added external calendar
Your external calendar should appear in your sidebar in the Calendars section, below the External calendars sub-list.
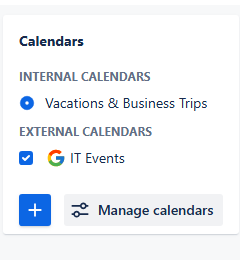
Vacations & Business Trips - External calendars menu
Note: This external calendar is attached to the calendar Vacations & Business Trips. Switching to another Internal calendar will hide the external calendars added to this one.
Creating Non-Jira events for Vacations & Business trips calendar
The Non-Jira Event (NJE) feature is an invaluable tool for quick, visual communication, which could act like sticky notes on the calendar. While the Vacations & Business Calendar is primarily focused on employee time off and travel, NJEs allow the HR team to inject vital, non-vacation context directly onto the schedule. This includes key administrative tasks, like marking the deadline for finding a temporary replacement for a departing employee or noting the final date for approving all outstanding leave requests. By utilizing the NJE's bright, distinguishing colors, these essential HR workflow items instantly stand out from the standard time-off entries, ensuring crucial deadlines are never missed.
To get started, click on any date where you would like to place the event.
Vacations & Business Trips - Picking a date
In the pop-up menu, select New Event.
Once you click New event, an Event creation window will appear:
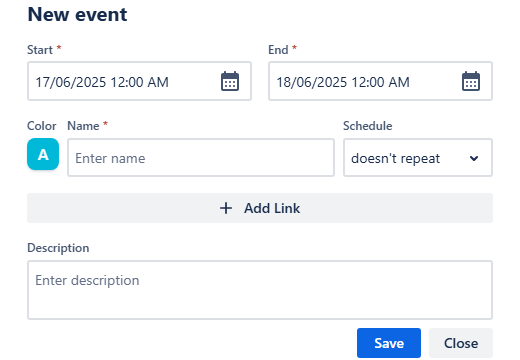
Vacations & Business Trips - Custom event creation window
Select the Start and End dates and time slots in their respective fields, pick a bright color for easy identification. Provide a Name for the event—it will be displayed on the event’s card on the calendar grid.
Choose the recurrence of the event—whether it happens once, weekly or even daily. Upon using the reoccurrence option, another field will appear—Ends on. Choose when the recurring event will happen for the last time.
Click + Add link to include any relevant URLs. Write a Description for further context in the description field.

Vacations & Business Trips - Custom events details provided
Once you are happy with the details provided and all the required fields are populated, click Save. The event will then appear on your calendar grid:
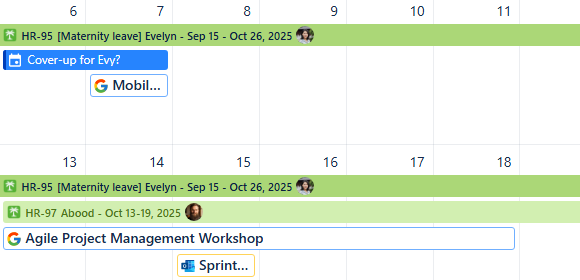
Vacations & Business Trips - Custom event added
The Non-Jira Event (NJE) feature is especially valuable for calendars viewed in Year Mode, as the integrated Reminder for Jira displays are not supported in this high-level view. This makes NJEs the only way to introduce high-priority, color-coded visual alerts directly onto the comprehensive year-at-a-glance schedule.
Sharing your calendar
Finally, once the configurations are complete, it is time to provide access to your calendar to your team.
To do so, locate the Share button at the top, between the Search and Instant Filters buttons:

Vacations & Business Trips - Sharing a calendar
Click it, and the sharing window will appear:
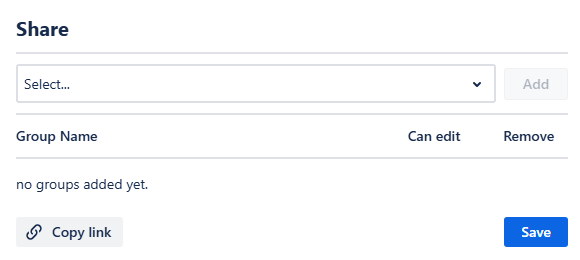
Vacations & Business Trips - Share window
In this window, you can select the user groups you’d like to share your calendar with. Choose the group from the drop-down menu (or begin typing the group’s name if the option isn’t there, and it will appear), then, once it’s selected, click Add. The group will be then added to the list below, indicating they will gain viewing access upon saving. Checking a box next to the group’s name will give the users editing permissions - they will be able to customize all settings except for Main and Layout tabs of your calendar.
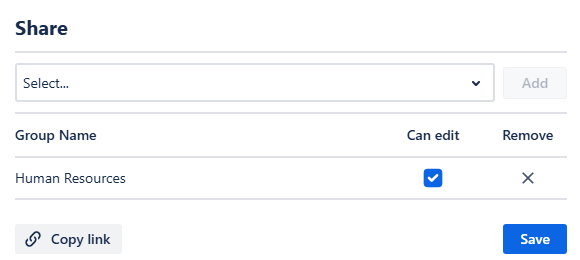
Vacation & Business Trip - Selected groups to share with
Once you are happy with sharing configuration, click Save. The sharing settings will then be immediately applied. The users of the selected group will be able to find your calendar in the Shared with me section of their calendar manager:
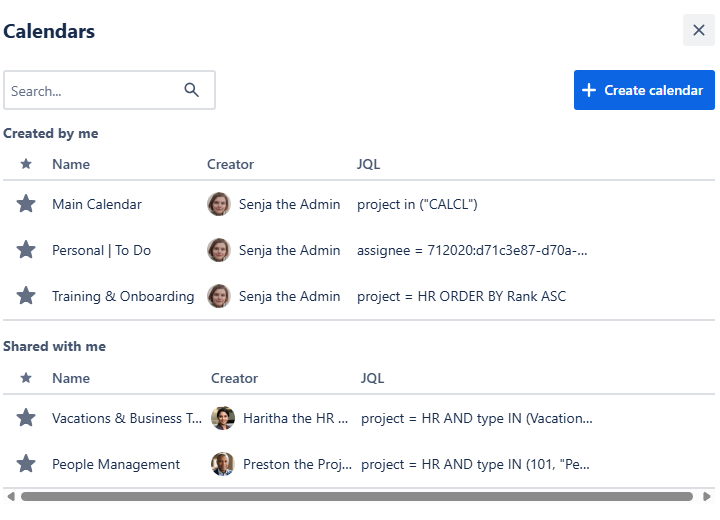
Vacations & Business Trips - Shared with me calendars