.png)
SLA 2.0
Overview
With HelpDesk, you can set goals for how quickly you manage customer issues. You might know them as Service Level Agreements, or SLAs. SLAs help you to control meeting the time requirements such as:
The first reaction in 1 hour
All incidents should be resolved in 5 working days
etc.
The HelpDesk solution is the two-level SLA control – not only for the whole process of resolving an issue but for the particular teams' actions within this process as well. SLA by Teams is almost the same as SLA but within one company. Basically, the purpose of SLA by Teams is to deliver SLA to a client.
This advanced level of control is optional.
SLA defines the responsibilities of a service provider.
SLA by Teams defines the responsibilities between TEAMS within the same organization. Required for meeting the overall SLA normative.
Example 1: blocking bug by SLA = 5h
30m to clarify and route the request (1 line of support)
1h to reproduce the bug (testers)
3h 30m to fix the bug (developers)
The main entity in the second-level concept is a TEAM. A team is a group of the issue resolving participants with the same responsibilities. It could be the lines of support, developers and so on. You can specify their particular goals in addition to the overall issue SLA. For example, all the first line of support is competent to do in this request can be done in 30 minutes. The remaining SLA time is only required for cases involving other teams.
It is possible to review the amount of time each team dedicated to the issue in the Activity Tab.

Field Appearance
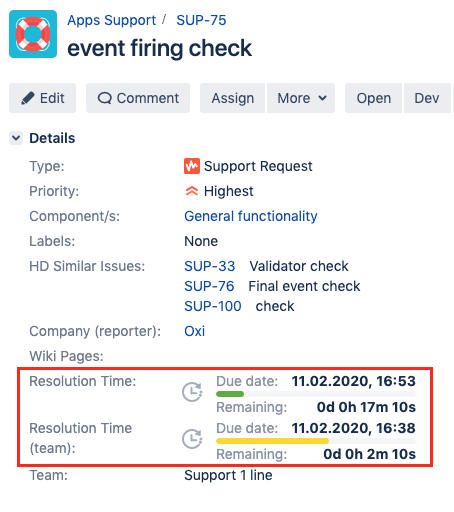
Both levels of the SLA fields have the same view in issues, navigator, gadgets.
Field Condition (Icon)
condition | not breached | breached |
|---|---|---|
not started or been reset |  | – |
in progress within the working schedule |  |  |
in progress out of the working schedule |  |  |
paused (intentionally) |  |  |
stopped |  |  |
Elapsed Time
As soon as the time countdown started, the elapsed time increases (excluding calendar and intentional pauses) up to the moment of SLA stop.
The progress bar demonstrates the elapsed time in relation to the SLA goal. The elapsed time may change color among with filling the bar according to the customizable color schemes.
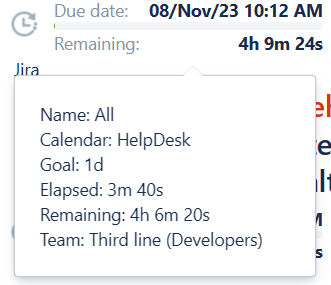
Remaining Time
The remaining time = Goal - Elapsed time.
Hover the field to see more information.
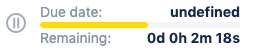
SLA Due Date
The SLA Due Date = current time + remaining time (taking into account the calendar pauses)
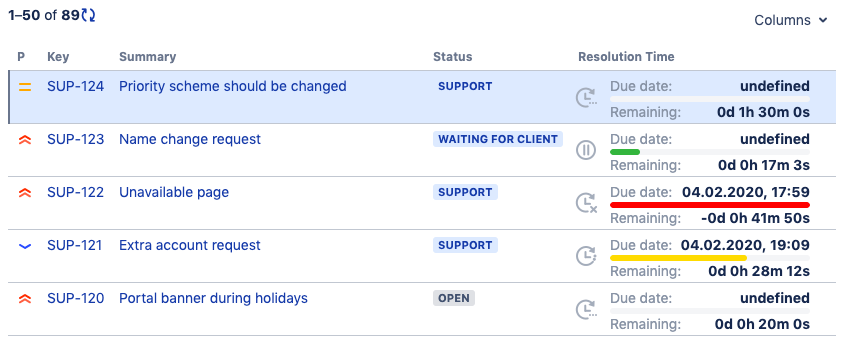
In one case you can see the due date as UNDEFINED. That means the SLA countdown is paused and the time of unpausing is unknown. For example, you are waiting for fo the information from a customer. As soon as the field countdown started, the due date will be shown.
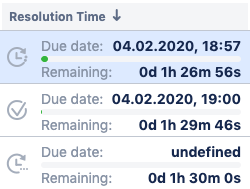
Sorting by the field
While sorting the field uses the DUE DATE information. The undefined due date counted as the latest date.
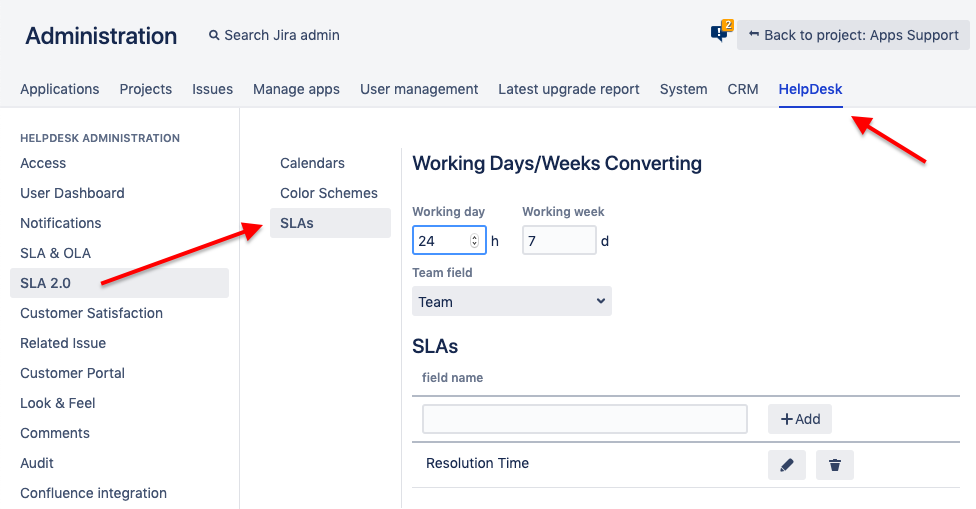
Setting Up
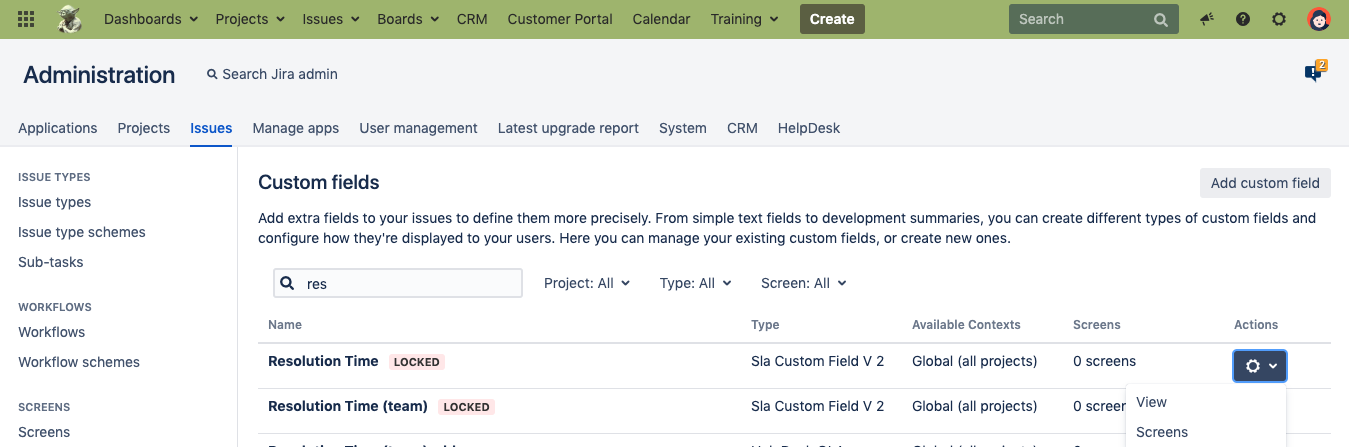
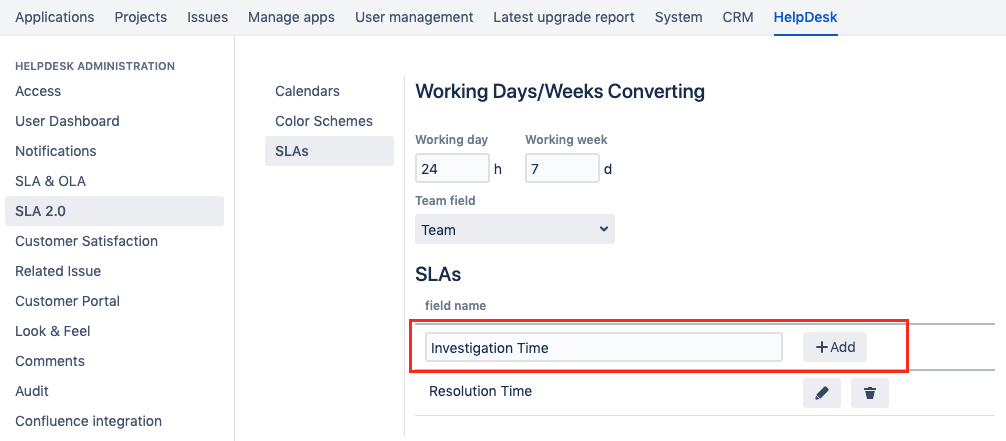
Jira Administrator can set up SLAs in Jira Administration → HelpDesk → SLA 2.0 → SLAs.
Here you can create the SLA 2.0 custom fields and set up the time countdown rules for them.
While creating the SLA field, you should set up:
the field name;
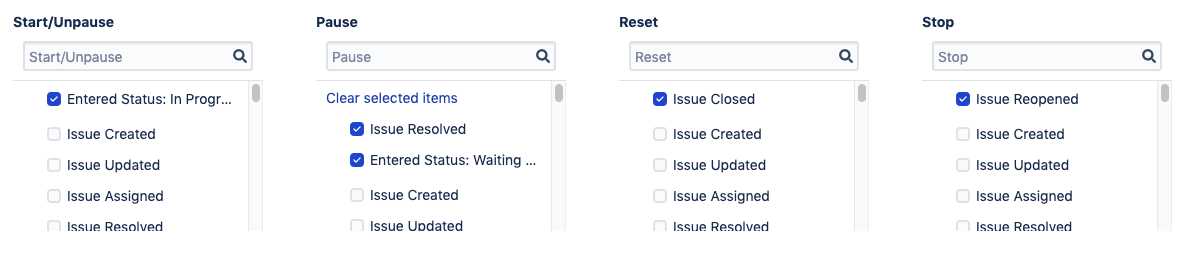
conditions for the start, stop, pause and reset time;
SLA levels: Goals and filters that specify the issues those goals should be applied to;
(optionally) SLAs by team division rules.
The SLA field translation is not available so far. Upcoming in the future versions.
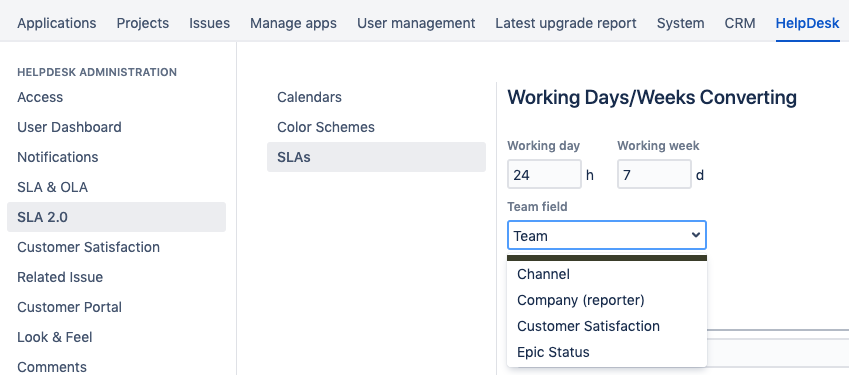
Time Converting Rule
Specify the Working Days/Weeks Converting rules. The SLA goal hours will be converted to days and weeks according to these rules. For example, if you select the working day = 8h, the 10h SLA goal will be displayed as 1d 2h. If you prefer to count the time in the calendar days/weeks, leave the default 24/7 setting.
Stanard SLA Field (One Level)
Create the name for your SLA field.
1. Create the name for your SLA field.
2. Go into field settings by clicking the
button and set up conditions of time countdown is started, paused, stopped and reset. You can set multiple conditions.
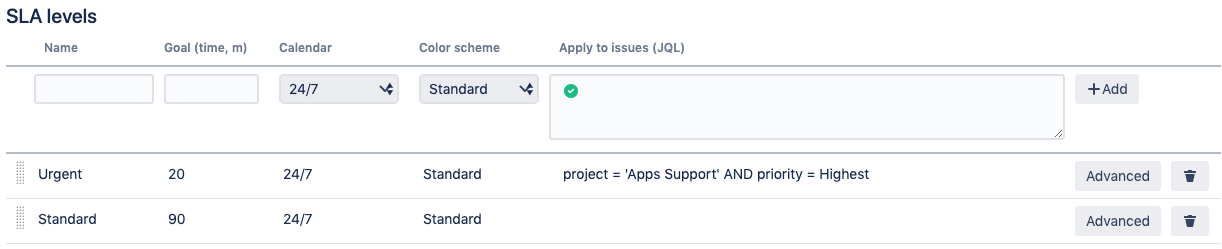
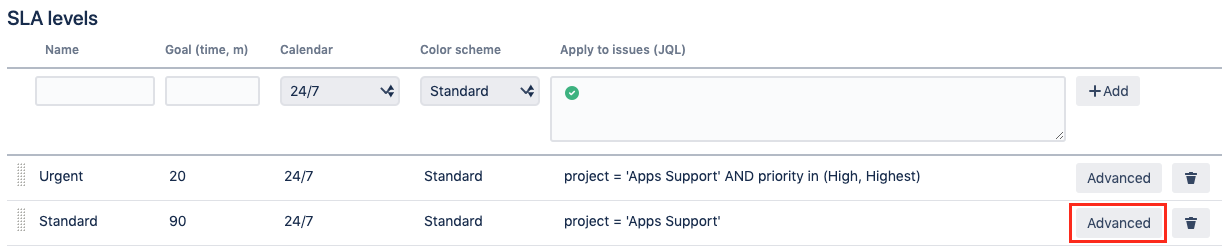
3. Set up the SLA levels. Each level is a rule consisting of:
name – just as information;
goal – time in minutes that should be met;
calendar – work timetable that defines how and when the time will be measured. Selection from Calendars;
color scheme – rules of the coloring of the time bar for this particular SLA level. Selection from Color Schemes;
applicable issues – issues the rule should be applied to. You can enter specific issue criteria using JQL.
4. A new custom field appears in the list of custom fields when you create an SLA. Add the field on the required view screens.

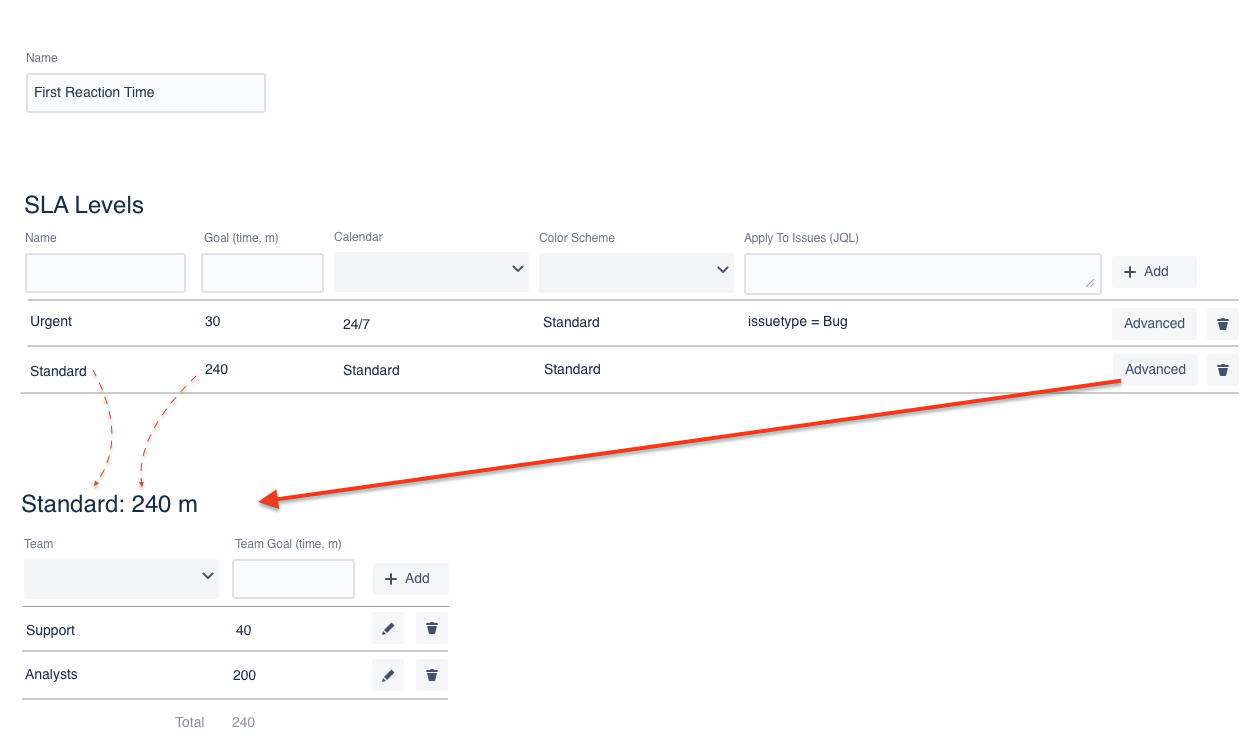
Advanced SLA Field (Two Levels)
The SLA by teams goes in addition to the overall SLA, which set up is described above.
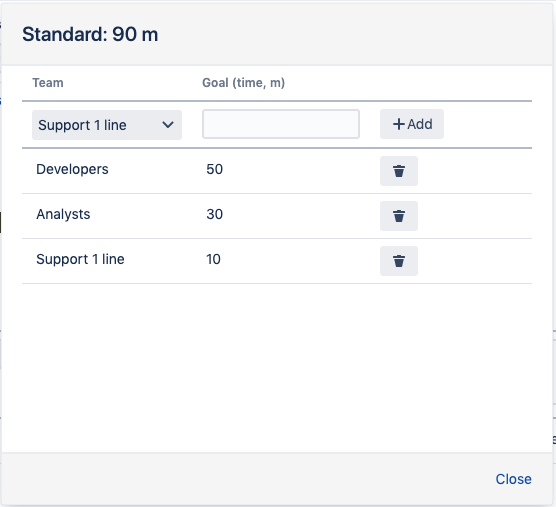
1. Navigate to Jira Administration → HelpDesk → SLA 2.0 → SLAs and select the Team field. Custom fields of Select List (single) are available. The team SLA field will be updated as soon as the Team field changed.
2. Navigate to the particular SLA and set up the Advanced settings for it. Distribute the overall SLA time between your teams (teams are the options from the field selected as the Team field).
The team SLA field uses the same color scheme and work schedule and will be applied to the same issues as the parent SLA field.
3. A new custom field appears in the list of custom fields when you create a team SLA. Add the field on the required view screens.