.png)
Import
Import is a great option to create or update multiple entries at once. This operation might be complicated for a regular user so we recommend advanced users such as administrators to perform it.
The main principles of import:
A user can only import to one directory per import.
The read-only attributes cannot be imported.
Attribute validation (data format) works during import the same way as during the manual creation/update of an entry.
Uniqueness is being checked during the import only for the system attribute (entry name).
An option cannot be created via import, all references (such as Jira users, list options, etc.) must exist for import to work.
An empty value during the entry update will delete the existing value.
An issue link cannot be created via import to CRM.
Make sure that templates use the correct fields and tabs before starting an import.
Start Import
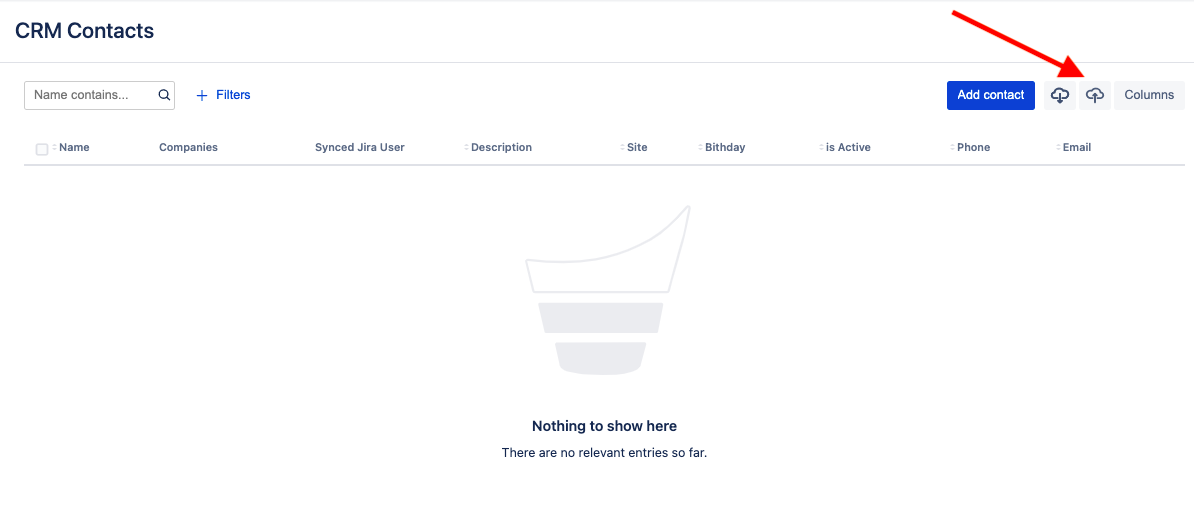
How to reach the Import window: go to CRM (top bar menu) → go to the directory you`d like to execute Import in → find the cloud icon (hover over the icon and find Import) and click on it to start new import.
Steps you need to go throught to execute Import:
Upload the CSV file (prepare file format and choose a proper delimiter)
Map attributes
Confirm amount of entries to be imported
Import in progress
Get a summary of your import
1. Upload the CSV file
In the first step you are required to select the CSV file from your system.
There are two ways how to get the file: export it from the directory first and then edit or create your own from scratch.
Export from the directory
Tick checkboxes for the rows from directory that you`d like to export.
Click on "Export" cloudy icon.
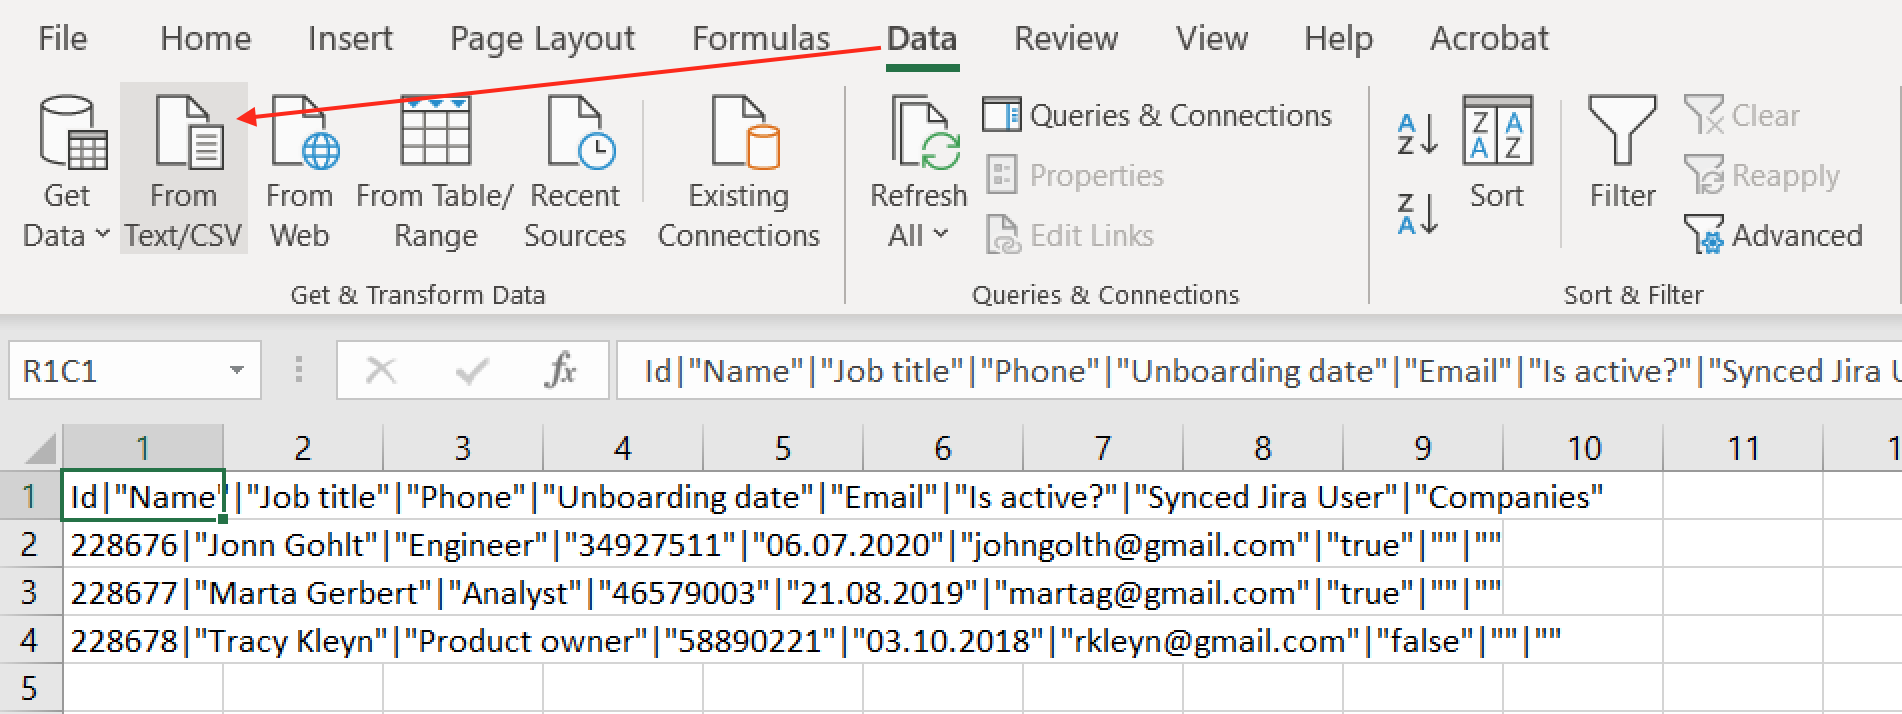
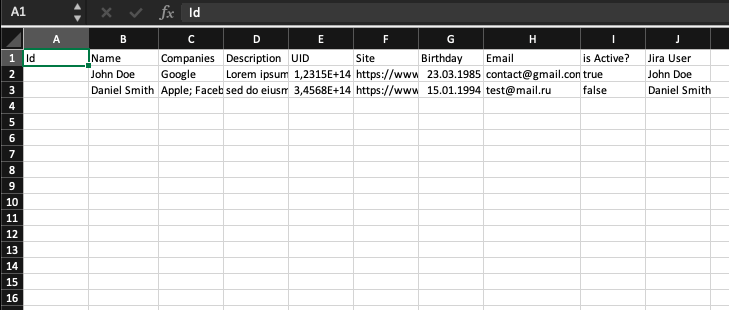
Open the file on Excel and then transform it from linear view into table view (Data —> From Text/CSV) to be able to edit it.
⚠️ Please note that editing the file with Excel in line view might corrupt it, making it impossible to import it.


Make changes you need on the file's data.
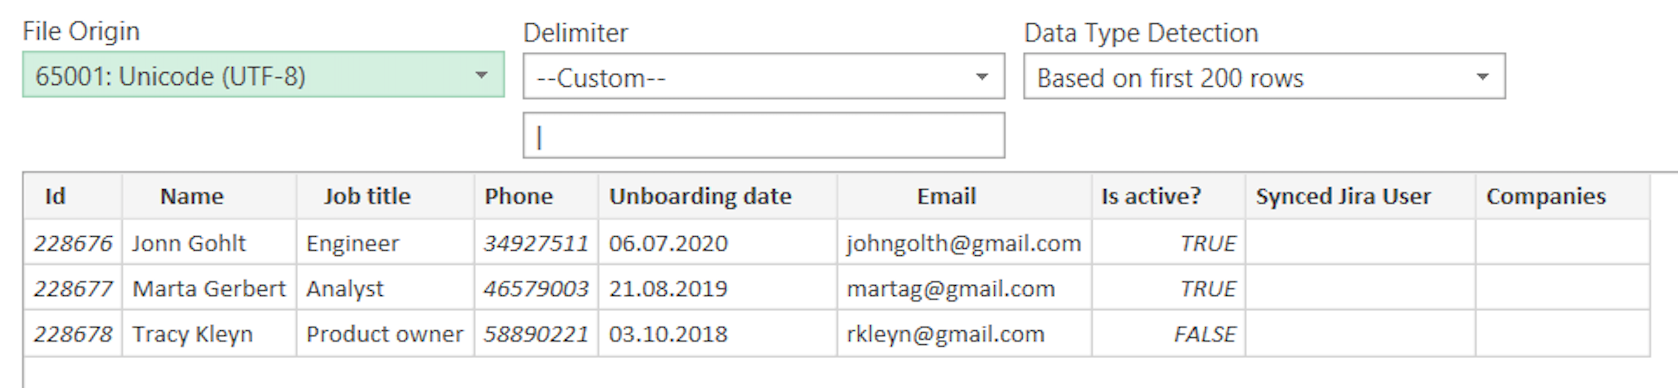
Save a file to use it further on Import. Please note that file is saved with UTF-8 coding type.
Perform the Import. Please note that while saving Excel might change a delimiter from pipe ("|") to the comma (",") or semicolon (";"), so you need to choose the relevant one in the "Upload a file" step.
Create from scratch
Make sure the file contains two predefined required fields: ID and Name (any Text type field that consider as a primary).
ID field:
if you perform Import to a directory for the first time, CVS file should contain empty ID column (IDs will be created automatically after the Import is performed).
if you would like to update the existing field values, CSV file should contain ID column with the relevant IDs from directory.
Name field: should contain unique values.
Specificity of the field types allowded to be used in Import
ID - should be empty for new entries or relevant for the existing ones from the directory (could be fetched via Export).
Name - should contain unique values.
Companies - if more that one, use semicolon (;) as separator.
Jira User - should be the same as in Jira User`s Full Name system field.
Checkbox - takes the values True and False (both case insensitive); a values will be cinsidered as False if True is not selected.
Text fields (Text, URL,Email) - forbid to include quots (") and pipes (|).
Dates - it is accepted to use different formats (the recommended one is dd.mm.yyyy).
Numbers - only integer and negative integers are allowded.
Choose CSV Delimiter from suggested options in the drop-down list.
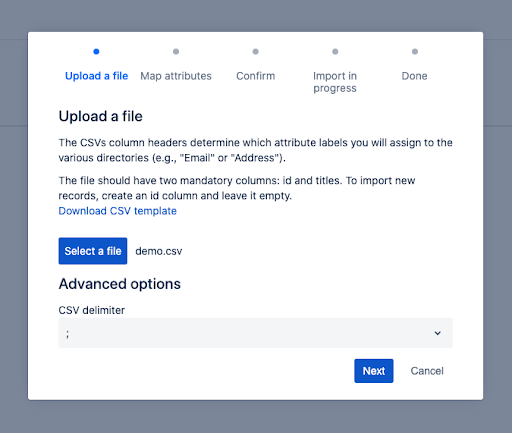
⚠️ Make sure you chose the convenient delimiter on this step (it is important for fields and attributes being correctly matched for the upcoming step).
If you`re going to perform Import to the Contacts directory and would like to include a contact to the particular company, it`s important to create companies (manually or using Import) first. Company names in the directory and in CSV file should be identical.
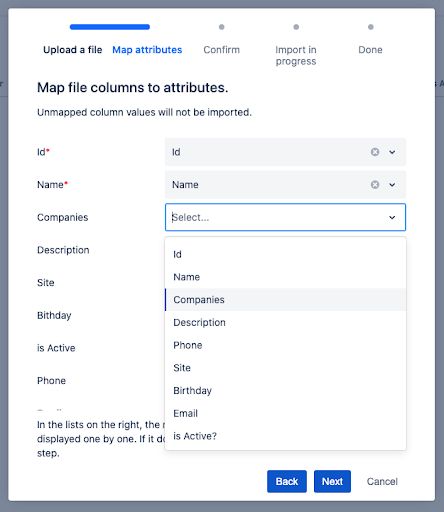
2. Map attributes
The second interation reqiures to manually match CSV columns with template fields.
For each field in the template, you can select a column from the CSV file. This means that you can choose what data you'd like to import and where you want to import it. Data that you do not select, will not be imported.
ID and Name fields are required to be matched.
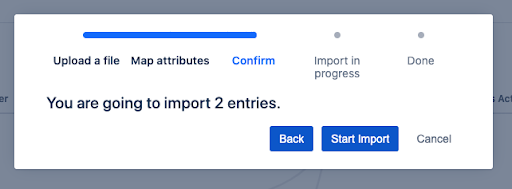
3. Confirm
In this step the import manager informs you about how many rows are detected and are about to be imported.
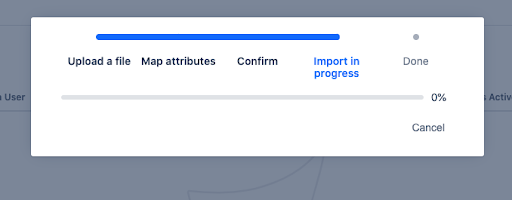
4. Import in progress
When import is performing it is allowded to Cancel it, however, please note - all changes that have already been applied can`t be reverted.
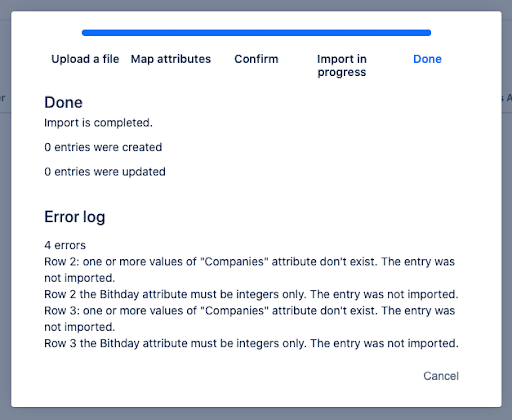
5. Done and error log
When import prosess is finished the import manager informs you about number of rows that were created and updated.
If there is any error you will see the relevant messages. The number of rows with an error correspond with the relevant number of the row in CSV.
Errorded rows are not being created or updated.