.png)
People Management
People Management Calendar
Use case description: This calendar is used by team leads and managers to schedule and track recurring team activities such as 1:1s, performance reviews, and onboarding sessions. It helps ensure consistent follow-through on people-related tasks and provides improved visibility into team management workflows across the organization.
Primary Actor: Team Lead, Department Manager.
Calendar Shared With: Team members, HR.
This guide will walk you through setting up a People Management Calendar using the Calendar for Jira app. The main purpose of this calendar is to help managers easily track and schedule recurring team activities. While you don't have to follow along with the configuration steps, we recommend you review them to get a better understanding of the features we refer to throughout this manual.
Create relevant work types:
You can create specific issue types to better track people management activities, such as 101, Performance Review and Onboarding.

People Management - Work types
Set up workflows for issue types:
A simple but effective workflow for these activities might consist of just two steps: Scheduled (status category To Do) and Completed (status category Done).
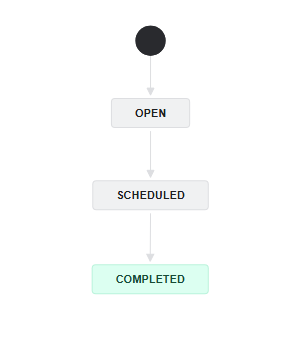
People Management - Workflow
Add Custom Fields (Optional)
For a more efficient and well-organized People Management calendar, we recommend adding custom fields. These fields are crucial for better organizing your team's activities and making it easier to find specific information.
In this demo, we'll use the Department and Primary Work Location custom fields. The Department field is valuable for managers who need to quickly check the schedule of a specific team without sorting through the entire company's calendar. Meanwhile, the Primary Work Location clarifies an employee’s availability and helps determine whether a meeting should be scheduled online or in-person.
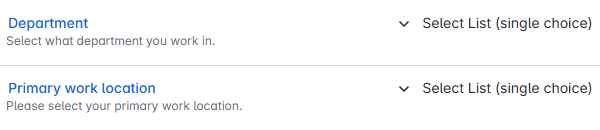
People Management - Custom fields
Create filters
When working with a wide variety of issue types and properties, it is often more convenient to create and save a filter directly within Jira. This allows you to pre-define all your desired properties and save that selection for future use.
To do this, navigate to Jira’s sidebar on the left side of your screen and click Filters, then select Search work items.
People Management - Filters
The action will redirect you to the filters page. Select a set of properties you’d like at the top of your screen.

Once you’re satisfied with your selection, click Save filter to the right of the filters' row. It will bring up the saving window.
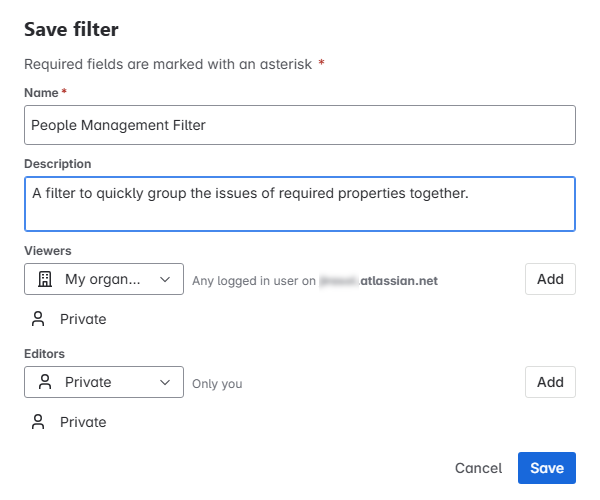
People Management - Save filter
In here you can give your filter a name and description and choose who has the rights to view and edit it. Don’t forget to click Add to add the desired groups into viewing or editing lists.
Note: To successfully share a calendar based on a Saved filter, it is essential that the filter itself is also shared with the users who will be viewing the calendar. If a user does not have permission to access the underlying filter, they will not be able to see the issues displayed on the calendar.
Click Save once you’ve finished configuring your filters.
With these steps complete you’re now ready to create this calendar in our Calendar for Jira app!
Creating the calendar
Open the Calendar for Jira app from the Jira Apps menu. In the sidebar on the right side of your screen, find the Calendars menu and click the + create button.
People Management - Create calendar
Once you provide your calendar with a name—People Management will do just fine—you'll then need to specify what the calendar is based on. Choose the Saved Filters option, as this allows you to configure your calendar to display only the work items you've pre-defined in a filter (see the setup). Later, you can use our app's filtering features to further narrow down this initial view as needed.
For the Date Fields type, choose Date-Time fields as your option. This will allow you to plan and schedule your team's activities with greater precision, down to the hour.
Note: Our Calendar for Jira app automatically creates the Start/End Date and Time custom fields upon installation. However, to use them properly within your project, you will still need to add them to your screen configuration.
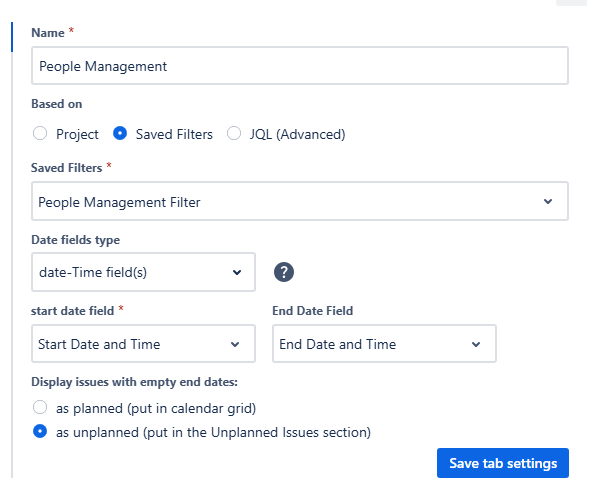
People Management - Main settings
For the Layout settings, set the default view to Week View. This is perfect for visualizing people management tasks across a team or department over time.
Disable the weekend visibility for your calendar to avoid empty spaces and choose your preferable first day of the week and the calendar’s hours.
Issue card fields are the pieces of information that appear directly on your calendar grid. Since space is limited, it's best to select crucial information that helps you quickly navigate and understand a card's purpose. The main properties of the work item, such as the issue key, its type (via an icon), summary and the assignee are displayed there by default. You may choose three more fields to be shown in the issue cards. Let’s select the Department custom field to be displayed here.
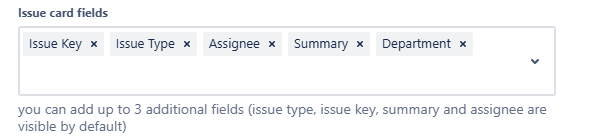
People Management - Issue card fields
Issue preview fields, on the other hand, appear in a pop-up once you click on an issue card. This provides extra space for additional details to be shown without needing to open the full issue screen. Choose what information you’d like to be easily accessible in selection.

People Management - Issue preview fields
You can still access the complete issue window to view all information by clicking the issue key link within the preview pop-up.
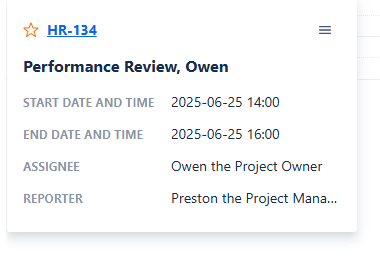
People Management - Issue preview
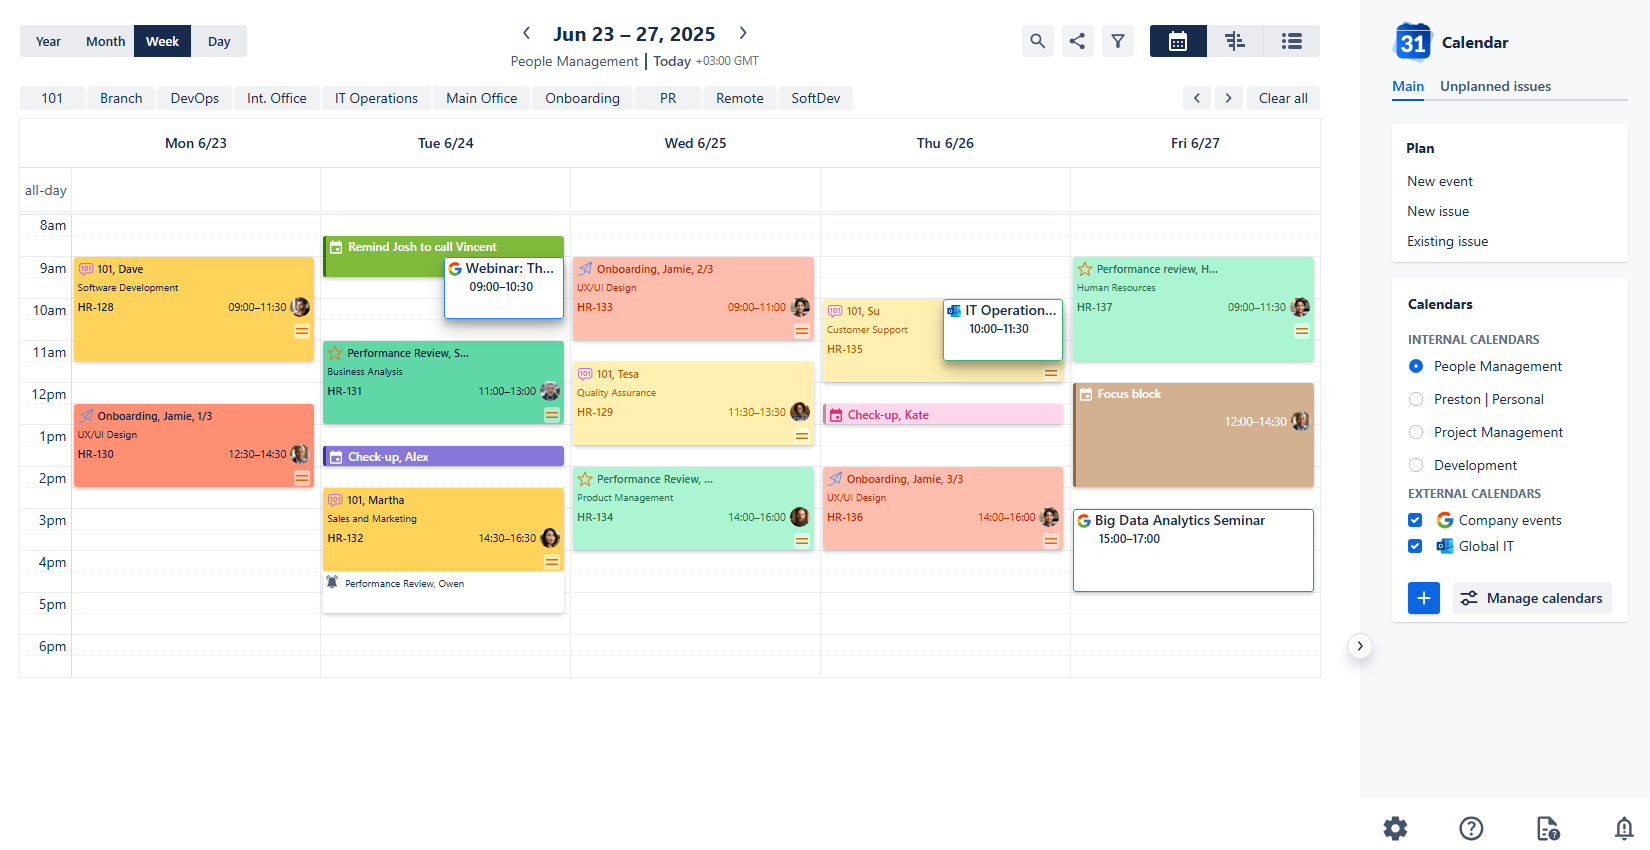
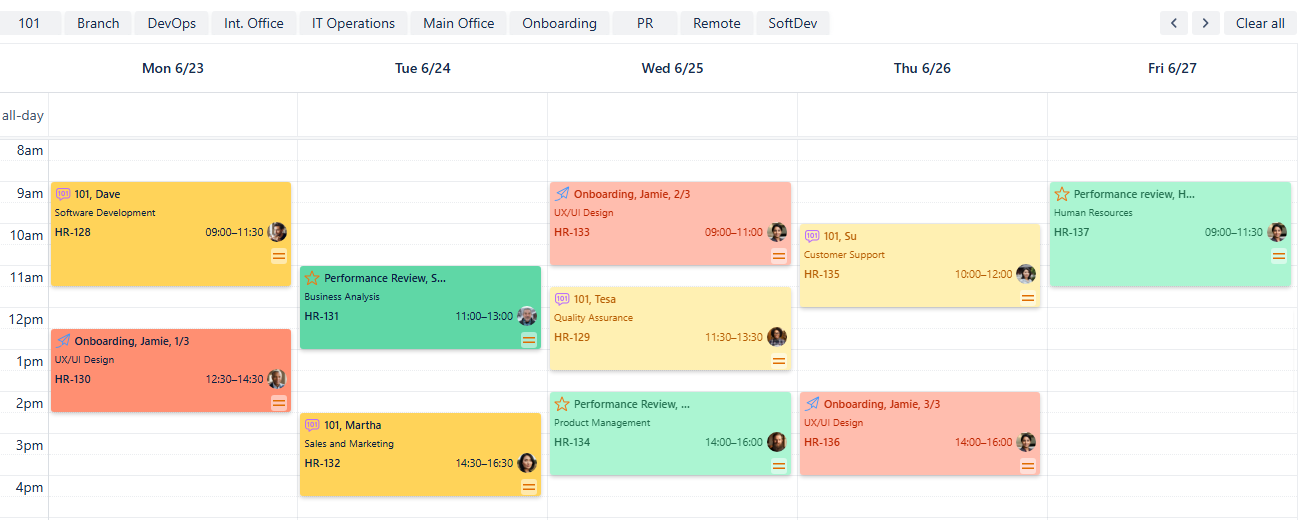
After confirming your settings, click Create. Congratulations, your calendar is now added. Upon creation it will look similar to this:
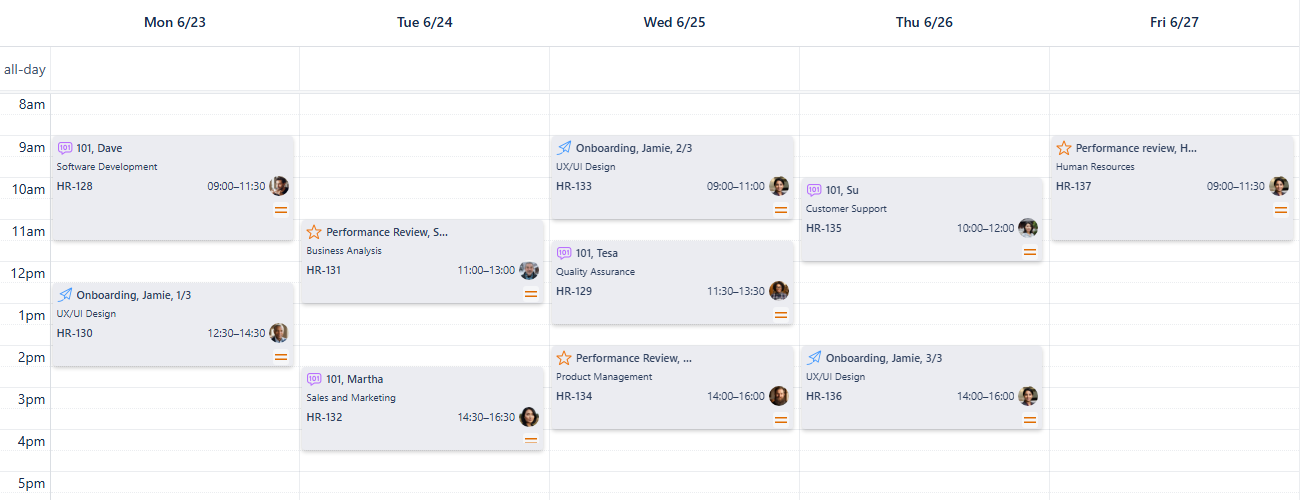
People Management - First look
Your issue cards may have a different default color based on your current settings. You can leave it as-is and start using the app immediately, but we highly recommend exploring the full functionality to customize your calendar's appearance.
Card Colors for People Management calendar
Adding color coding is a great way to make your calendar more readable and to quickly identify activities by meeting type or team.
First, open the calendar's settings at the bottom of the sidebar and select the Card colors tab.

People Management - Settings

People Management - Card colors menu
In here you can use JQL statements to apply colors to your works' properties. To do so, select the color you’d like issues with certain properties to have and then describe the properties using JQL. After that, click the blue add + button to add the rule to the list.
This feature allows for a great deal of customization. For instance, you could color issue cards by status to instantly visualize your team's progress. You might choose to use paler shades to represent scheduled or ongoing work and more saturated colors for completed tasks. Alternatively, you could take the opposite approach and use the most saturated colors for ongoing work, while reserving paler shades for items that are already done.
You could also color the cards by department or projects to distinguish between employees' tasks based on where or what on they work. Varying saturation levels could help visually indicate an issue's priority or risk level.
For simplicity, let’s assign the rules based on issue types and statuses:
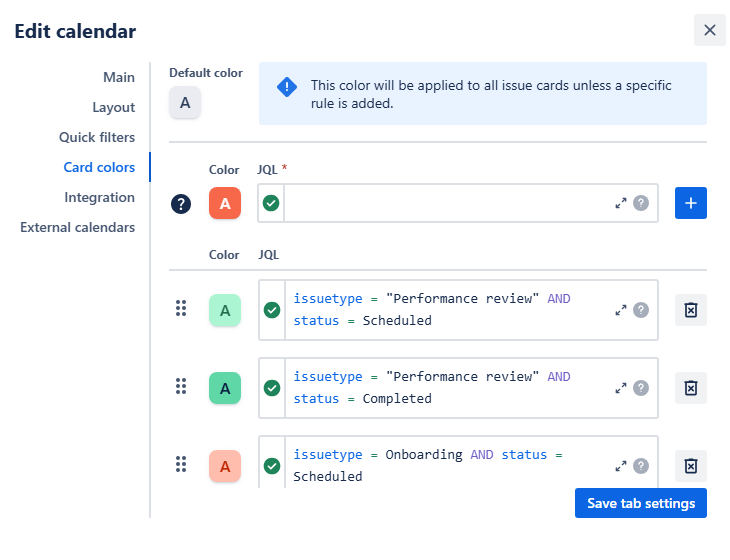
People Management - Card color rules
Tip: Not feeling confident in using JQL? Here’s our small hint on how to get a proper query without mistakes!
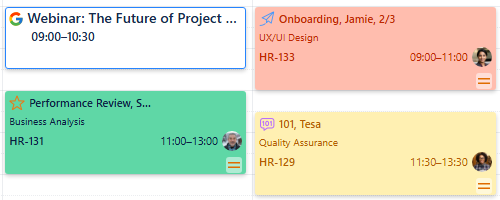
Once you’ve added all rules, click Save tab settings. After that, your calendar will change its appearance:
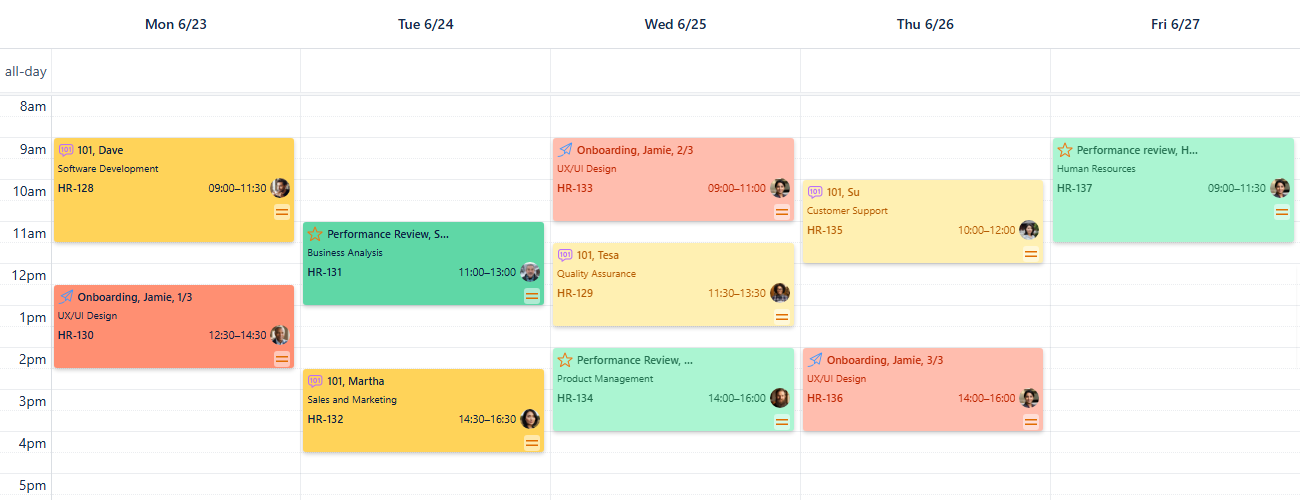
People Management - Color rules applied
As you can see, using color-coded cards provides aid for easier navigation. At a glance, you can get an instant idea of your entire week's activities, allowing you to quickly prepare for the different types of meetings and tasks ahead.
To quickly preview what the different card colors on your calendar mean, head to the bottom of the sidebar on the right side and click the Legend button. You can see the entire JQL associated with the specific color by hovering your mouse cursor over that color. This is especially useful when viewing a calendar created by another person, as it gives you an instant key to all their color-coding rules.
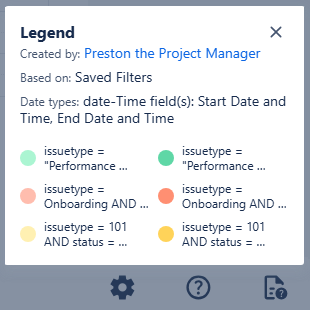
People Management - Legend
Quick Filters for People Management calendar
Quick filters allow your team to easily access information based on any JQL query, including ones with custom fields, which is vital for effective management.
Navigate to the calendar's settings, then go to the Quick filters tab.
People Management - Settings
People Management - Quick filters menu
You can also access the same settings page by clicking + Add quick filter right below the zoom select of your calendar:
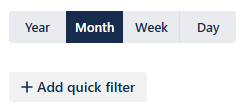
People Management - Add quick filter
Even with color differentiation based on issue type, it can still be useful to remove all distractions and focus on a specific kind of work. For a more streamlined view, let's add quick filters based on issue type to your calendar. We should also utilize our custom fields by creating Department and Primary work location quick filters.
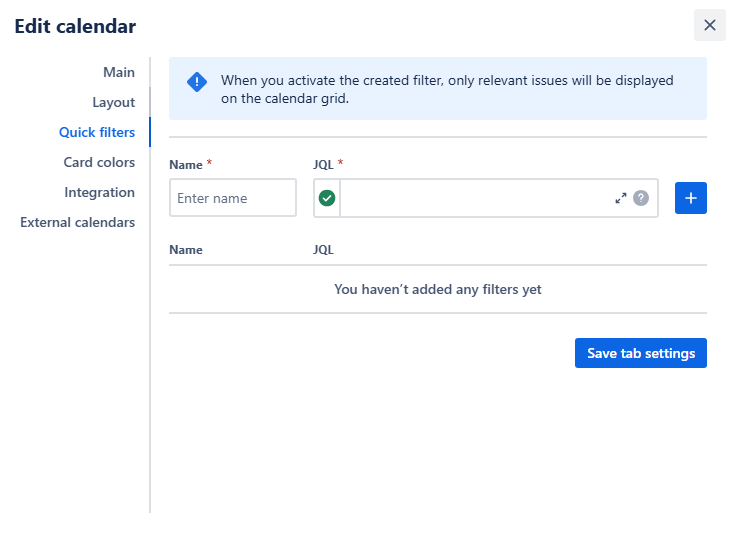
Give each filter a short name, enter the JQL query describing the property you’re wishing to include in that filter, then click the blue add + button to add the filter to the list.
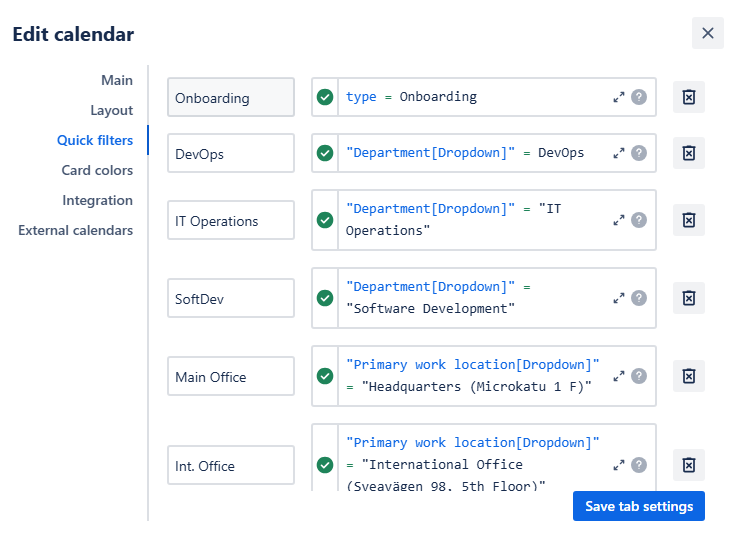
People Management - Quick filters added
Click Save tab settings to finalize your filters. The buttons to use them will then appear above your calendar grid.
People Management - Quick filters added
Click a button to enable a quick filter, and it will darken to show it's active. Your calendar will then display only the issues that match that filter's rule. If you click a second button, your calendar will show issues that adhere to both rules.
To turn off a filter, simply click the button again, and it will lighten. If you want to disable all active quick filters at once, click Clear all at the right end of the quick filter row.
Note: When you choose more than one quick filter, an AND operator is applied to them. This means that for an issue to be displayed, it has to meet the conditions of all selected filters.
Example: Choose DevOps and Int. Office quick filters. The calendar then will show vacations and planned business trips only for people who are in the DevOps department and are located in the International Office.
Example: Choose DevOps and QA quick filters. You've selected two different departments, and in our setup, an issue cannot belong to both at once. Therefore, no issues will be displayed.
Example: Choose 101 and Onboarding quick filters. Both filters describe different work types, and because a work item cannot be of two types, no issue will be displayed.
Keep in mind that with custom fields, how well quick filters combine depends on your specific setup. You won't be able to combine issues based on properties from the same field that can't logically co-exist on a single work item.
Connecting External Calendars
For a more complete view of your team’s schedule, you can integrate external calendars for company-wide events or the official HR calendar.
First, get the iCal link (.ics URL) for the external calendar. Detailed instructions can be found here.
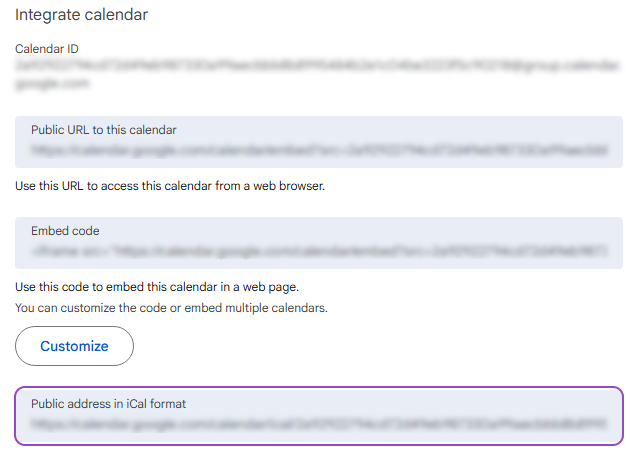
People Management - iCal link from Google Calendar
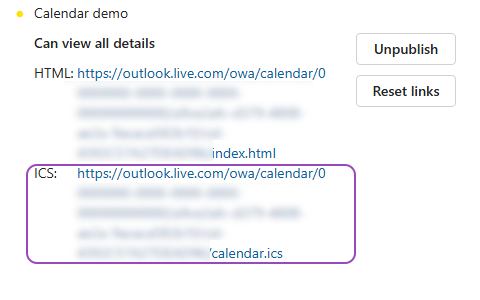
People Management - iCal link from Outlook
Once you’ve acquired the link, in your Calendar for Jira app, go to the calendar settings and choose the External calendars tab.
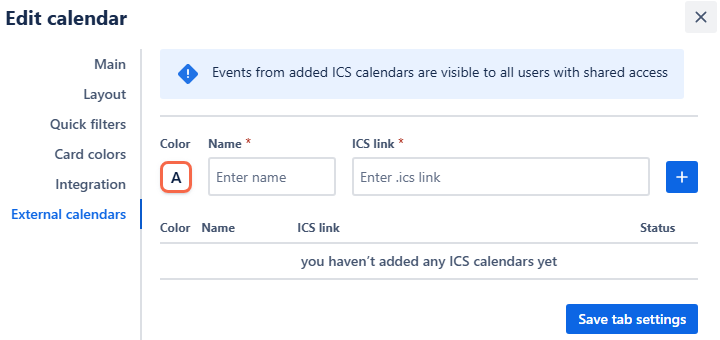
People Management - External calendars menu
Select a color for the external calendar, give it a name, and paste the iCal link into the ICS link field. Click the blue add + button to add this calendar to the ICS calendars list below.

People Management - Adding external calendar
Click Save tab settings.
The events from your external ICS-subscription will now also be displayed on your calendar.
People Management - External calendar added
The external calendar will then be visible in the sidebar under External calendars. An icon next to its name will indicate whether the calendar comes from Google Calendar or Outlook.
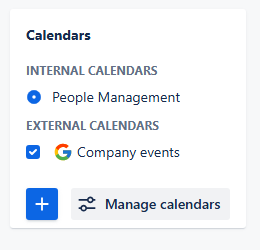
People management - Calendars menu
To hide them at any time, simply uncheck the box next to the external calendar's name in the sidebar.
Creating Non-Jira Events
The Custom or Non-Jira Events (NJE) feature is great for scheduling important team management activities that don't need a Jira issue. This could include scheduling prep time before reviews, check-ups or informal coaching sessions.
To schedule a custom event, pick a date on your calendar. Bring your mouse over that date and simply click it—a pop-up window will appear.
People Management - Picking a date
In the pop-up menu, select New Event. Alternatively, you can click the same button from the Planning menu of your sidebar on the right side of your screen.
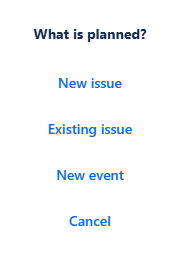
People Management - Planning pop-up menu
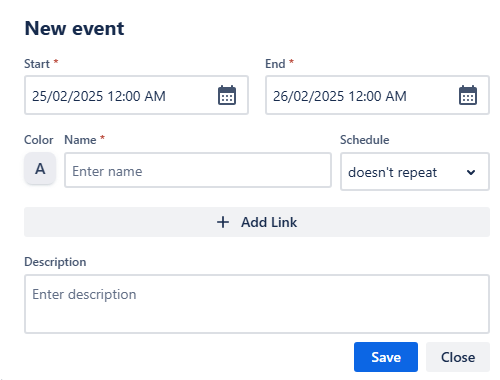
People Management - New event window
Fill in the start and end dates and times, choose a color and give the event a name like Check-up, Kate. Correct the time if needed, attach a link to external webpages and provide description.
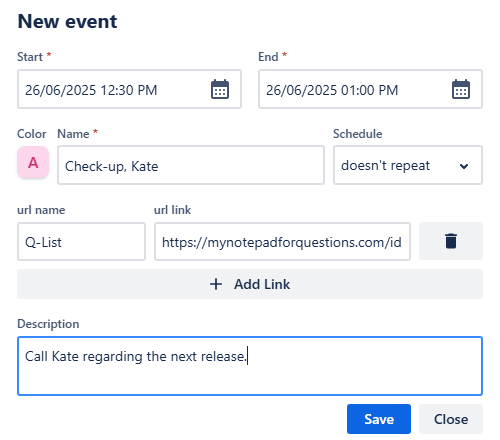
People Management - New event
Once you provide all necessary information click Save. Your new custom event will immediately appear on your calendar grid:
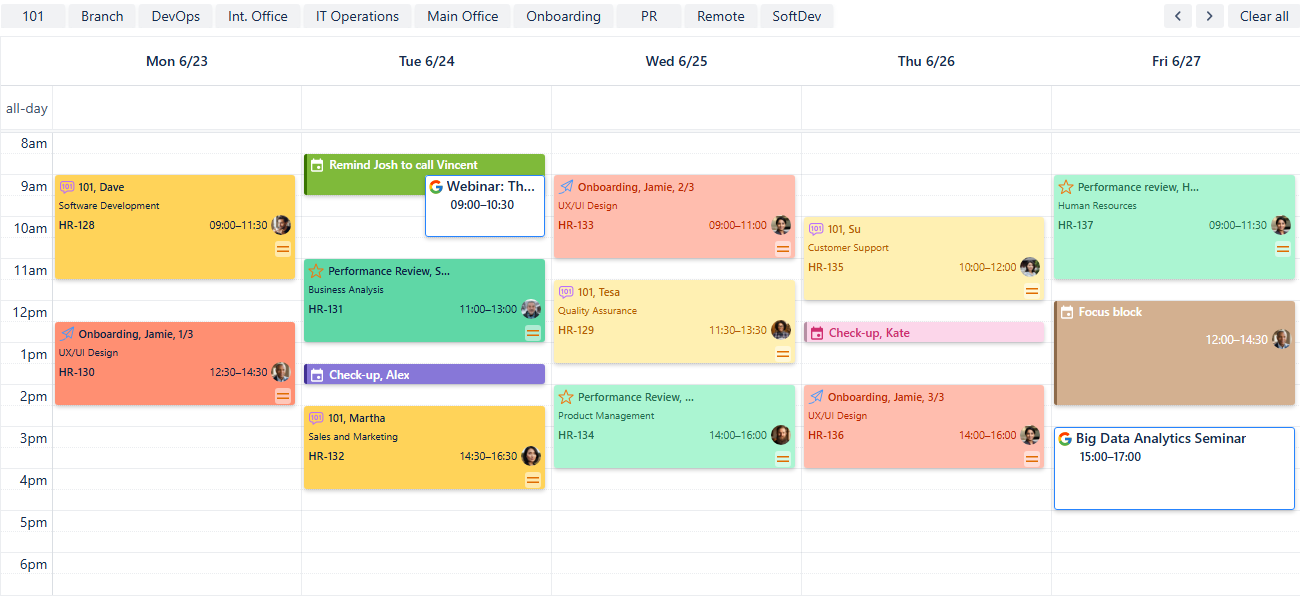
People Management - New events added
You can use this feature to plan a large amount of custom events within your calendar or use this tool to create personal reminders. However, if you use our Reminder for Jira app, there is a way to display those within your calendar as well!
Adding Reminders
Displaying reminders attached to Jira work items in your calendar is an effective way to keep everyone on top of feedback cycles, 1:1 schedules, or onboarding steps.
To create a reminder, simply press the R-key to summon the reminder creation window over your calendar. Alternatively, head over to our Reminder for Jira page (by Teamlead). On its main page, find + Add reminder button to the right side of your screen:
People Management - Add reminder
In the window that appears, first select the issue for which you'd like to set a reminder. Then, provide the rest of the necessary information, including recipients, day and time when the reminder should occur, and whether you want the reminder to repeat. Any additional information could be added in the comment box as a short message (255 symbols max).
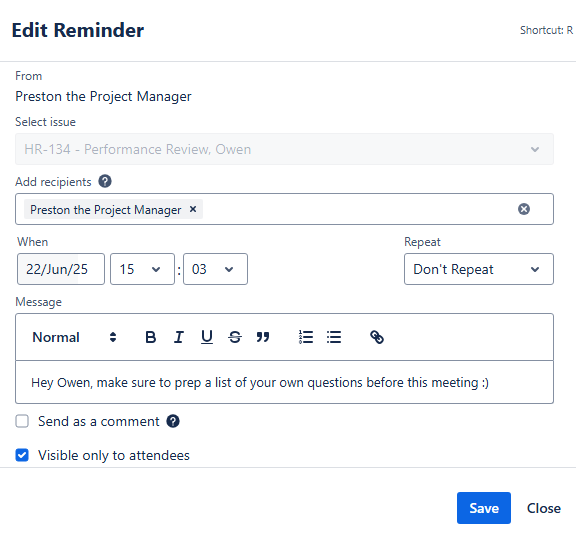
People Management - Creating a reminder
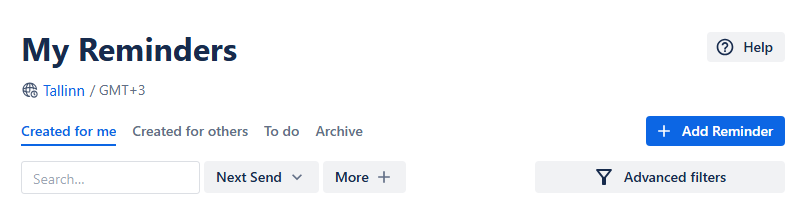
Click Create. Your reminder should then appear in your reminder list.
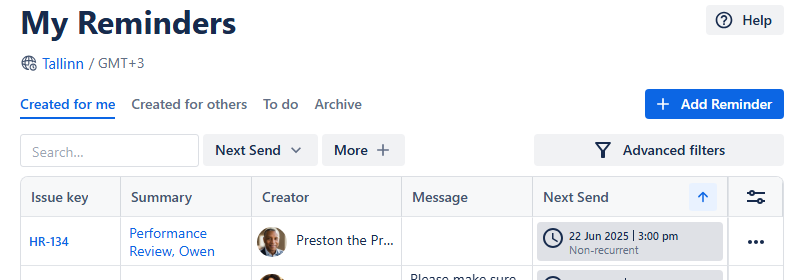
People Management - Reminder added
For the complete manual for our Reminder for Jira app, please refer to our documentation here.
Now, to display those reminders on your calendar, head back to our Calendar for Jira app and to the calendar settings. In the settings, locate the Integration tab.
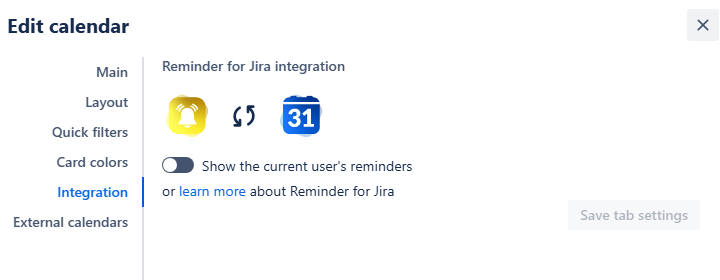
People Management - Integration settings
Switch the Show the current user’s reminders toggle to on, turning it green. After that, click the Save tab settings. Your reminders will then appear on the calendar grid alongside your issues:
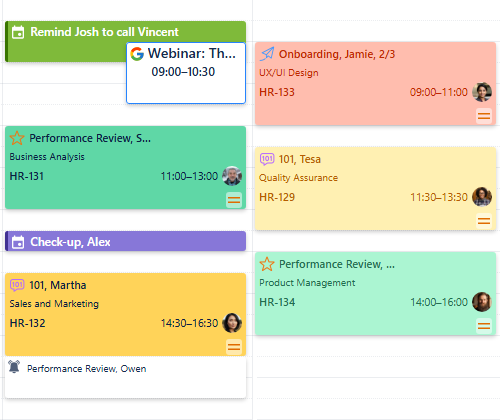
People Management - Reminders on the calendar grid
Sharing your calendar
After you’ve customized the calendar, you can share it with your team and HR to improve collaboration.
On the calendar interface, find the Share button. It's located to the right of the Today link, between Search and Instant filters buttons.

People Management - Share button
Click this button, and a share window will pop up.
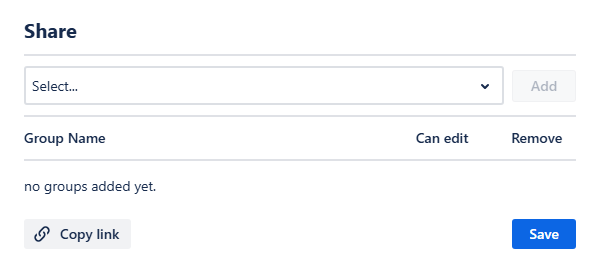
People Management - Share window
From the drop-down selection menu you can choose the user group you’d like to share your calendar with. Click Add, and then confirm if the group members should have editing rights by checking the box next to their name.
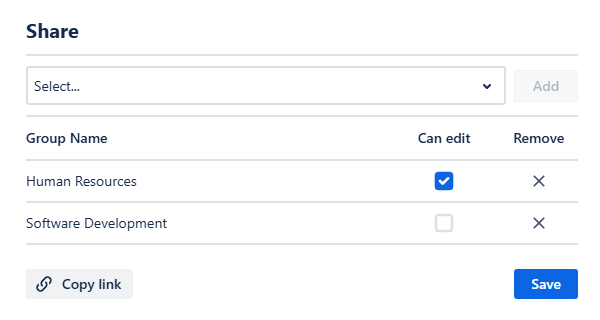
People Management - Sharing the calendar
Finally, click Save. Your team members will be able to access the calendar from the Shared with me section of the Calendars menu. You can also get a direct link to the calendar by clicking Copy link in the share window, and then send it to your colleagues.
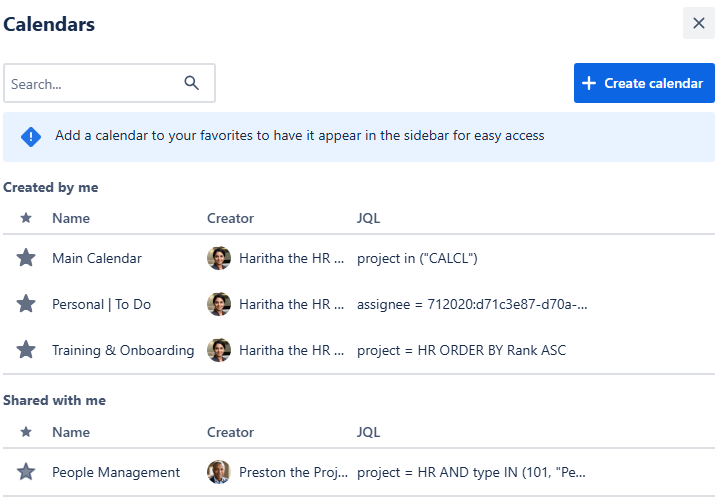
People Management - Shared with me calendars
When you add a shared calendar to your favorites by clicking the Star icon, the calendar will appear in the Internal calendars section of your sidebar. A distinct icon next to its name will indicate that the calendar belongs to another user.
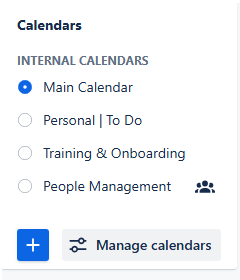
People Management - Shared with me calendars